
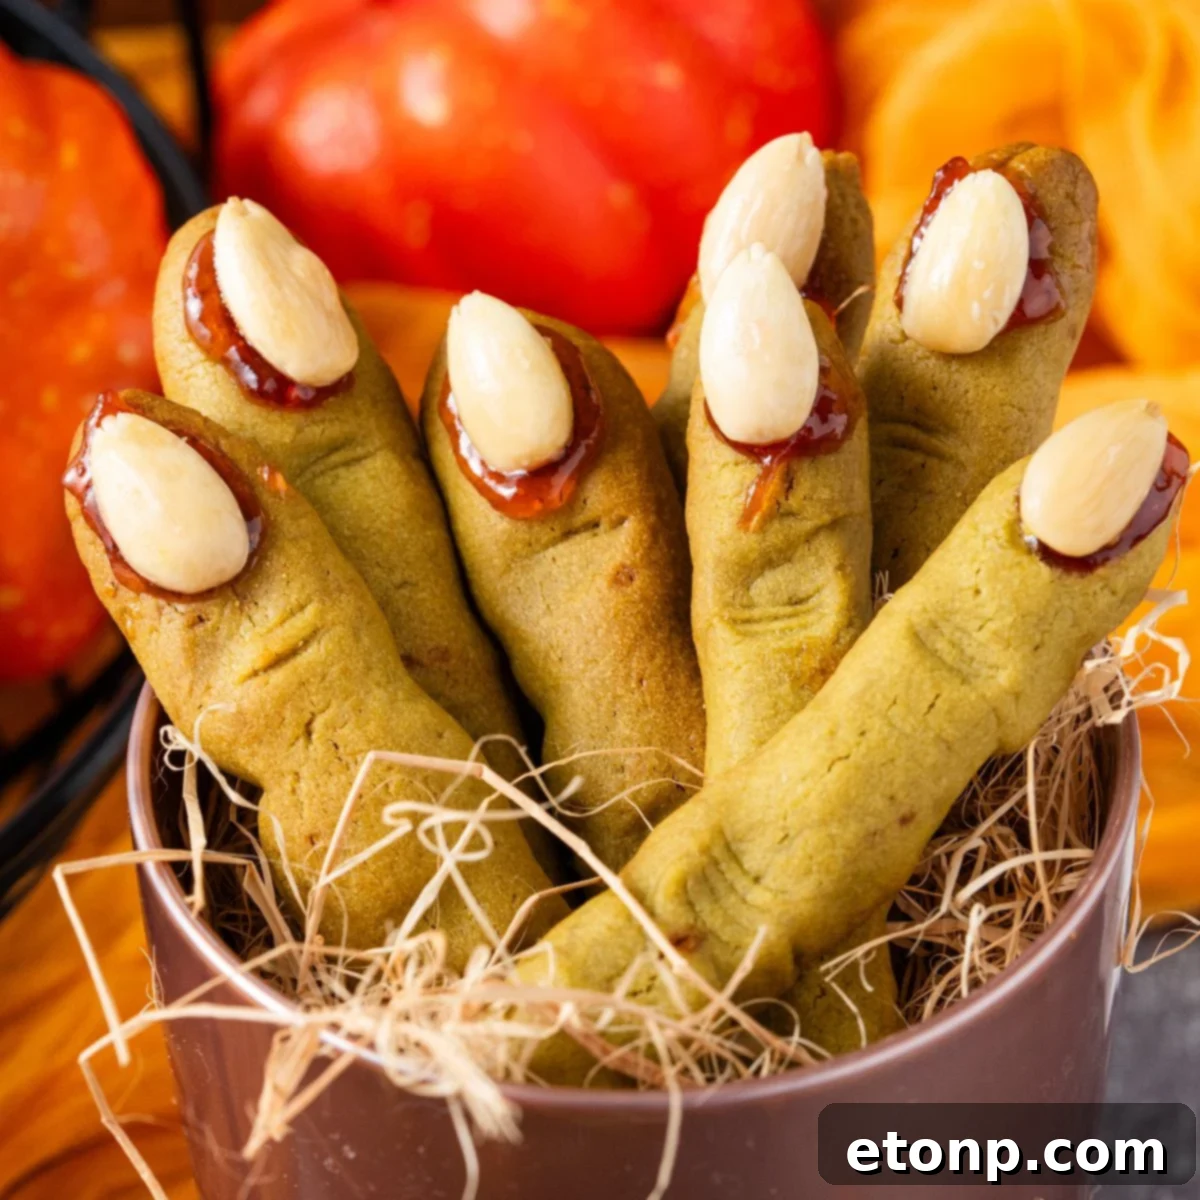
Welcome to the enchanting world of Halloween baking, where creativity meets culinary delight! My signature **Witch Finger Cookies** are more than just a recipe; they are a cherished annual tradition that transforms our kitchen into a hub of spooky fun and delicious aromas. As soon as autumn leaves begin to fall and the air gets crisp, my family eagerly anticipates making these eerily delightful treats. They consistently become the star attraction of our Halloween dessert spread, drawing smiles and shivers in equal measure.
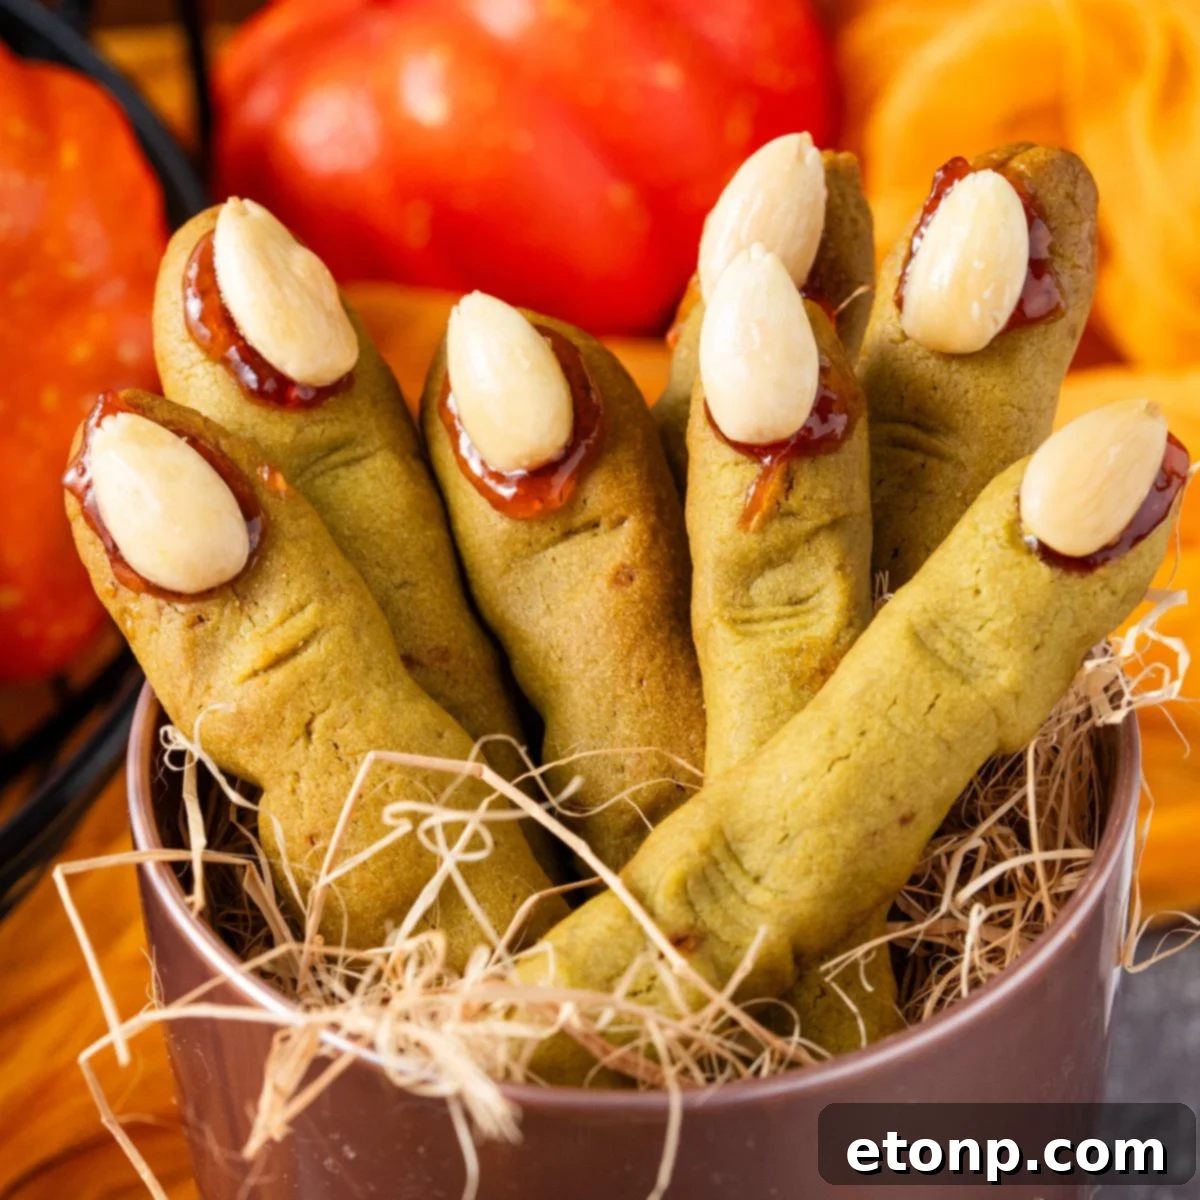
The magic of these cookies lies in their perfect blend of ghoulish appearance and irresistible flavor. My children, with their boundless imagination, adore shaping the dough into grotesque, gnarled fingers, each one unique and wonderfully weird. My husband, James, always makes a beeline for the first batch, often snagging a few before they’ve even had a chance to cool completely – a testament to their buttery goodness! Even little Cameron, who hasn’t quite grasped the “creepy” concept yet, is simply smitten by the sweet, tender cookie base. And Ariya, ever the artist, meticulously examines every wrinkle and almond “fingernail,” appreciating the intricate details as if each cookie were a miniature masterpiece.
This recipe isn’t just about baking; it’s about crafting memories and embracing the festive spirit of Halloween. It strikes a harmonious balance between being incredibly fun to make and surprisingly simple to execute. Whether you’re planning an epic Halloween bash, preparing a special treat for school events, or simply seeking a delightful seasonal activity to share with your loved ones, these Witch Finger Cookies deliver that ideal combination of spooky charm, rich flavor, and creative engagement. They are designed to bring joy and a touch of delicious fright to any occasion.
Unveiling the Mystery: What Exactly Are Witch Finger Cookies?
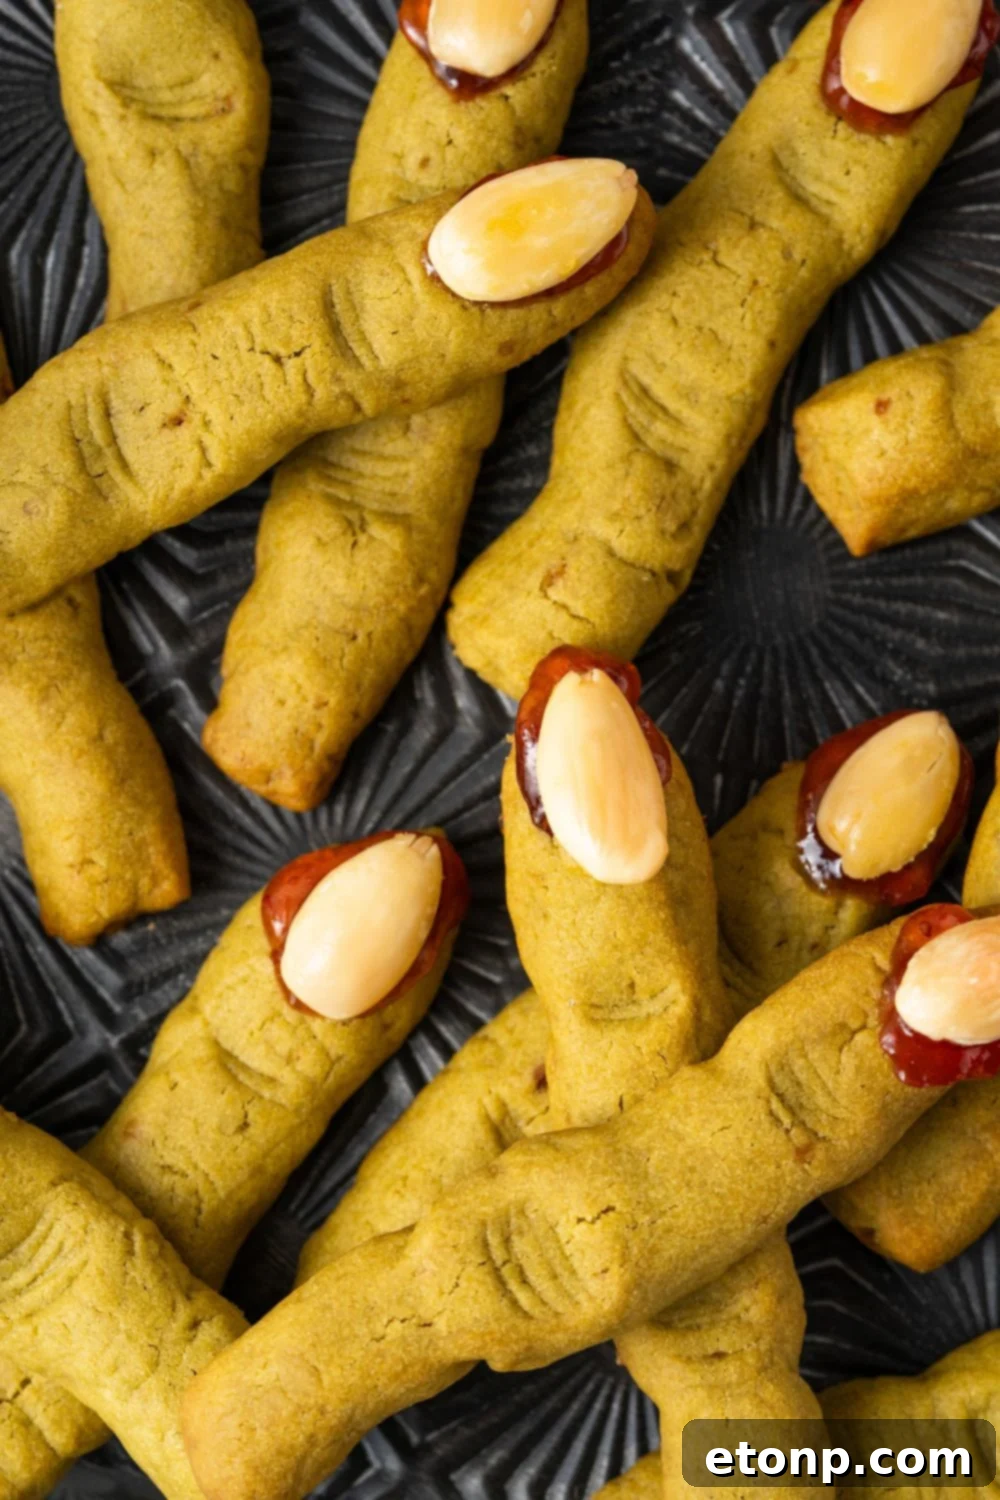
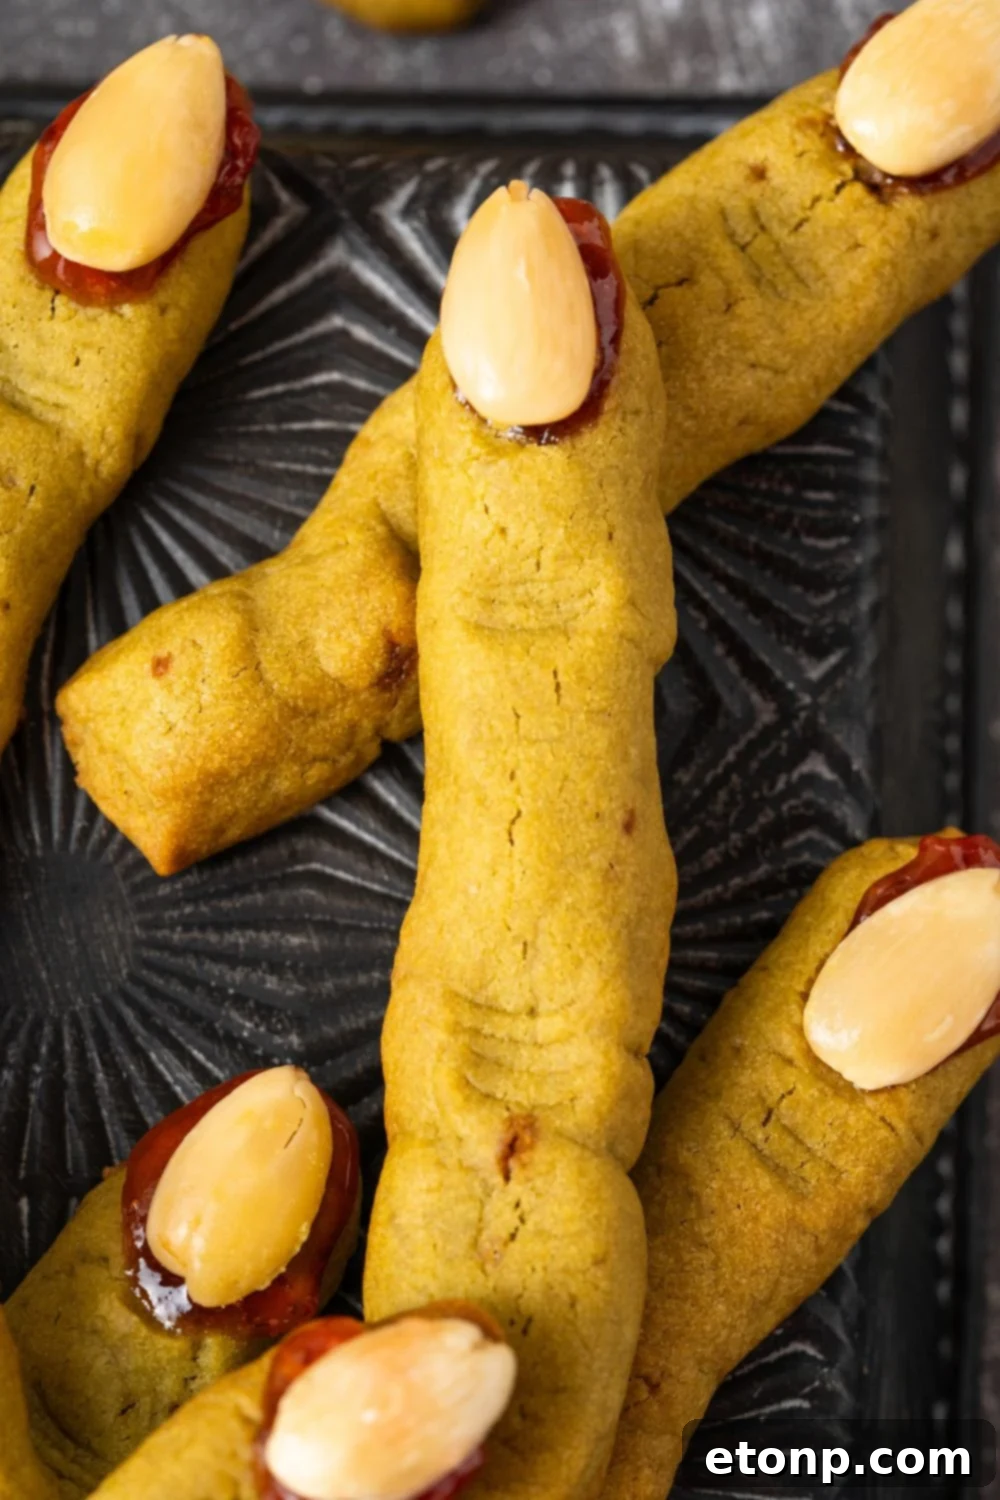
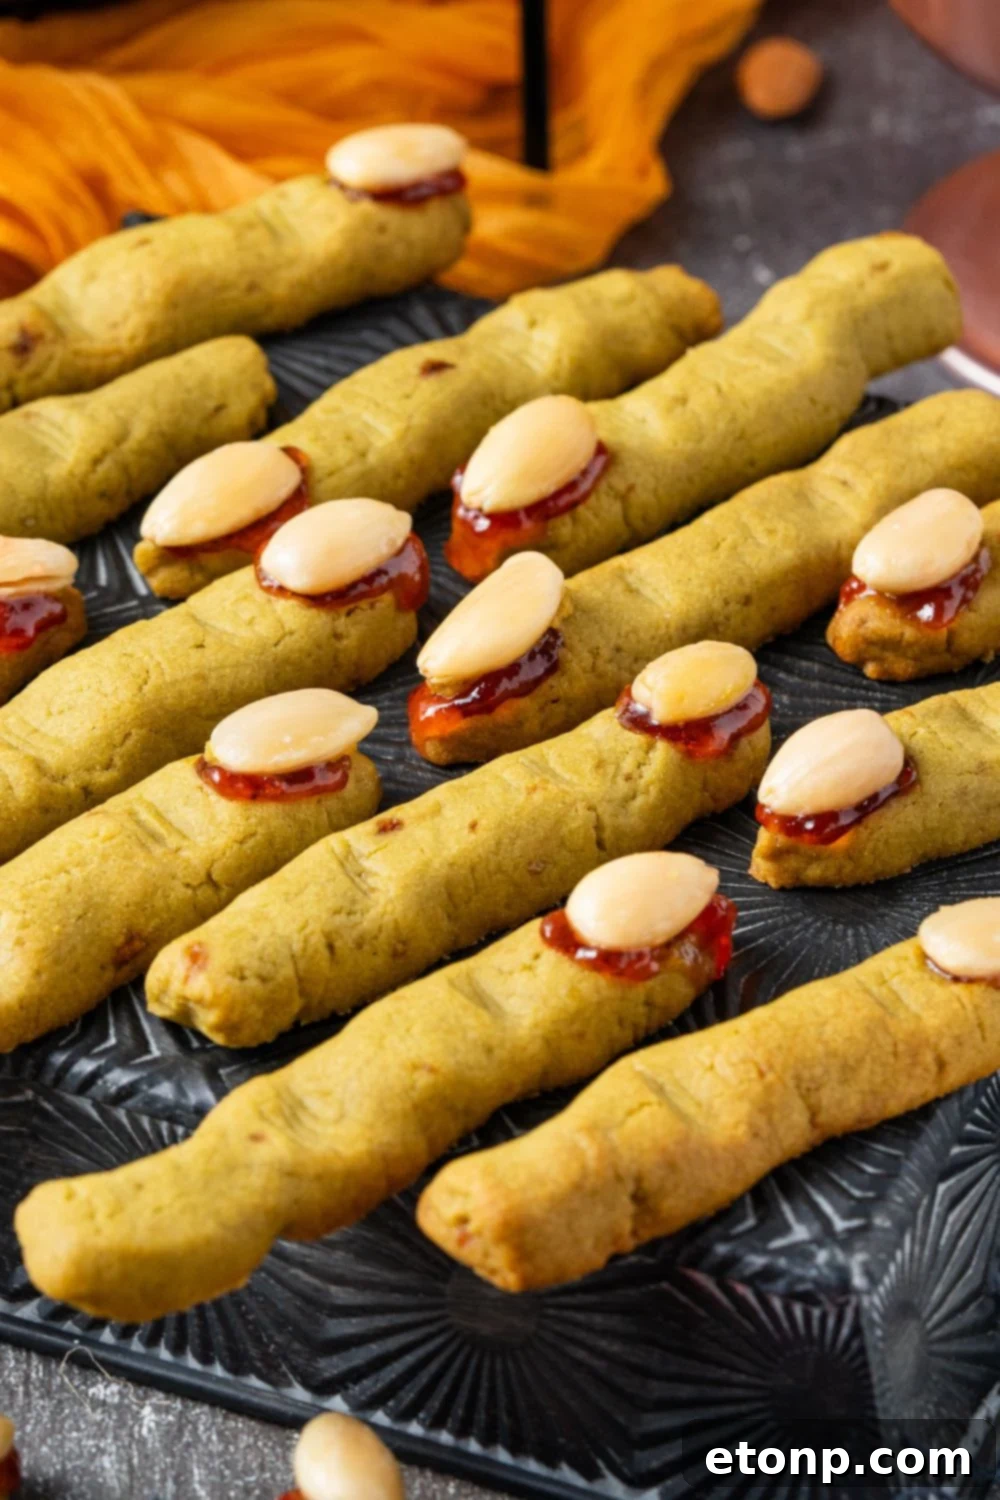
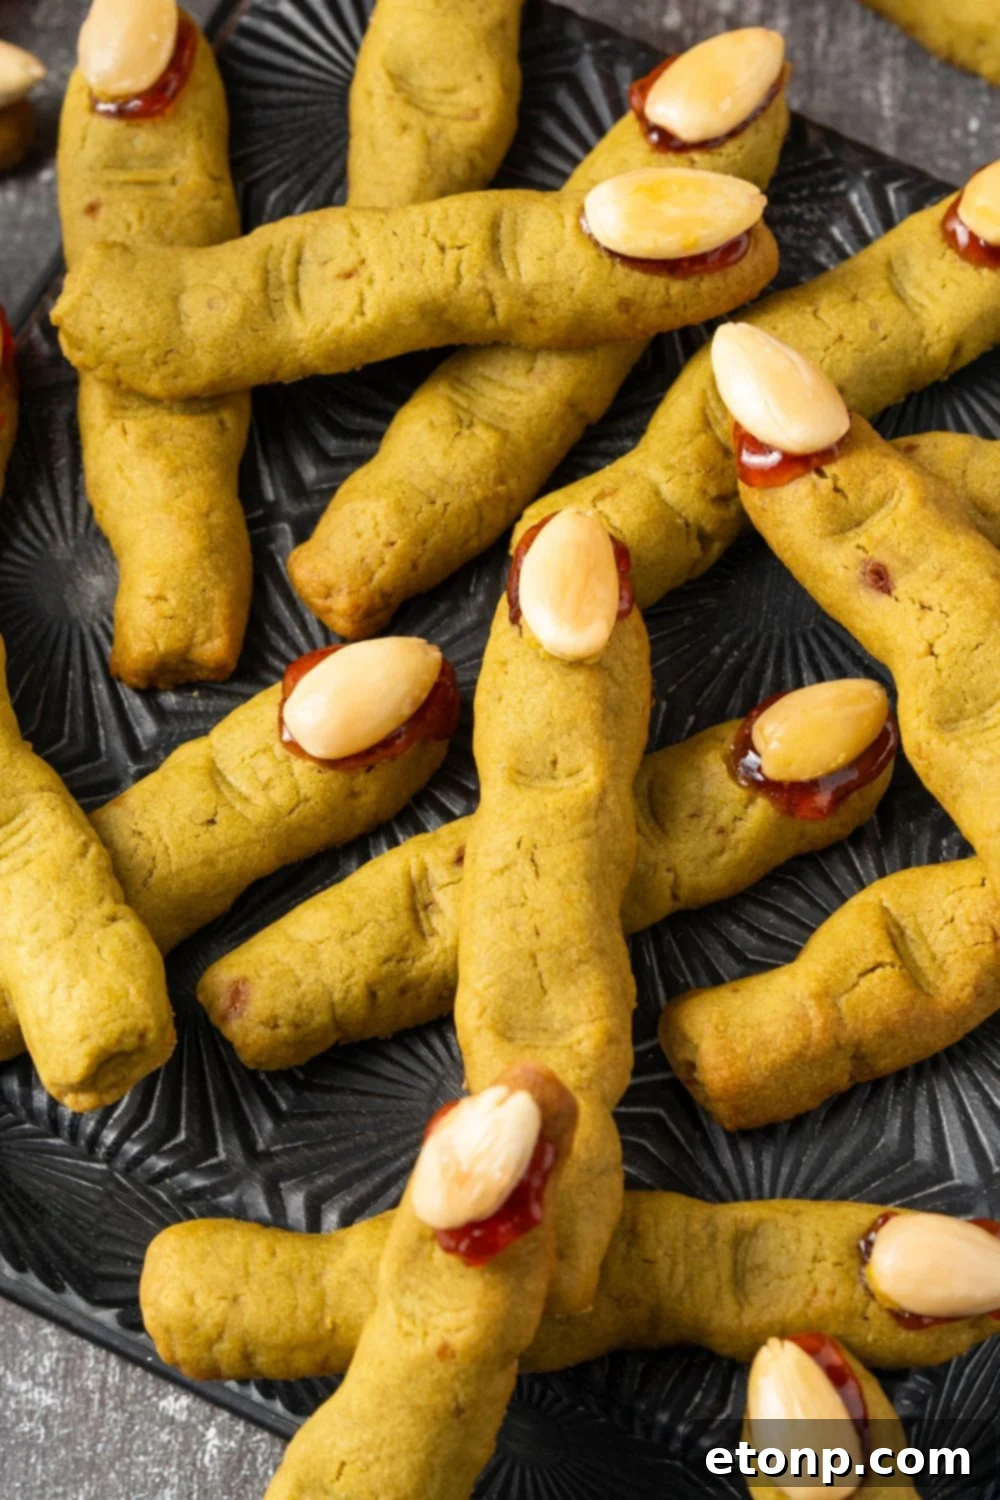
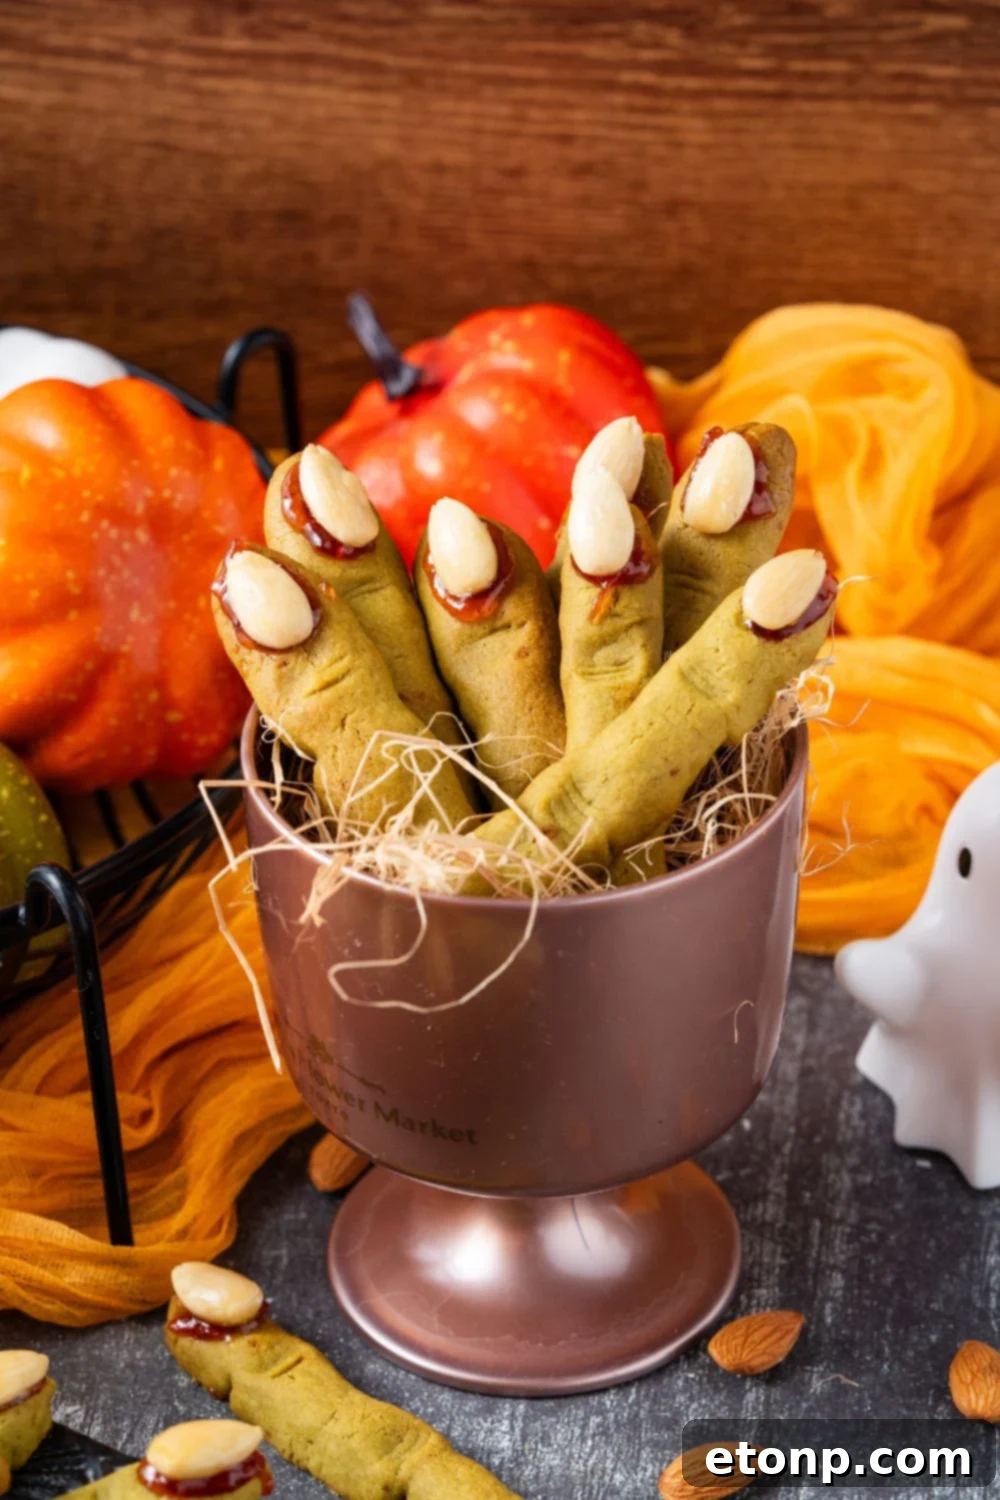
At their core, Witch Finger Cookies are a delightful twist on classic buttery shortbread, reimagined for the spooky season. Picture a crisp yet tender cookie, expertly shaped to mimic the gnarled, eerie digits of a witch, complete with a blanched almond “fingernail” and a gruesome dab of strawberry or raspberry jam for “blood.” This combination not only creates a visually striking Halloween treat but also delivers an exquisite balance of textures and flavors. They are crisp on the exterior, yielding to a tender, melt-in-your-mouth crumb on the inside, all while offering just the right amount of sweetness to counteract their delightfully macabre appearance.
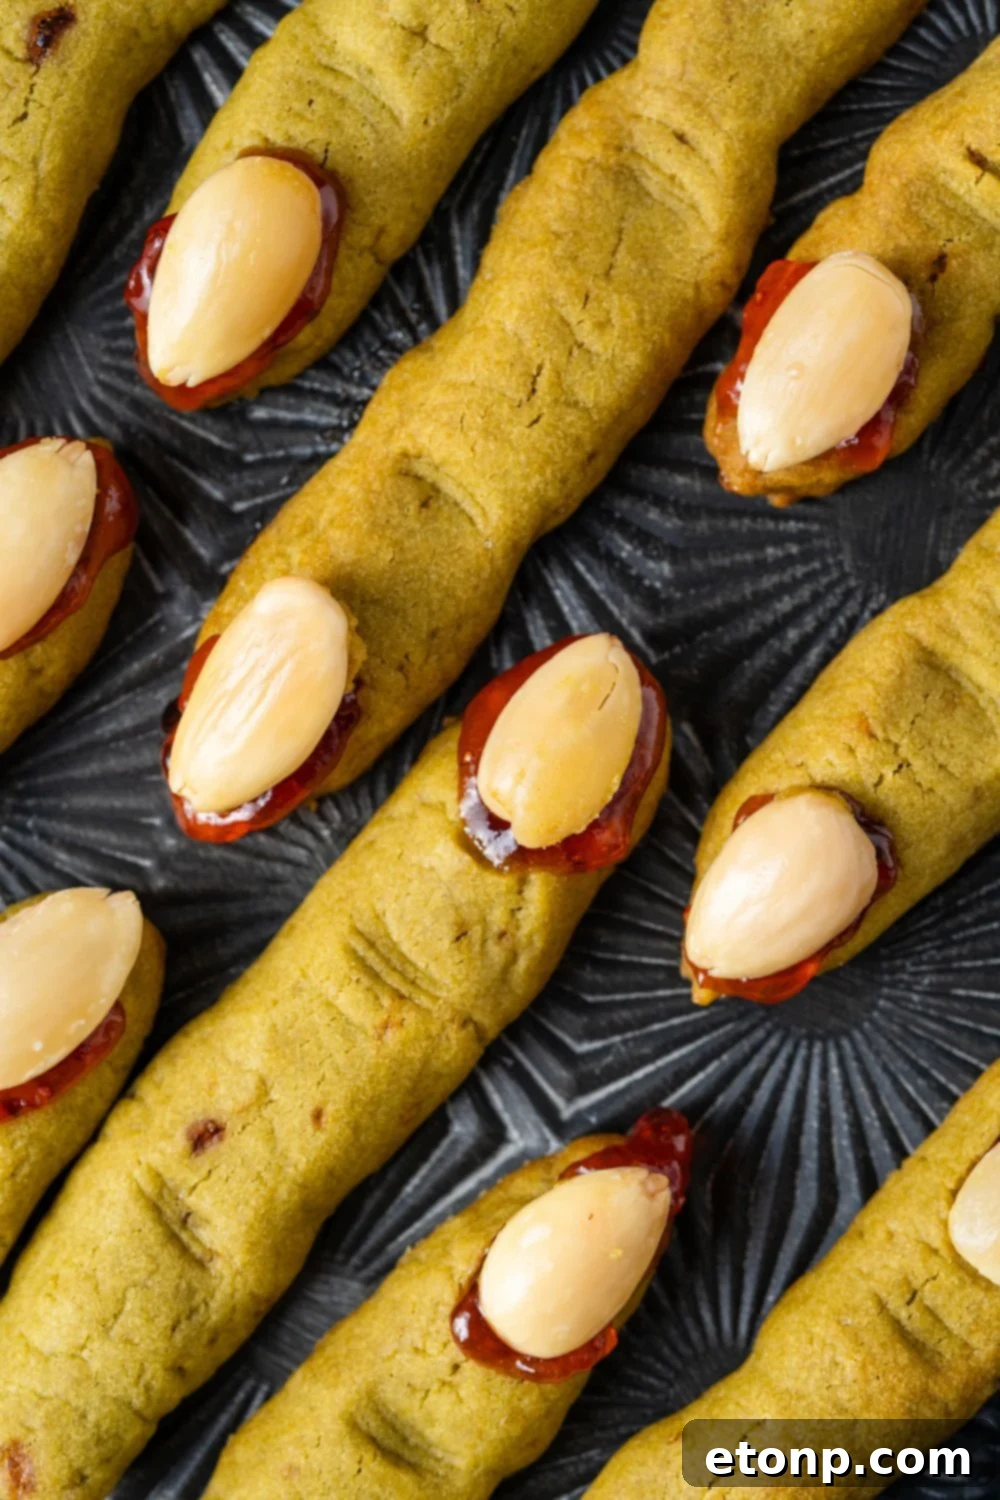
What truly elevates these cookies beyond a simple dessert is the immersive and imaginative creative process they invite. You’re not merely dropping dough onto a baking sheet; you’re becoming an artist of the edible, sculpting each individual cookie. You’ll find yourself carefully forming knuckles, pressing the almond nails firmly into place, and infusing each “finger” with its own unique, creepy personality. This hands-on approach ensures that no two Witch Finger Cookies ever look exactly alike, which is precisely the charm! This isn’t just a plain sugar cookie dressed up with orange sprinkles; it’s a gourmet experience disguised in a spooky costume. The cookie base itself is closer to a rich shortbread or a classic butter cookie, providing a crisp edge and a tender interior. It’s delicately flavored with fragrant vanilla and, uniquely, a subtle nutty depth from pistachio paste. This pistachio infusion not only adds a wonderful flavor dimension but also contributes to the signature pale green hue, enhancing the eerie effect.
The blanched almonds provide a satisfying crunch and a toasted, slightly sweet counterpoint to the buttery cookie. Finally, a touch of vibrant, fruity jam—be it strawberry or raspberry—adds a tangy, sweet burst that perfectly simulates “blood” and completes the flavor profile. When you take a bite, you experience a harmonious blend of buttery richness, nutty undertones, and a delightful hint of fruitiness from the “bloody” jam. In essence, these are sophisticated, buttery **pistachio-vanilla cookies with almond and jam accents**, making them truly unforgettable for Halloween.
The Magic Behind the Method: Why This Recipe Consistently Works Wonders
There’s a reason why this particular Witch Finger Cookie recipe has become a perennial favorite and a guaranteed success every Halloween season. It’s meticulously crafted to ensure a smooth, enjoyable baking experience and a consistently delicious outcome. Here’s a closer look at what makes this recipe an absolute winner:
- Effortlessly Foolproof Dough: The pistachio-infused cookie dough is a dream to work with. It’s soft and pliable enough to be easily shaped into intricate “fingers” and knuckles, yet remarkably sturdy. This resilience means the dough holds its distinct shape beautifully throughout the baking process, preventing frustrating spreading or flattening, and ensuring your spooky creations look perfectly realistic.
- Harmoniously Balanced Flavors: Every ingredient plays a crucial role in creating a delightful symphony of tastes. The rich, buttery base is perfectly complemented by the subtle nuttiness of the pistachio, with a hint of warm vanilla. This sweetness is masterfully balanced by the bright, tangy fruitiness of the jam, delivering a complex flavor profile that satisfies the palate without being overwhelmingly sweet.
- Accessible for All Skill Levels: Whether you’re a seasoned baker who kneads dough in their sleep or a novice who only ventures into the kitchen for special occasions, this recipe is designed for success. The steps are straightforward and uncomplicated, requiring no advanced techniques or specialized equipment. It’s a forgiving recipe that builds confidence and delivers impressive results regardless of your baking prowess.
- Festive and Endlessly Customizable: The inherent creepiness of these cookies provides a fantastic canvas for your Halloween imagination. Feel free to experiment with different “nail” toppings, such as pumpkin seeds or chocolate chips, or swap out the classic strawberry jam for a darker, more sinister raspberry or even blueberry jam. For an extra dramatic effect, intensify the green hue with more food coloring or try entirely different colors like purple or black for a truly witchy vibe.
- Perfectly Make-Ahead Friendly: One of the greatest advantages of this recipe is its flexibility. The dough chills wonderfully, allowing you to prepare it hours or even a day in advance. This means you can break down the baking process, making it less stressful and more enjoyable. Simply prepare the dough, chill it, and then bake your spooky fingers when you’re ready to impress. This convenience makes it ideal for busy schedules and party planning.
Ultimately, this is one of those rare recipes that truly delivers on both exceptional taste and show-stopping presentation. Be prepared for an abundance of “oohs” and “ahhs” from your guests even before they take their first bite. These cookies aren’t just food; they’re an experience.
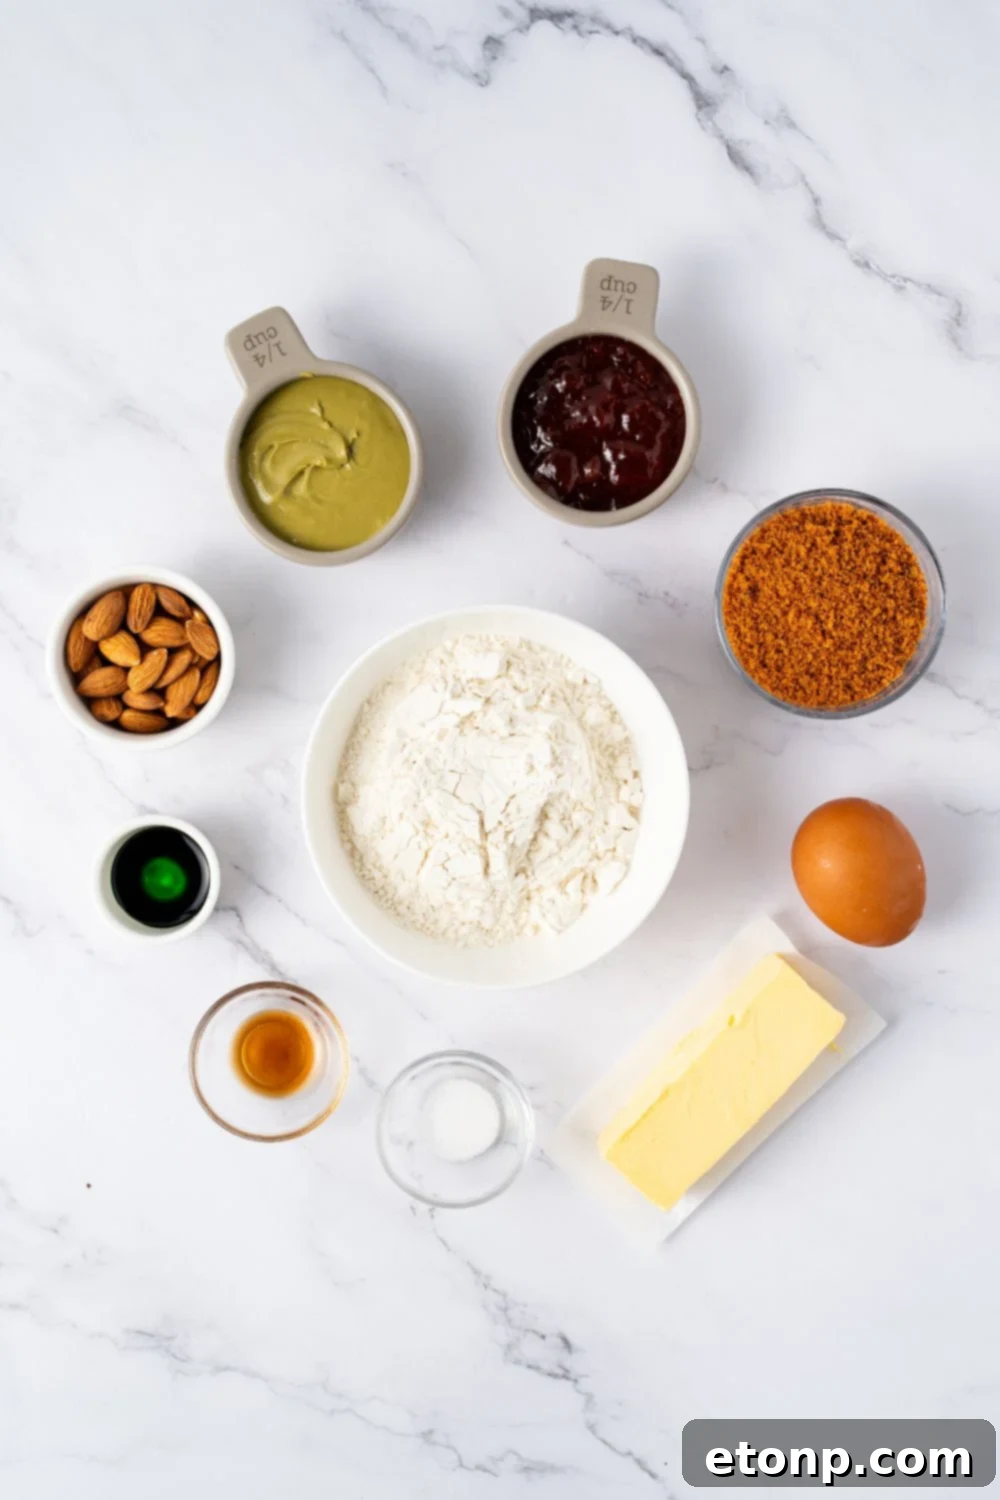
Decoding the Delicacy: An Ingredient-by-Ingredient Breakdown
Each component in our Witch Finger Cookies recipe has a vital role, contributing to both their enchanting flavor and their distinctively creepy appearance. Understanding what each ingredient does will not only help you bake better but also empower you to experiment with confidence. Let’s explore the contribution of each:
- Unsalted Butter: This is the foundation of our cookies, providing unparalleled richness and that quintessential melt-in-your-mouth texture characteristic of fine shortbread. Using unsalted butter allows you to control the exact amount of salt in the recipe, ensuring perfect flavor balance. Softened butter creams beautifully with sugar, incorporating air for a light, tender crumb.
- Brown Sugar: Beyond just sweetness, brown sugar introduces a wonderful depth of flavor with its subtle caramel notes. This complex sweetness pairs exquisitely with the nutty pistachio and the vibrant fruitiness of the jam, adding another layer of deliciousness that granulated sugar alone cannot provide.
- Egg: The egg acts as a crucial binder, holding the dough together and preventing it from becoming crumbly. It also contributes to the structure of the cookie, ensuring the “fingers” maintain their shape during baking. Furthermore, the egg adds moisture and richness, enhancing the overall texture.
- Salt: A small but mighty ingredient, salt is essential for balancing and enhancing all the other flavors. It prevents the cookies from tasting bland or overly sweet, instead highlighting the nutty pistachio and sweet jam.
- Vanilla Extract: Just like salt, vanilla extract is a flavor enhancer. It rounds out the sweetness and adds a warm, aromatic note that is universally loved in baked goods. Opt for pure vanilla extract for the best results.
- Pistachio Paste or Jam: This is the secret ingredient that gives our Witch Finger Cookies their unique identity. It infuses the dough with a delicate, earthy, and sweet nutty flavor that perfectly complements the buttery base. Additionally, it naturally imparts a subtle greenish tint, making your “witch fingers” look even more authentic and unsettlingly good. If using jam, ensure it’s not too watery.
- Green Food Coloring (Optional): For those who desire a truly dramatic and vivid creepy green, a few drops of food coloring can intensify the hue provided by the pistachio. This is purely for aesthetic effect, allowing you to customize the spookiness to your preference. Gel food coloring works best for vibrant colors without altering dough consistency.
- All-Purpose Flour: The primary structural component of the dough, all-purpose flour provides the necessary framework for the cookies. It ensures that the shaped fingers remain intact throughout the mixing, shaping, and baking processes, maintaining their gnarled appearance.
- Blanched Almonds: These are ingeniously used to create the realistic “fingernails.” Their oblong shape and slightly crunchy texture are ideal for this purpose. Blanching them (briefly boiling and then peeling) ensures a smooth, pale surface that truly resembles a nail, and they toast lightly during baking, adding another layer of flavor.
- Strawberry or Raspberry Jam: This vibrant, fruit-forward ingredient serves two crucial roles: it provides the visually striking “blood” effect, making the cookies instantly recognizable as a Halloween treat, and it adds a wonderful burst of tangy sweetness that cuts through the richness of the cookie. Raspberry jam offers a deeper, more realistic “blood” color, while strawberry provides a brighter, classic fruit flavor.
Each ingredient, carefully chosen, plays its part in crafting a cookie that is both a visual spectacle and a delightful culinary experience, ensuring every bite is as memorable as the last.

When and Where to Conjure These Cookies: Serving Ideas for Every Spooky Occasion
Witch Finger Cookies are incredibly versatile and perfect for a wide array of Halloween festivities. Their unique appearance makes them a conversation starter, while their delicious taste ensures they’re devoured quickly. Here are some fantastic ideas for when and how to serve these spooky delights:
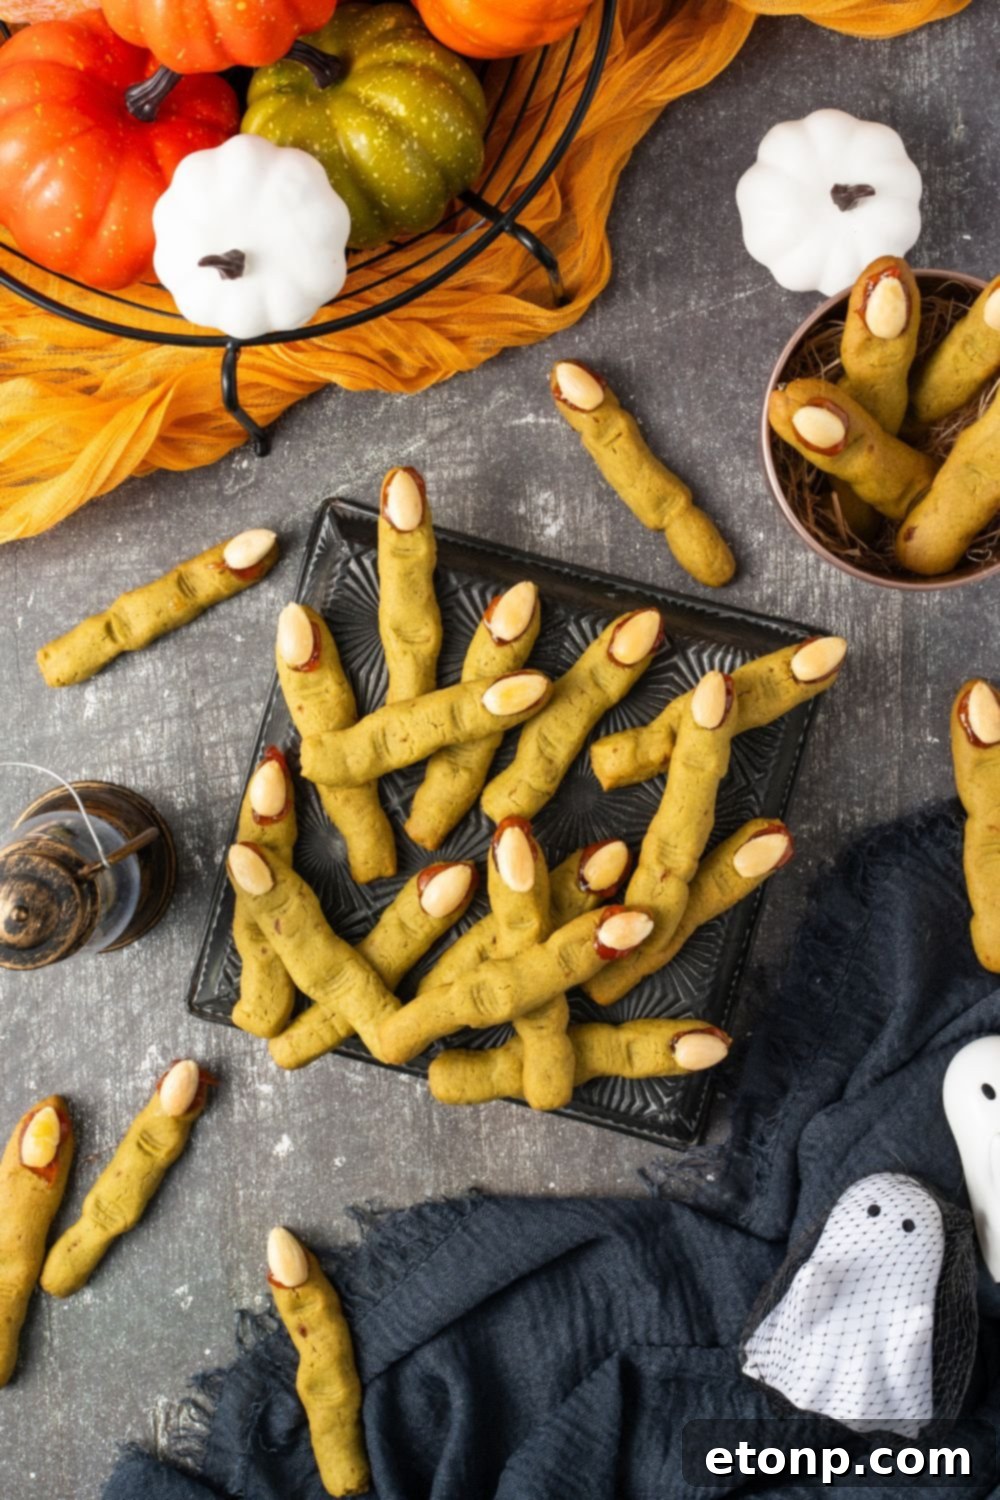
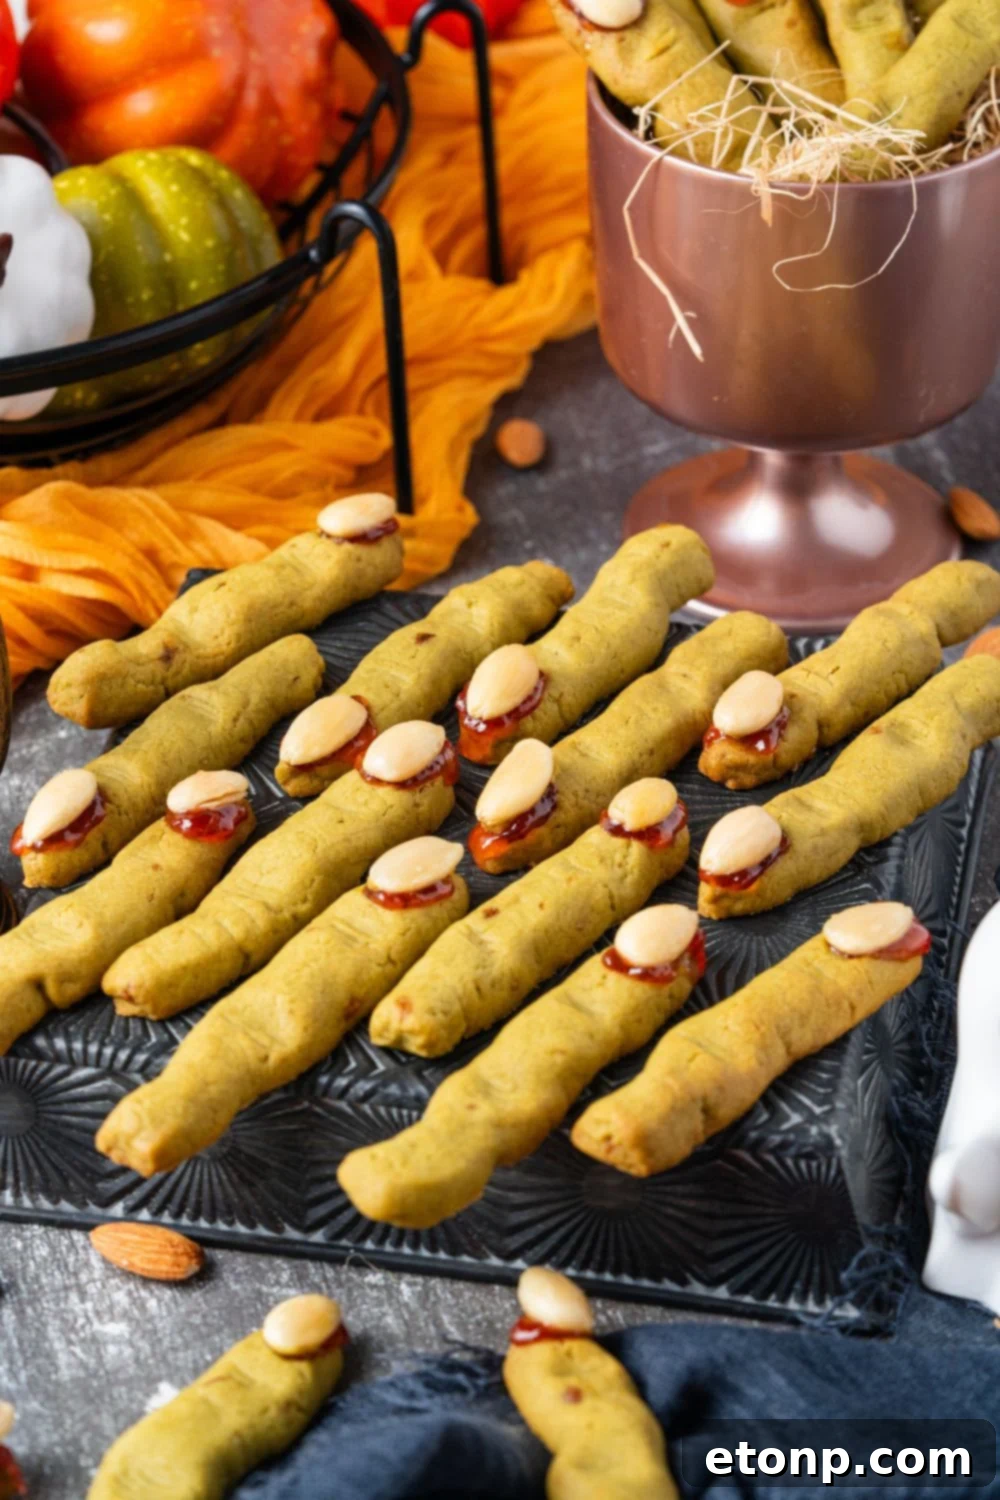
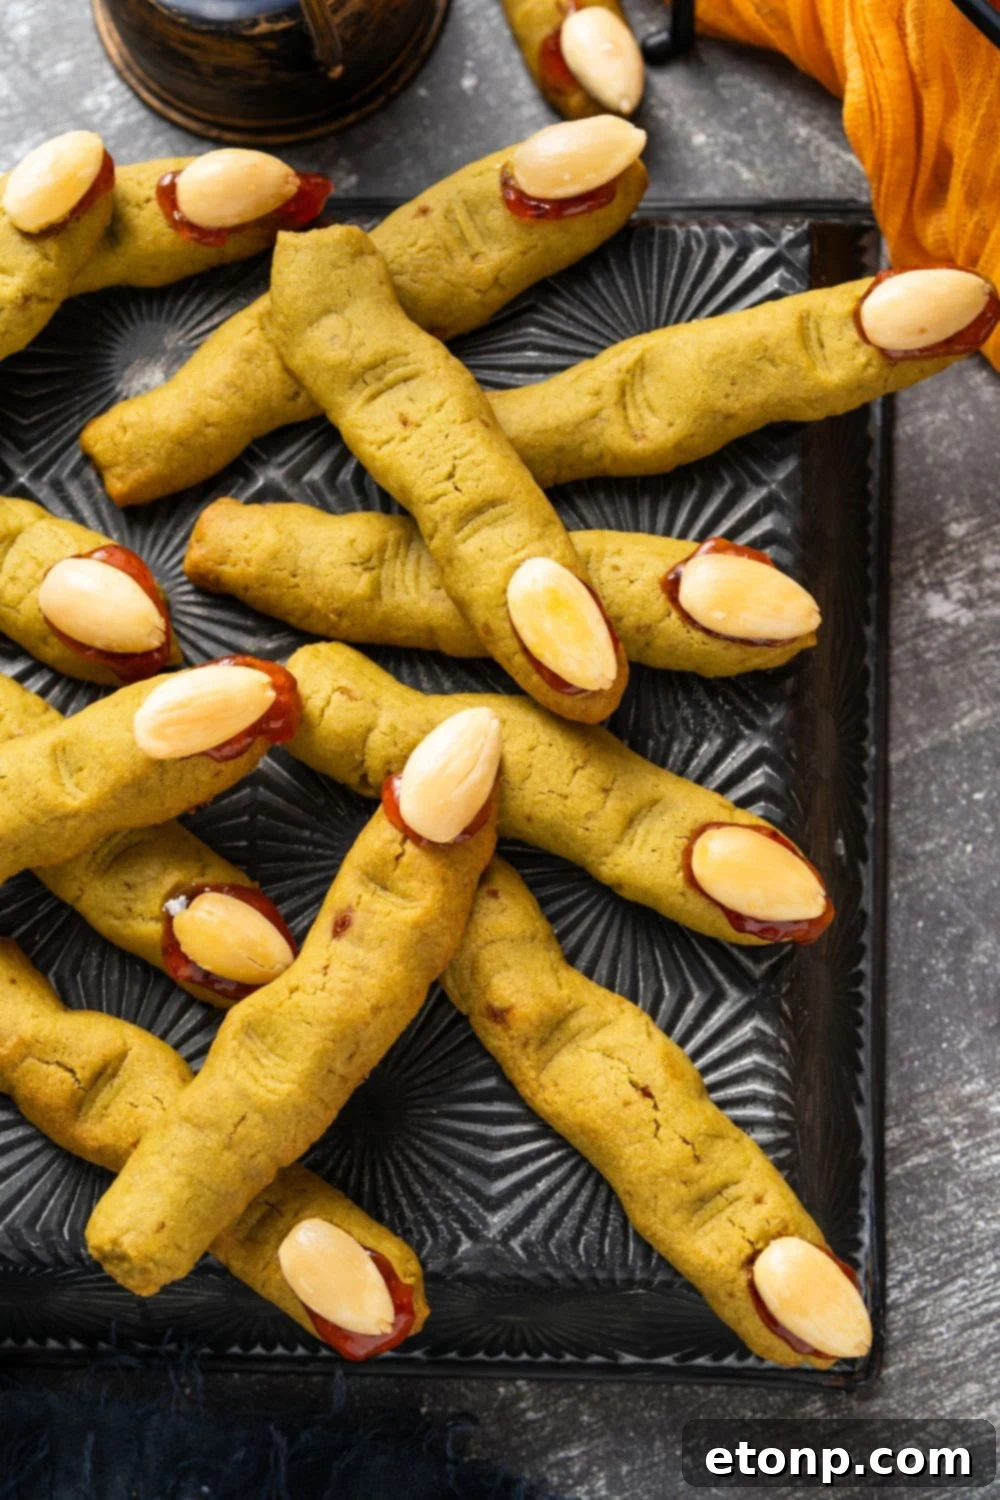
- Halloween Parties: Make these cookies the centerpiece of your dessert table! Arrange them artfully on a dark, rustic platter – perhaps black, deep purple, or even a vibrant orange – creating a striking visual impact. Consider adding some faux spiderwebs, plastic spiders, or dried leaves around the platter to enhance the eerie ambiance.
- School Treats & Class Parties: Kids absolutely adore these cookies. Their creepy appearance elicits excited shrieks and giggles, making them a surefire hit at school events or as lunchbox surprises during the spooky season. Individually wrapping them with a fun Halloween tag ensures they’re hygienic and easy for little hands to grab.
- Cozy Halloween Movie Nights: Elevate your autumn movie marathon by pairing these cookies with a themed charcuterie board. Alongside classic Halloween candy, add some spooky-shaped cheeses, dark grapes, and other seasonal snacks. These cookies provide the perfect sweet, slightly unsettling bite for a night of frights and fun films.
- Trick-or-Treat Dessert Tables: If you’re hosting a post-trick-or-treat gathering, these cookies are ideal. You can individually bag them, making them easy for guests to grab and go, or arrange them on a dessert table where they can be admired (and then devoured) by all.
- Fall Bake Sales: Looking for a bake sale item that stands out from the crowd? Witch Finger Cookies are your answer. Their creative and unique design instantly captures attention, guaranteeing they’ll be among the first items to sell out. People love buying treats that are both delicious and visually engaging.
- Haunted House Events: If you’re hosting a haunted house or a spooky walk-through, offering these cookies as a post-scare treat can be a fun, thematic touch. The juxtaposition of their creepy look with their sweet taste is always a crowd-pleaser.
- Teacher & Neighbor Gifts: Package a few cookies in a cute Halloween-themed bag with a ribbon for a thoughtful, handmade gift. It’s a wonderful way to share some festive cheer with those around you, and a delightful alternative to traditional candy.
No matter the occasion, Witch Finger Cookies are guaranteed to add a memorable touch of spooky sweetness, making them an indispensable part of your Halloween celebrations.
Preparation Prowess: Make-Ahead & Storage Tips for Spooky Success
One of the best features of this Witch Finger Cookie recipe is its incredible flexibility for make-ahead preparation and storage. This means you can spread out your baking tasks, reduce stress on party day, and always have a stash of spooky treats ready to go. Here’s how to effectively manage your cookie production:
- Make-Ahead Dough (Refrigeration): To get a head start, you can prepare the cookie dough up to 2 days in advance. After mixing, form the dough into a disc, wrap it tightly in plastic wrap, and refrigerate. When ready to bake, let it sit at room temperature for about 10-15 minutes to slightly soften, then proceed with shaping the fingers. This initial chill also helps prevent spreading during baking.
- Freezing Shaped, Unbaked Dough: For longer-term planning, you can freeze the shaped, unbaked fingers. Once you’ve rolled and added the almond “nails,” place the cookies on a parchment-lined baking sheet and freeze until solid (about 1-2 hours). Once firm, transfer them to a freezer-safe, airtight container or a heavy-duty freezer bag, layering with parchment paper to prevent sticking. They can be stored for up to 2 months. When you’re ready to bake, simply place the frozen fingers on a baking sheet and bake directly from frozen, adding an extra 2-3 minutes to the specified bake time. No need to thaw!
- Storing Baked Cookies: After your Witch Finger Cookies are baked and completely cooled (this is crucial to prevent condensation and sogginess), store them in an airtight container at room temperature. They will maintain their crispness and delightful flavor for up to 5 days. For optimal freshness, a cookie jar or a sturdy plastic container works perfectly.
- Freezing Baked Cookies: Baked Witch Finger Cookies also freeze beautifully. Once completely cooled, arrange them in a single layer on a baking sheet and flash freeze until firm. Then, transfer them to an airtight freezer container or heavy-duty freezer bag, again separating layers with parchment paper. They can be frozen for up to 2 months. To serve, simply thaw them at room temperature for a few hours. This is an excellent option for managing larger batches or saving some treats for unexpected guests.
By utilizing these make-ahead and storage techniques, you can enjoy the festive fun of baking Witch Finger Cookies without the last-minute rush, ensuring fresh and delicious treats whenever the spooky mood strikes!
Why You’ll Fall in Love with Baking These Spooky Treats
Beyond being a simple dessert, these Witch Finger Cookies offer an experience that will undoubtedly make them a staple in your annual Halloween festivities. They captivate the imagination and delight the taste buds, creating lasting memories for everyone involved. Here’s why you’ll absolutely adore this recipe:
- Engaging for All Ages: This recipe isn’t just for adults; it’s a fantastic family activity. Kids will be thrilled to help shape the dough, carefully pressing in the “nails” and drawing the gnarled knuckles. Adults, too, will find a creative outlet in crafting each uniquely spooky finger. It’s a wonderful way to bond and share the joy of Halloween together in the kitchen.
- Pantry-Friendly Ingredients: You won’t need to hunt for obscure or expensive specialty items. Most of the ingredients—butter, flour, sugar, eggs, vanilla, and jam—are common staples likely already in your pantry. The pistachio paste and almonds are the most unique elements, but readily available in most grocery stores or online. This makes the recipe accessible and convenient.
- Limitless Customization Potential: The creative possibilities are endless! Beyond the classic green, you can experiment with purple, black, or even orange food coloring to create different “witchy” aesthetics. Swap the almond nails for pumpkin seeds or chocolate chips, or try different jam flavors for varied “blood” effects. This adaptability ensures that every batch can feel fresh and exciting.
- Perfect for Large Gatherings: Planning a big Halloween party or need treats for a school event? This recipe scales up beautifully. It’s incredibly easy to double or triple the batch without compromising on quality, ensuring you have plenty of spooky fingers to go around and impress a crowd.
- The Quintessential Halloween Aesthetic: These cookies are the epitome of Halloween treats. They boast a perfectly eerie, wonderfully creepy appearance that makes them stand out on any table, but they deliver an unbelievably delicious taste that surprises and delights. It’s the ultimate combination of looking gross in the best possible way and tasting absolutely incredible, making them a memorable highlight of the spooky season.
Prepare to make these Witch Finger Cookies an unforgettable tradition, bringing smiles, scares, and satisfaction to all who encounter them.
Frequently Asked Questions: Your Witch Finger Cookie Queries Answered
Baking unique treats like Witch Finger Cookies can sometimes spark a few questions. Here are answers to some of the most common queries to help ensure your spooky baking experience is seamless and successful:
Q: Can I make Witch Finger Cookies without food coloring?
A: Absolutely! The green food coloring is purely for visual effect, intensifying the spooky “witch skin” look. The cookies will still boast their fantastic pistachio-vanilla flavor and tender texture without it—they’ll simply be a more natural, pale golden cookie color, which is still perfectly delicious and festive.
Q: How do I keep the almond “nails” from falling off after baking?
A: The key is to secure them properly. First, press them firmly into the dough *before* baking. If, after baking, some almonds seem loose or fall out when cooled, simply lift the almond, apply a tiny dab of strawberry or raspberry jam into the cavity where the nail sits, and then press the almond back into place. The jam acts as a natural “glue” and will hold it perfectly once set.
Q: Can I use something besides blanched almonds for the nails?
A: Yes, certainly! Feel free to get creative. Alternatives that work well include pumpkin seeds (for a flatter, green nail), sunflower seeds, chocolate chunks (for a dark, mysterious nail), whole pecans or walnuts, or even small, shaped pieces of fondant or candy corn for a more whimsical touch. Choose whatever suits your taste and desired aesthetic.
Q: How do I make these cookies gluten-free?
A: To adapt this recipe for a gluten-free diet, substitute the all-purpose flour with a high-quality cup-for-cup gluten-free flour blend. For the best possible texture and to ensure the cookies hold their shape, make sure your chosen blend specifically contains xanthan gum. Adjustments to liquid might be minimal, but monitor dough consistency.
Q: Can I double or triple this recipe for a large party?
A: Definitely! This recipe is incredibly forgiving and scales up beautifully, making it ideal for parties, bake sales, or large family gatherings. When doubling or tripling, simply use extra baking sheets to ensure the cookies are spaced properly, preventing them from baking unevenly or merging together. Bake in batches if necessary.
Q: How do I get realistic-looking “wrinkles” or knuckles on the fingers?
A: After you’ve rolled the dough into finger shapes and before pressing in the almond, gently pinch the sides of the dough in two or three places to create a slightly wider “knuckle” area. Then, use the back of a butter knife or even a toothpick to lightly press and etch horizontal lines across these pinched sections. This creates convincing, gnarled knuckle details that enhance the creepy effect.
Q: Can I use homemade jam for the “blood”?
A: Homemade jam works wonderfully for this recipe and often adds an extra layer of flavor! The most important factor is to choose a homemade jam with a thicker consistency. This will prevent it from running or sliding off the cookie tips once applied. If your homemade jam is a bit runny, you can gently simmer it down on the stove for a few minutes to thicken it before using.
Q: How do I keep the cookies from spreading too much during baking?
A: The secret to maintaining those distinct finger shapes is chilling the dough, and doing it twice! First, chill the mixed dough before shaping. Second, and crucially, chill the *shaped* cookies in the fridge for at least 30 minutes (or even longer) before baking. This firming up of the butter in the dough is essential for preventing excessive spreading and ensuring your cookies retain their perfectly gnarled, finger-like appearance.
Unleash Your Inner Alchemist: Exciting Variations & Substitutions
The beauty of Witch Finger Cookies lies not just in their spooky appearance and delicious taste, but also in their adaptability. Don’t be afraid to experiment and personalize your batch to perfectly match your Halloween vision. Here are some fun variations and simple substitutions to try:
- Enticing Flavor Twists: To add another layer of autumnal warmth, consider incorporating a few drops of almond extract into the dough alongside the vanilla. Almond and pistachio flavors are a match made in heaven! Alternatively, a pinch of pumpkin spice or a dash of cinnamon can infuse a cozy, seasonal flavor that complements the buttery cookie base beautifully.
- Mysterious Color Changes: While the classic green is iconic, you’re not limited to it. For an even more intense witchy vibe, try using purple or black food coloring for truly sinister-looking fingers. A deep charcoal black could mimic burnt fingers from a cauldron, while a vibrant purple could suggest a magical, potion-infused hand. For a fiery Halloween look, use orange food coloring!
- Nut-Free Options: If you or your guests have nut allergies, don’t despair! You can easily make this recipe nut-free. Simply omit the pistachio paste (the cookies will still be delicious, just not green without food coloring) and substitute the almond “nails” with candy corn (for a whimsical look), small pretzel pieces, sunflower seeds, or even mini chocolate chips pressed flat.
- Juicy Jam Choices: The “blood” is a crucial visual element, and you have several options for achieving different effects. Raspberry jam creates a wonderfully deep, rich red that looks strikingly realistic as “blood.” Strawberry jam offers a brighter, classic red color. For a truly dark and ominous effect, consider using blueberry or blackberry jam – their deep purple-black hues can create a truly unsettling, decaying finger appearance. A cherry preserves could also work beautifully, offering a glossy, bright red.
- Spice It Up: For those who love a bit of heat, a tiny pinch of cayenne pepper in the dough can add a surprising, subtle kick that contrasts delightfully with the sweetness, creating a truly unexpected treat.
- Citrus Zest: A touch of lemon or orange zest can add a bright, fresh note to the dough, cutting through the richness and offering a sophisticated twist.
Let your imagination be your guide! These cookies are a canvas for your Halloween creativity, so have fun making them your own.
No Treat Left Behind: Creative Leftover Ideas
While it’s hard to imagine any Witch Finger Cookies surviving long, sometimes you might have a few extra (or you might intentionally bake more!). Don’t let these deliciously spooky remnants go to waste. Here are some fun and creative ways to transform any leftover Witch Finger Cookies into new delightful desserts:
- Spooky Halloween Ice Cream Sundaes: Crumble your leftover Witch Finger Cookies over generous scoops of vanilla (or even pistachio!) ice cream. Drizzle with extra strawberry or raspberry jam for a “bloody” effect, add a dollop of whipped cream, and top with some Halloween sprinkles or gummy worms for a decadent, themed sundae.
- Ghastly Good Milkshakes: Blend a few cooled Witch Finger Cookies into a vanilla or chocolate milkshake base. The cookies will add a delightful texture, a hint of pistachio, and extra sweetness. Top with whipped cream and a single, intact Witch Finger Cookie for a visually striking and delicious Halloween beverage.
- Layered Halloween Trifles or Parfaits: Create individual Halloween-themed dessert cups or a larger trifle. Layer crumbled Witch Finger Cookies with creamy vanilla or chocolate pudding, fluffy whipped cream, and perhaps some chopped candy corn or mini chocolate chips. The layers of green cookie, white cream, and dark pudding will create a visually appealing and utterly delicious treat.
- Cookie Crust for Pies or Cheesecakes: Crush the leftover cookies into fine crumbs and mix with a little melted butter to create a unique and flavorful base for a Halloween-themed pie or cheesecake. Imagine a “bloody” cherry pie with a pistachio-flavored cookie crust!
- Edible Decorations: If you have just a few left, they can be broken into pieces and used as eerie garnishes for other Halloween desserts, like cupcakes or frosted brownies. Their unique shape and color will add an instant spooky touch.
With these ideas, your Witch Finger Cookies can continue to bring spooky joy long after the initial bite!
Baking on a Budget: Your Cost-Conscious Guide to Witch Finger Cookies
Creating impressive and delicious Halloween treats doesn’t have to break the bank. Witch Finger Cookies are surprisingly affordable, making them an excellent choice for parties, school events, or simply enjoying festive baking without stressing your wallet. Here’s a quick breakdown of the budget-friendly aspects:
- Butter & Flour: These are usually pantry staples that many households already have on hand. Even if purchased, they are inexpensive base ingredients that form the bulk of the cookie dough, making the overall cost very reasonable. Buying larger bags of flour or butter in bulk can further reduce the per-cookie cost.
- Almonds & Jam: While these are the more “specialized” ingredients, a little goes a long way. You don’t need a massive quantity of blanched almonds for the “nails” or a huge jar of jam for the “blood.” A standard-sized package of almonds and a small jar of jam will easily cover several batches, making them a cost-effective investment for multiple baking sessions. Look for sales on these items during the fall season.
- Food Coloring: Green food coloring is entirely optional for this recipe. If you choose to use it, a small bottle is very inexpensive and typically lasts for numerous baking projects, offering great value over time. You can often find multi-packs of food coloring around holidays.
With these affordable ingredients, the estimated total cost for making a generous batch of approximately 30 Witch Finger Cookies comes in at under $10. This makes them a wonderfully party-friendly and incredibly budget-friendly option, proving that you can create spooky, delicious, and memorable Halloween treats without overspending.
Health-Conscious Creations: A Lightened-Up Version
For those looking to enjoy the spooky fun of Witch Finger Cookies with a slightly healthier twist, a few simple substitutions can make a difference without sacrificing too much of the flavor or festive spirit. Here are some ideas for a lightened-up version:
- Swap Butter for Coconut Oil: To make the cookies dairy-free and introduce a different fat profile, you can substitute unsalted butter with an equal amount of solid coconut oil. This will give the cookies a slightly different texture and a subtle coconut flavor, which can be a pleasant addition for some palates. Ensure the coconut oil is solid and at room temperature for creaming.
- Reduce Sugar Content: If you prefer a less sweet cookie, you can comfortably reduce the amount of brown sugar by a quarter to a half. The cookies will still be delicious, allowing the nutty pistachio and tangy jam flavors to shine through even more prominently. Alternatively, experiment with using coconut sugar as a natural, less refined alternative that offers a similar caramel-like depth.
- Incorporate Whole Wheat Flour: For added fiber and a nuttier flavor profile, consider substituting up to half of the all-purpose flour with whole wheat pastry flour. Whole wheat pastry flour is lighter than regular whole wheat flour, ensuring the cookies remain tender. This small change boosts the nutritional content while maintaining a great taste and texture.
- Use All-Fruit Jam: Opt for all-fruit jams or preserves with no added sugars to keep the “bloody” element healthier. These still provide the vibrant color and fruity tang but with fewer processed sugars.
- Natural Food Coloring: Instead of artificial green food coloring, you could experiment with natural alternatives like a tiny amount of spinach powder (which won’t affect flavor in small quantities) or spirulina powder for a more subtle green tint.
By making these mindful adjustments, you can still enjoy the delightful experience of baking and devouring Witch Finger Cookies, aligning them more closely with your dietary preferences without losing any of their Halloween charm.
The Art of Presentation: How to Package Witch Finger Cookies for Memorable Halloween Gifts
One of the most rewarding aspects of baking Witch Finger Cookies is sharing them. Packaging these delightfully spooky treats for friends, family, neighbors, or as party favors adds an extra layer of festive cheer and personal touch. They look absolutely charming in simple gift bags, making it an effortless way to spread some Halloween spirit without a huge expense. Here’s my tried-and-true method for packaging these cookies so they remain fresh, look adorable, and travel perfectly:
1. The Golden Rule: Ensure Complete Cooling
This step is non-negotiable for any baked good you plan to package. Warm cookies release steam, and if sealed in a bag, this steam condenses, turning your crisp cookies soft and soggy. Always allow your Witch Finger Cookies to cool entirely, preferably on a wire rack, until they reach room temperature before even thinking about wrapping them up.
2. Opt for Food-Safe Cellophane Bags
For that professional, yet homemade touch, I highly recommend using clear, gusseted treat bags. These are widely available on Amazon, at craft stores, or even in the baking aisle of larger supermarkets. The transparency of cellophane perfectly showcases the eerie “fingers” inside, making them an instant visual hit. Always look for bags explicitly labeled “food-safe” to ensure they are designed for direct contact with edibles.
3. Elevate with a Festive Touch
Once the cookies are nestled in their bags, it’s time for the decorative flourish. Cinch each bag with a festive Halloween-themed ribbon, a rustic baker’s twine in black and orange, or even classic curling ribbon in seasonal colors. To add an extra dash of charm, attach a small paper tag. Handwrite or print a fun, spooky message like “Witch Fingers – Fresh from the Cauldron!”, “Eat if You Dare!”, or “A Treat from Our Haunted Kitchen.”
4. Enhance the Kids’ Treat Bags
If your cookies are destined for little trick-or-treaters or a children’s party, make the gift extra special. Before tying the bag shut, tuck in a few individually wrapped candies, a small plastic spider ring, or a Halloween sticker. This transforms each cookie bag into a miniature, delightful Halloween goodie bag that kids will adore.
5. Mindful Portion Sizes
Consider your recipients when deciding on portions. For children’s gifts or small favors, 2-3 cookies per bag usually suffice. For family members, neighbors, or a more generous offering, 4-5 cookies per bag is a good rule of thumb. This ensures your gift looks abundant without depleting your entire batch too quickly.
6. Smart Storage for Gifted Batches
If you’re packaging your cookies a day or two in advance of gifting, store the sealed bags in a cool, dry place away from direct sunlight and strong odors. For longer storage, or if your environment is particularly humid, it’s best to place the bagged cookies inside a larger, airtight container and refrigerate them. Remember to bring them back to room temperature before presenting them as gifts for the best texture and flavor.
By following these simple steps, your Witch Finger Cookies will not only be a delectable treat but also a wonderfully presented and memorable Halloween gift, spreading joy and spooky fun wherever they go.

Insider Secrets: Reader Favorite Tips & Ideas for Perfect Witch Finger Cookies
Over the years, bakers have shared their clever tricks and creative embellishments for these Witch Finger Cookies. Incorporating these reader-approved tips can elevate your baking experience and make your spooky treats even more impressive:
- The Double Chill for Perfect Shapes: This is arguably the most crucial tip! Chilling the dough *twice* – once after mixing and again after shaping the fingers – is the ultimate secret to preventing spreading in the oven. The cold butter in the dough helps maintain the intricate gnarled shapes, ensuring your fingers look perfectly gruesome and defined. Don’t skip this step!
- Toothpick Artistry for Knuckle Details: For ultra-realistic knuckles, after shaping the finger and pinching the knuckle areas, use a simple toothpick to gently etch in fine lines and wrinkles. This small detail adds significant authenticity to the creepy effect, making each cookie a miniature work of edible art. You can also use the dull side of a butter knife for broader lines.
- Intensify the “Bloody” Realism with Red Food Coloring: While strawberry or raspberry jam provides a fantastic “blood” color, a single drop of red gel food coloring stirred into a small amount of jam can create an even more vivid and realistic deep-red “blood” effect. This simple trick makes the cookies truly pop and enhances their spooky appeal.
- Dramatic Presentation with Dark Platters and Fake Spiderwebs: To maximize the visual impact, serve your Witch Finger Cookies on a contrasting dark platter – think black, deep charcoal, or even a dark wood finish. Drape some inexpensive faux spiderwebs around the serving dish, scatter a few plastic spiders, or arrange dried leaves for an effortlessly eerie display. Presentation points are always a bonus!
- A Touch of Sparkle: For a magical witchy effect, lightly dust the cooled cookies with edible glitter (silver or green works wonderfully) before adding the jam. It adds an enchanting shimmer, making them look like they’ve just emerged from a magical potion.
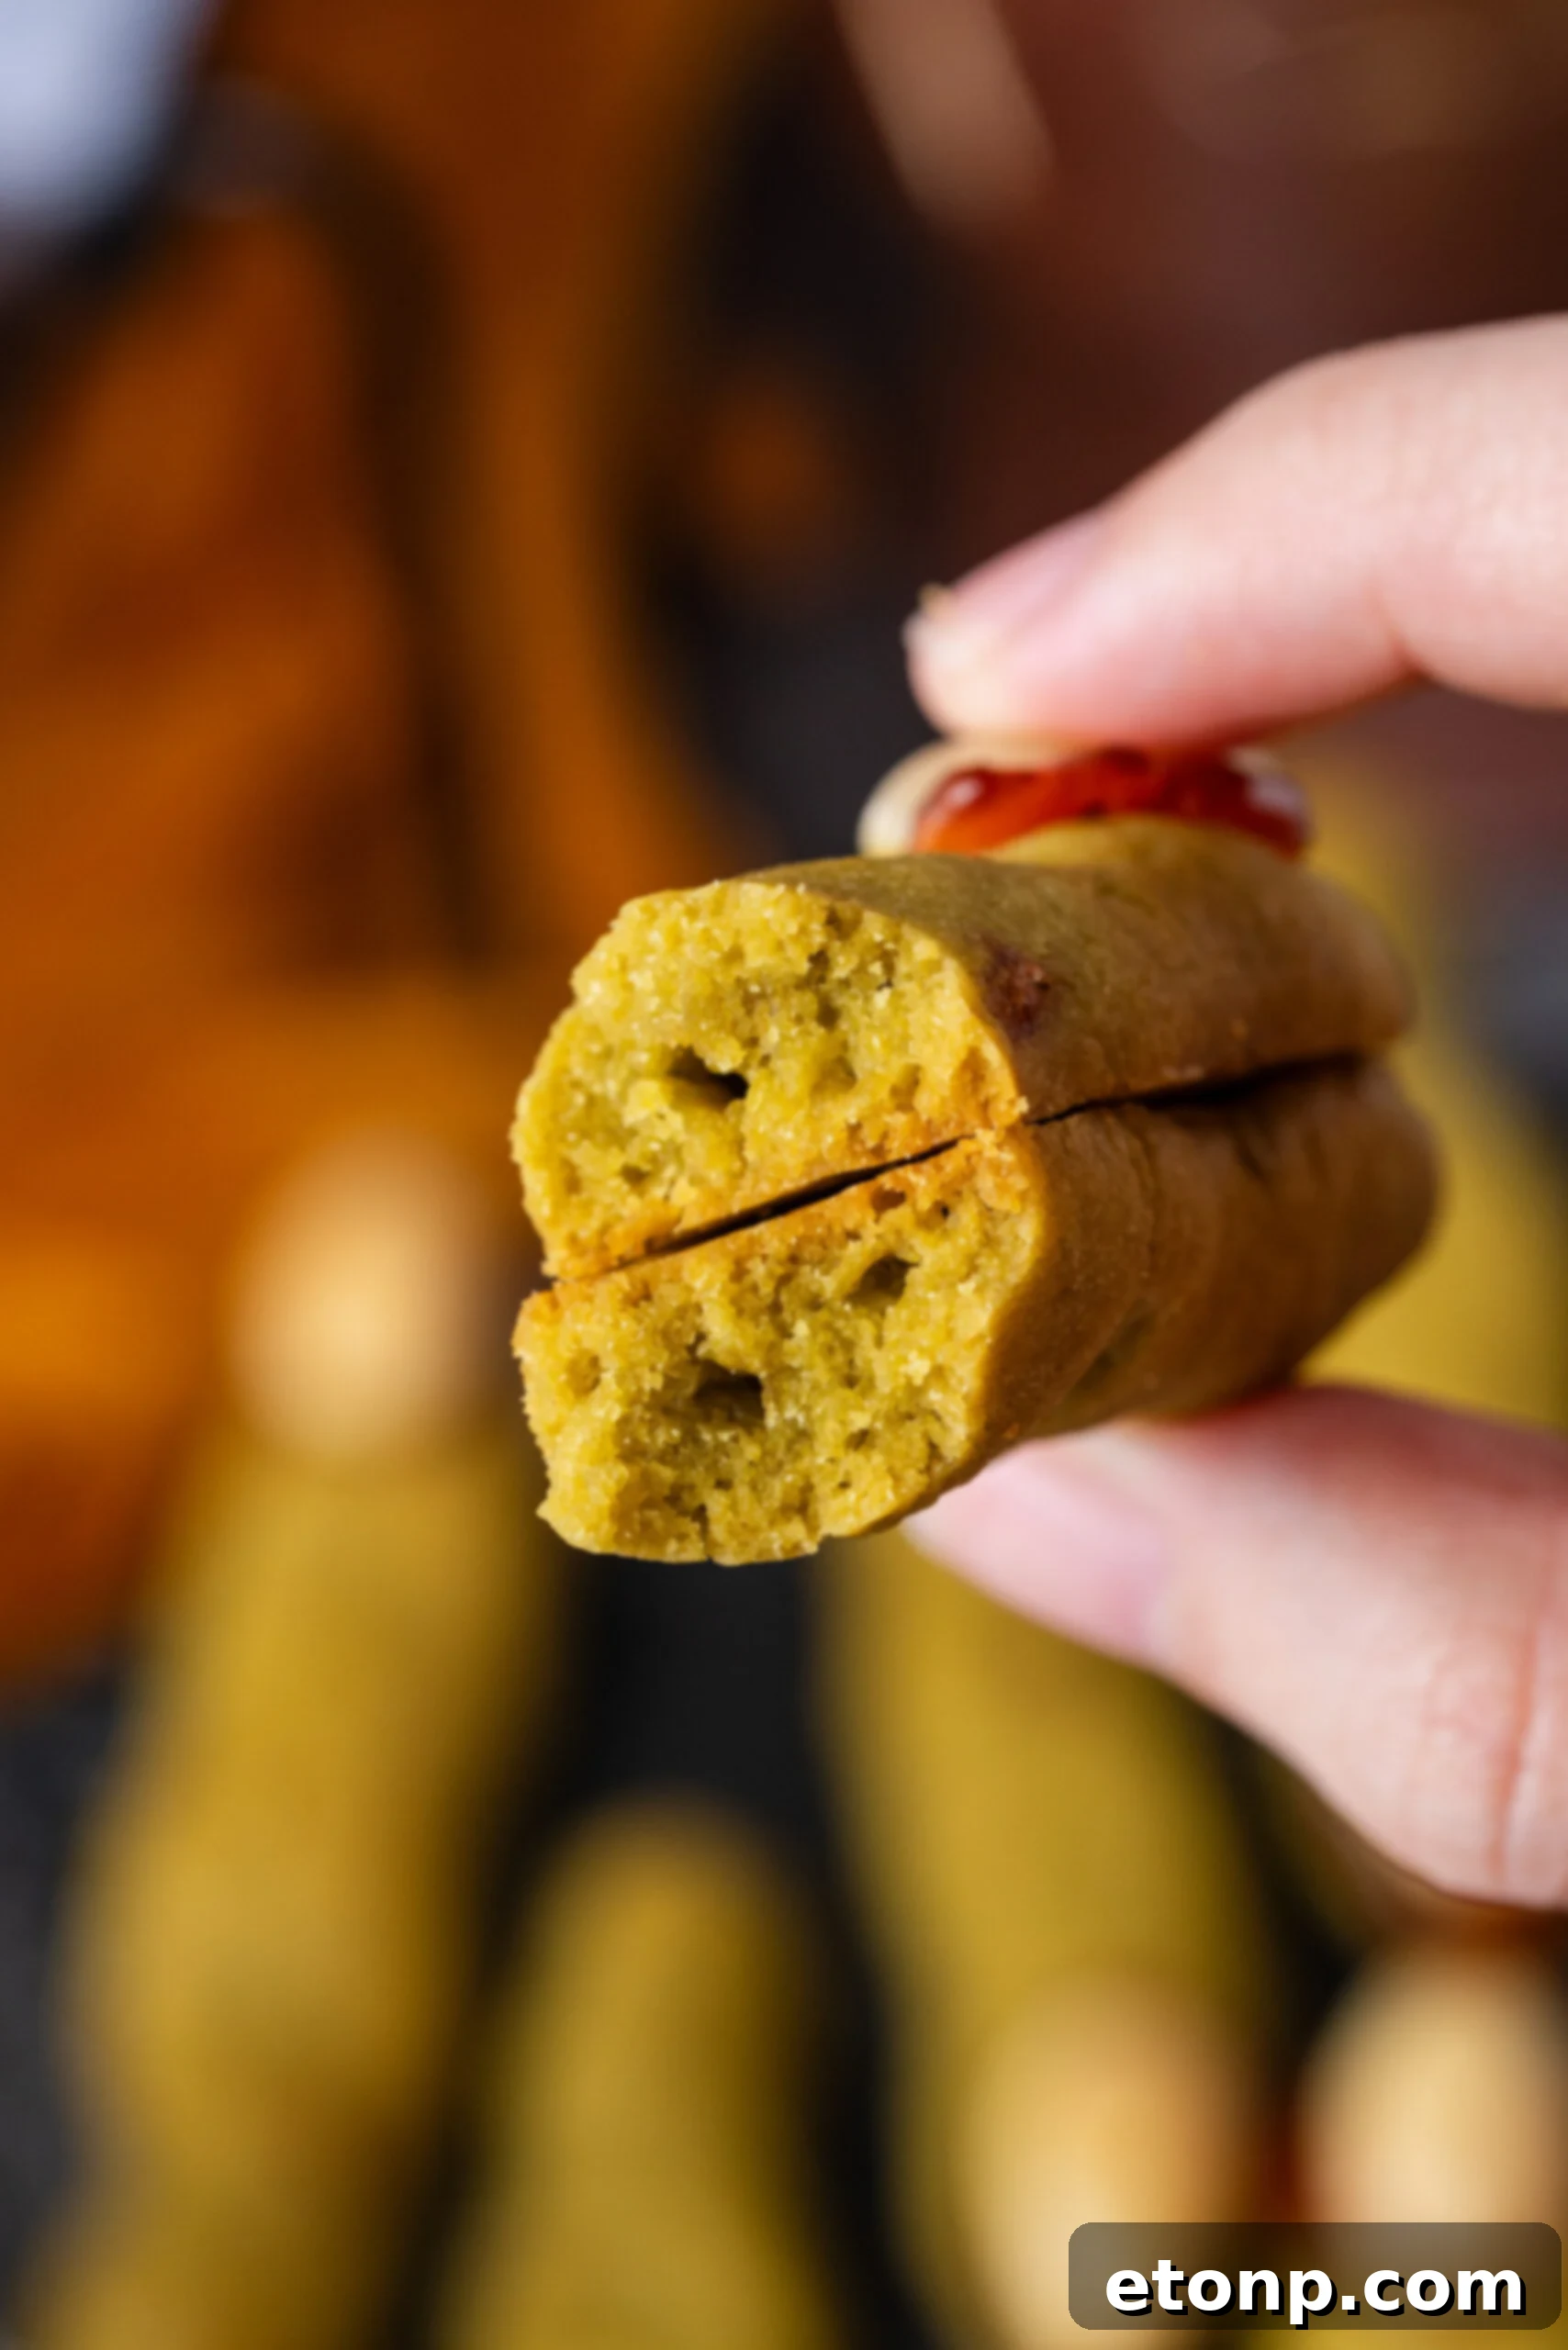
- Create “Broken” Fingers: For an even more grotesque touch, after some cookies have cooled, carefully snap a few in half. Arrange them on the platter as if they’ve been torn or severed for an extra fright factor.
These favorite tips are testament to the creativity this recipe inspires. Embrace them and make your Witch Finger Cookies truly legendary!
Solving Spooky Snags: Comprehensive Troubleshooting Tips
Even the most foolproof recipes can sometimes encounter minor hiccups in the kitchen. Don’t fret if your Witch Finger Cookies aren’t looking quite as spooky or tasting as perfect as you’d hoped. Here are some common issues and their straightforward solutions to help you achieve cookie perfection:
- Problem: Cookies Spread Too Much and Lose Their Finger Shape.
Solution: The most common culprit here is insufficient chilling time. The butter in the dough needs to be firm to hold the cookie’s shape during baking. Ensure you chill the dough *twice*: once after mixing (for at least 20-30 minutes), and crucially, again after you’ve shaped the individual fingers (for at least 30 minutes, or even longer in the fridge). If your kitchen is warm, you might need to chill for an hour or until the dough is very firm. - Problem: Almond “Nails” Popped Off During or After Baking.
Solution: This often happens if the almonds weren’t pressed firmly enough into the raw dough or if the cookie expanded slightly. A simple fix after baking is to gently remove the almond, pipe or dab a tiny amount of jam (the “blood”) into the indentation where the nail belongs, and then press the almond firmly back into place. The jam acts as a fantastic adhesive once it sets. - Problem: Cookies Are Too Dry or Crumbly.
Solution: Overbaking is usually the cause of dry cookies. Keep a close eye on them during the last few minutes of baking. They should be just lightly golden around the edges, but still appear slightly pale in the center. Slightly underbaking them will result in a wonderfully tender, melt-in-your-mouth texture. Also, ensure you’re measuring your flour accurately (spoon and level, don’t scoop directly from the bag). - Problem: Cookies Are Not Sweet Enough.
Solution: If you find the cookies lacking in sweetness for your preference, you have a few easy remedies. Once cooled, you can lightly dust them with powdered sugar for an extra touch of sweetness. Alternatively, prepare a simple glaze by mixing powdered sugar with a little milk or lemon juice and drizzle it over the cookies. Ensure your jam is also sweet and flavorful. - Problem: The Green Color Isn’t Vibrant Enough.
Solution: If your pistachio paste isn’t imparting a strong enough green, or if you omitted food coloring, simply add an extra drop or two of green gel food coloring to the dough mixture next time. Gel food coloring provides much more vibrant results than liquid coloring without adding excess moisture. - Problem: Jam Spills or Runs Off the Cookie.
Solution: This can occur if the jam is too thin or if the cookie is still too warm. Ensure your jam has a thick consistency. If it’s too runny, gently simmer a small amount on the stove to reduce and thicken it before applying. Always wait until the cookies are completely cool before adding the jam “blood.”
Armed with these troubleshooting tips, you’ll be able to tackle any baking challenge and ensure your Witch Finger Cookies are perfectly creepy and delicious every time!
Nutrition Information (Per Cookie)
Here’s an estimated nutritional breakdown for one Witch Finger Cookie. Please note that these values are approximate and can vary based on specific ingredient brands, exact measurements, and any substitutions made. This information is provided as a general guide.
- Calories: ~120 kcal
- Fat: 6g
- Carbohydrates: 15g
- Protein: 2g
- Sugar: 8g
These cookies are designed to be a delightful treat, perfect for occasional indulgence during the Halloween season.
They May Look Creepy… But Just Wait Until You Taste Them!
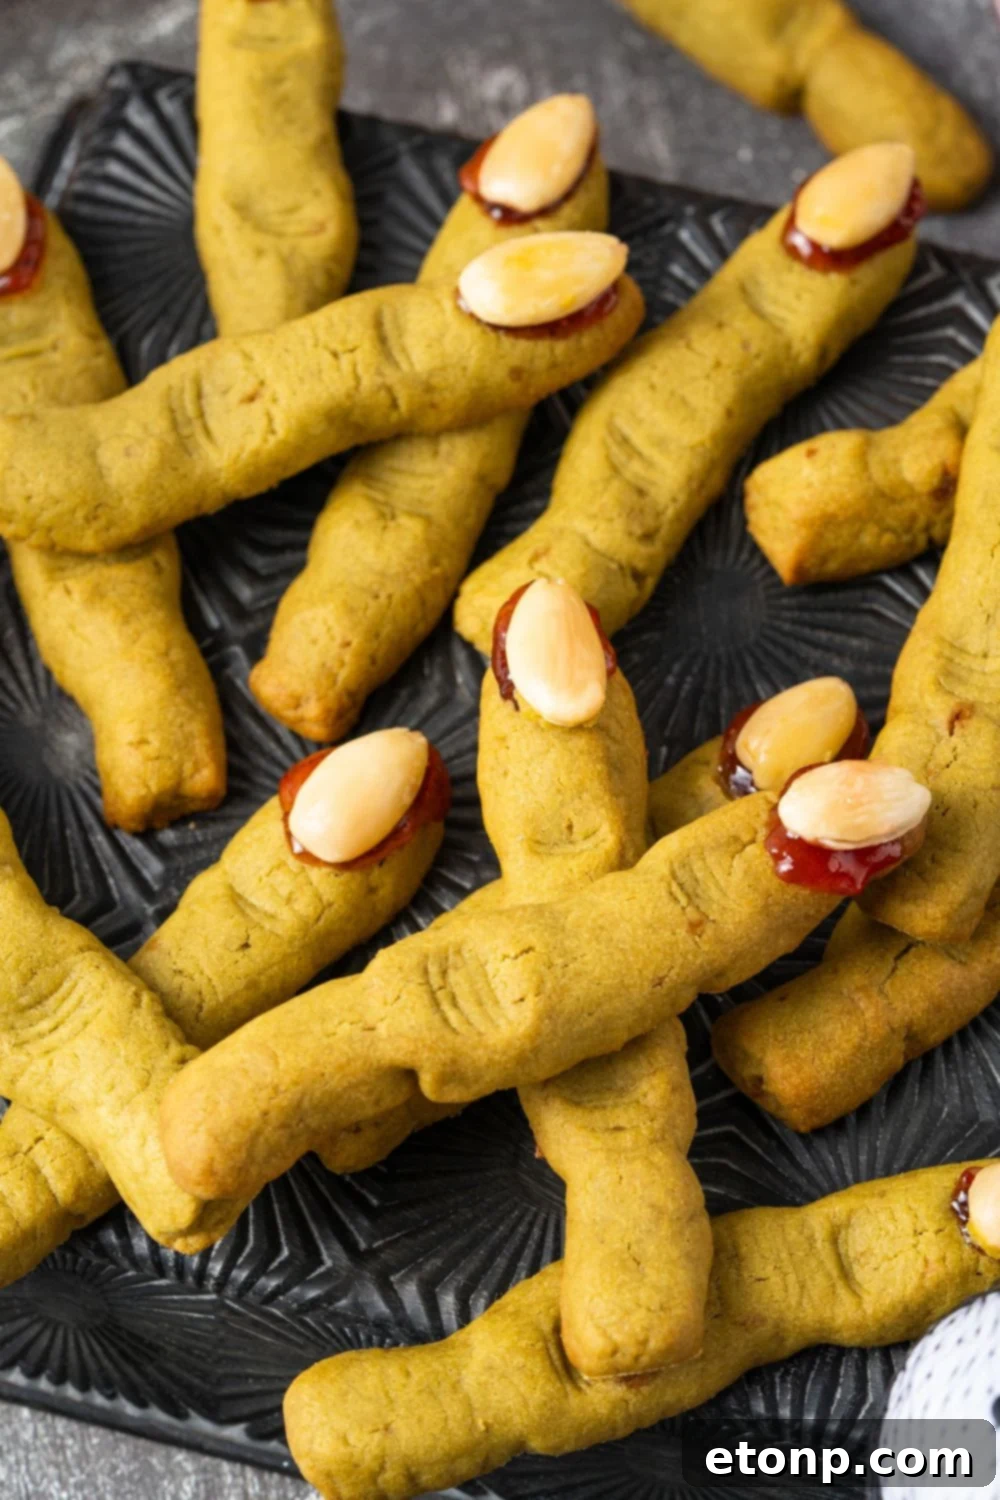
Let’s be honest, the initial impression of these Witch Finger Cookies is delightfully disturbing. With their gnarled knuckles, pale green hue, eerie almond “nails,” and that perfectly placed drizzle of “bloody” jam, they truly earn their spot on any Halloween party table. Some might even find them a little *too* realistic at first glance, inciting gasps and giggles in equal measure. But here’s the ultimate secret, the grand reveal: all that spooky artistry is merely a clever disguise for an utterly incredible taste experience.
One bite is all it takes for any apprehension to vanish, replaced by pure culinary delight. These cookies are a marvel of textures and flavors: wonderfully buttery, tender and soft in the center, yet with a satisfyingly crisp edge. The subtle, earthy nuttiness from the pistachio paste permeates every crumb, providing a unique flavor dimension that sets them apart from ordinary sugar cookies. And then there’s the vibrant, fruity tang of the jam, which cuts through the richness of the cookie, adding a burst of sweetness and freshness that completes the perfect bite.
They are the kind of treat that makes children squeal with delighted fright, causes adults to reach for a second (and often a third!) helping, and will undoubtedly be the subject of delighted chatter long after the Halloween decorations are packed away. So, while they embrace the spirit of looking gloriously gross for the spooky season, rest assured that their flavor is nothing short of winning. They are the ultimate Halloween surprise – a feast for both the eyes and the palate!
My Personal Kitchen Notes & Favorite Memories
Over my many years of baking, especially during the festive seasons, I’ve experimented with countless Halloween cookie recipes. But without fail, these Witch Finger Cookies hold a special, almost magical, place in our family’s October traditions. They are a constant in our rotation, not just because they’re simple to make, but because they bring so much joy and laughter into our kitchen.
The process of making them is a highlight for my kids. They absolutely love getting their hands in the dough, carefully molding each “finger,” and deciding where the “knuckles” should go. Each cookie becomes a miniature sculpture, uniquely gnarled and wonderfully imperfect. My husband, James, always has the same running joke: he claims they look “too real to eat.” Yet, despite his feigned horror, that never stops him from sneakily grabbing two or three (sometimes more!) straight from the cooling rack. It’s a testament to their deliciousness that even their creepy appearance can’t deter him.
Honestly, these cookies perfectly strike that balance that makes Halloween so much fun: they are just gross enough to truly freak out the kids, eliciting screams and giggles, but so incredibly delicious that adults keep coming back for more, long after the initial novelty of their appearance wears off. They are a staple that truly embodies the spirit of spooky season, creating not just treats, but cherished family memories year after year. They’ve sparked countless conversations, debates over which “finger” is the creepiest, and joyful moments of shared baking. This recipe is more than just ingredients and instructions; it’s a slice of our family’s Halloween heart.
My Final Thoughts: The Ultimate Halloween Treat
More than just a seasonal snack, Witch Finger Cookies are destined to become a beloved Halloween tradition in your home. They represent everything wonderful about the spooky season: fun, creativity, and a touch of delightful fright, all wrapped up in an incredibly delicious package. From the interactive joy of shaping each gnarled finger to the satisfying crunch and sweet, nutty flavor of every bite, these cookies offer an experience unlike any other.
They are guaranteed to be the first treats to vanish from any Halloween spread, leaving behind only crumbs and satisfied smiles long before the trick-or-treaters even knock on your door. So this Halloween, cast aside your culinary inhibitions and embrace the wonderfully weird. These are truly the only fingers you’ll actually *want* to eat! Get ready to impress, delight, and perhaps even slightly disgust your guests with these unforgettable spooky creations.
Explore More Spooky Delights: Other Halloween Recipes You’ll Love!
- Eerie Halloween Pudding Cups
- Mystical Witches Brew Cocktail
- Bewitching Halloween Candy Apples
- The Spellbinding Hocus Pocus Margarita
Witch Finger Cookies
Ingredients
- 1 stick unsalted butter softened
- ¾ cup brown sugar
- 1 large egg
- ½ teaspoon salt
- ½ teaspoon vanilla extract
- ¼ cup pistachio jam or paste
- 3-4 drops green food coloring
- 2 ½ cup all purpose flour
- Strawberry jam (or raspberry, blueberry, blackberry)
- Almond
Instructions
Make the Dough
-
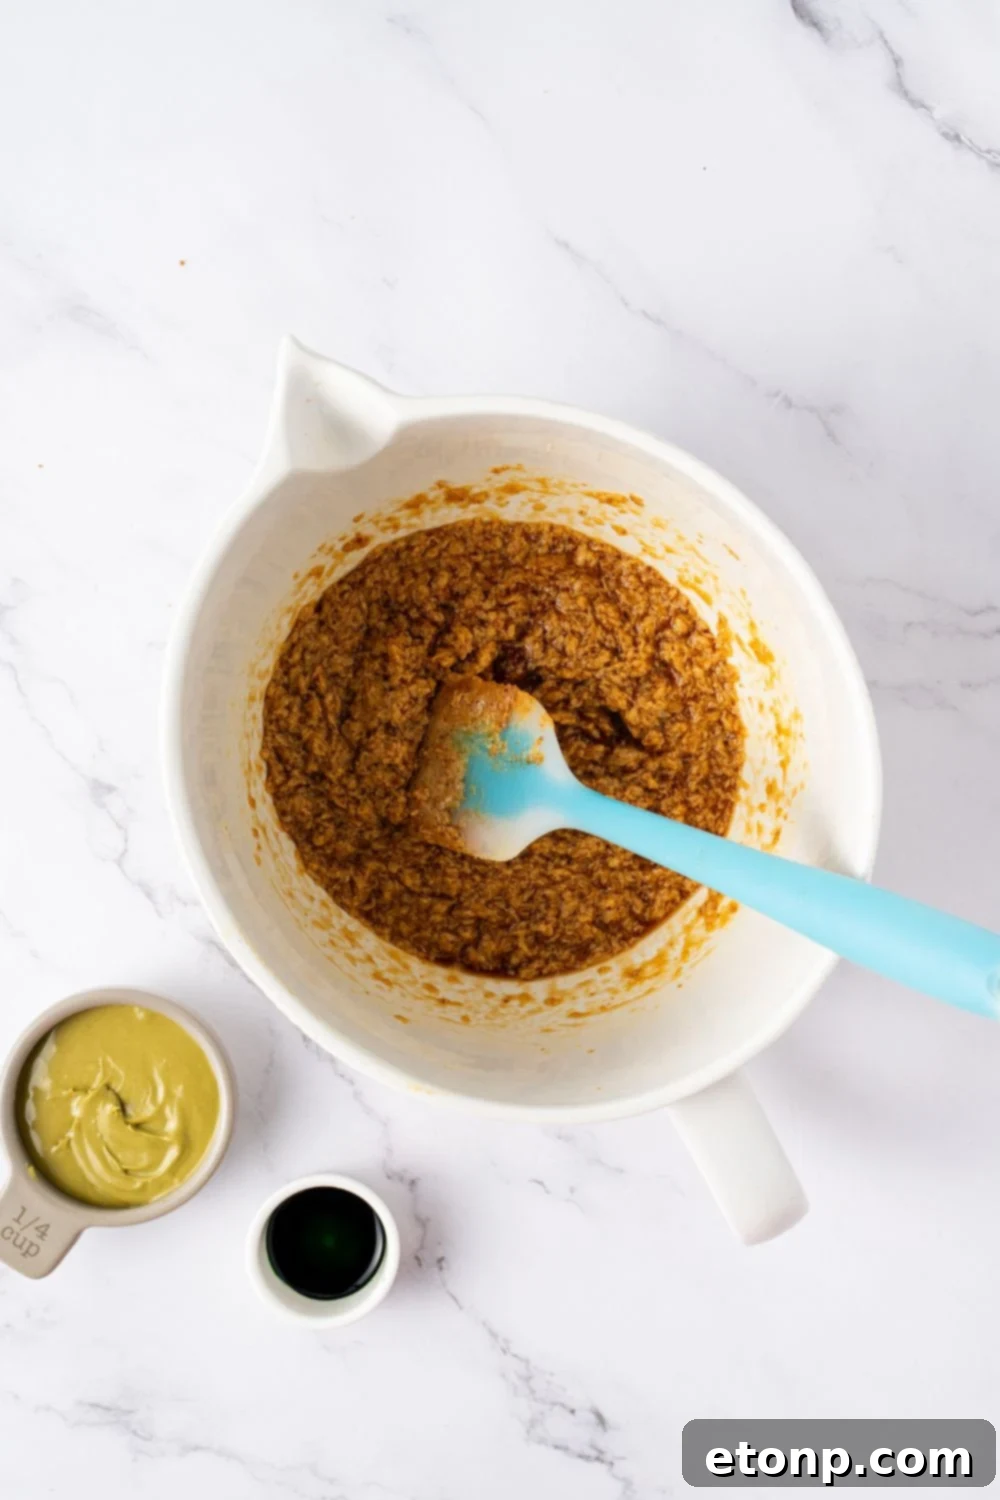
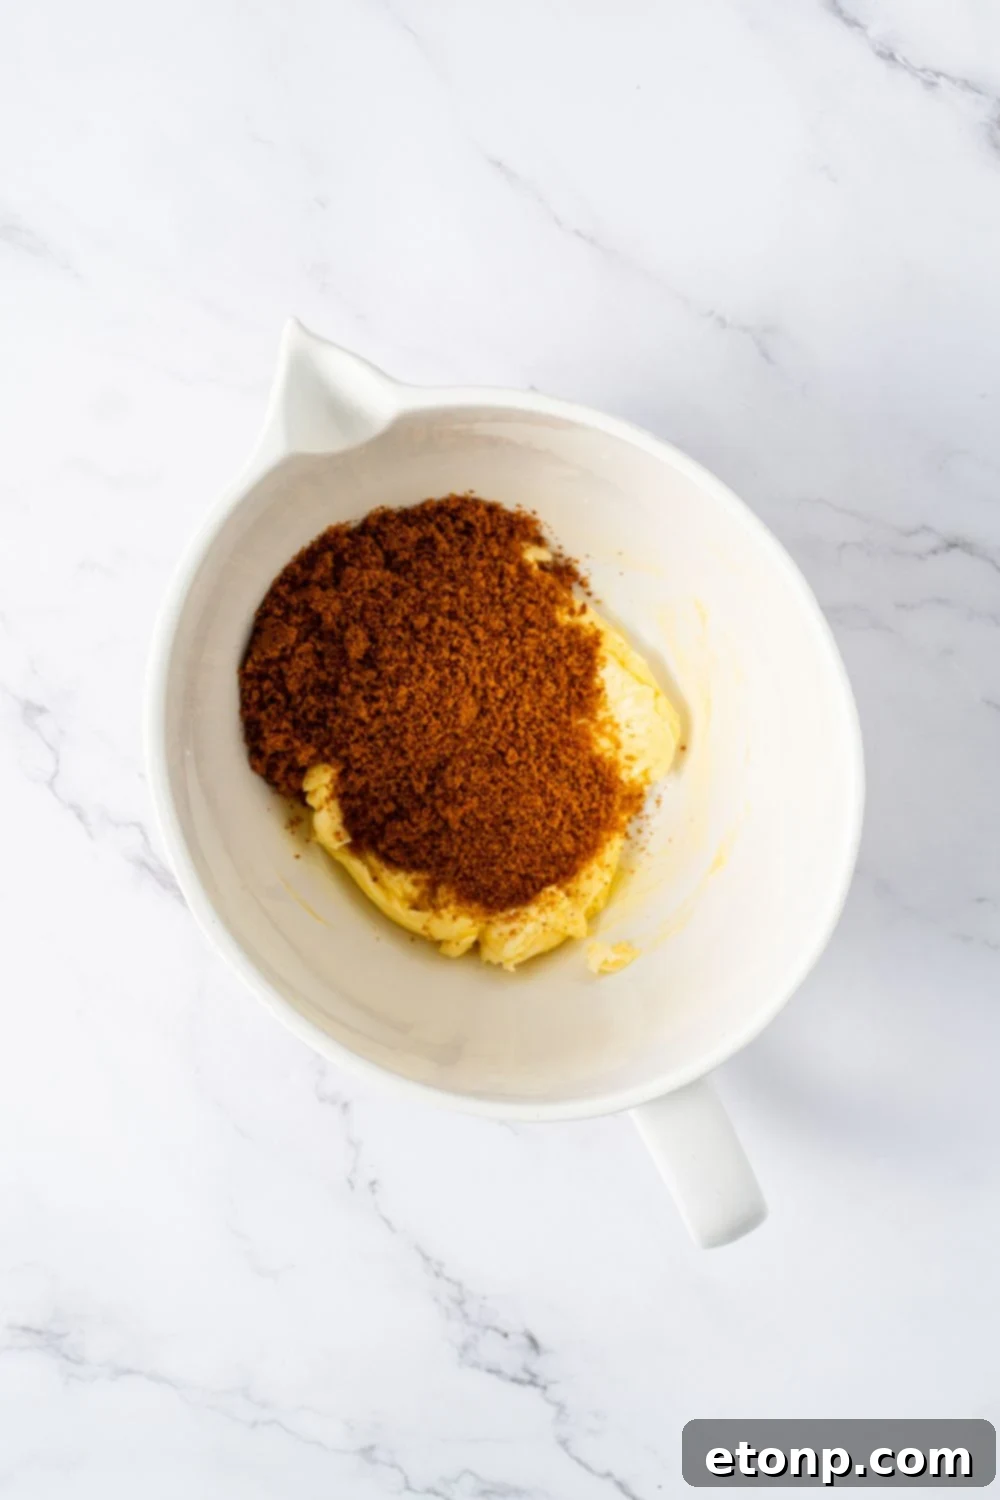
In a large mixing bowl, cream together the softened unsalted butter and brown sugar using a spatula or an electric mixer until the mixture is light, smooth, and fluffy. This process incorporates air, contributing to the cookies’ tender texture.
-
Next, add the large egg, salt, and vanilla extract to the creamed mixture. Continue to mix until all these wet ingredients are thoroughly combined and incorporated into a cohesive dough.
-
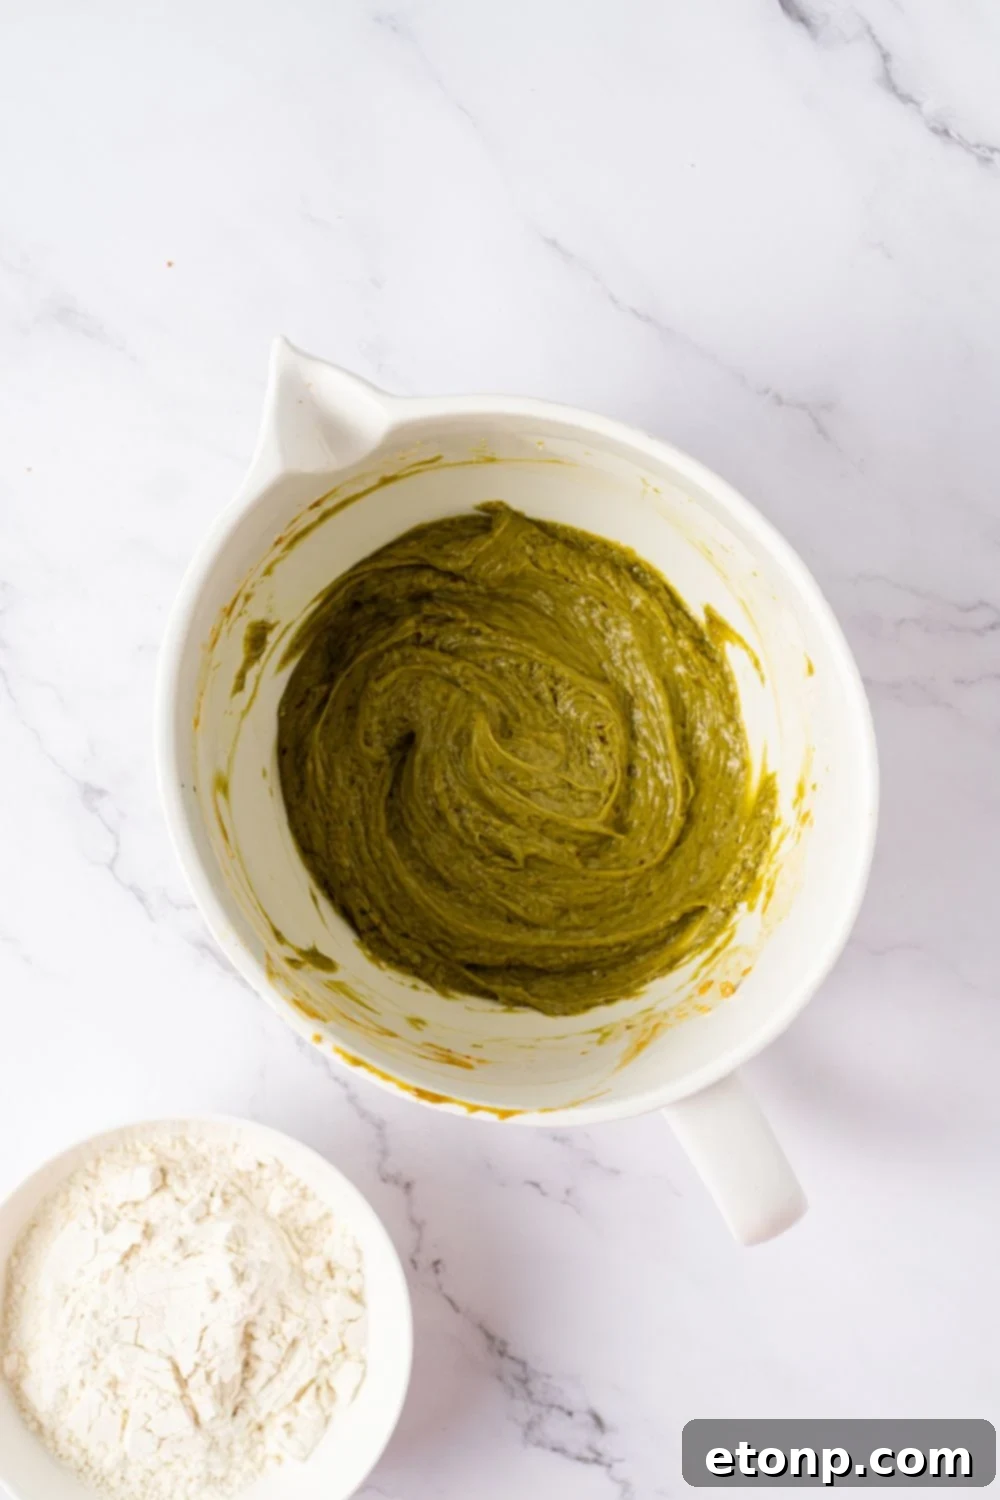
Stir in the pistachio paste or jam. This will infuse the dough with a delightful nutty flavor and begin to give it a subtle green hue. If using, now is also the time to add the green food coloring to achieve your desired level of spooky green vibrancy.
-
Sift in the all-purpose flour gradually. Using a spatula, gently fold the flour into the wet ingredients until just combined. Be careful not to overmix, as this can lead to tough cookies. Mix only until no streaks of dry flour remain.
-
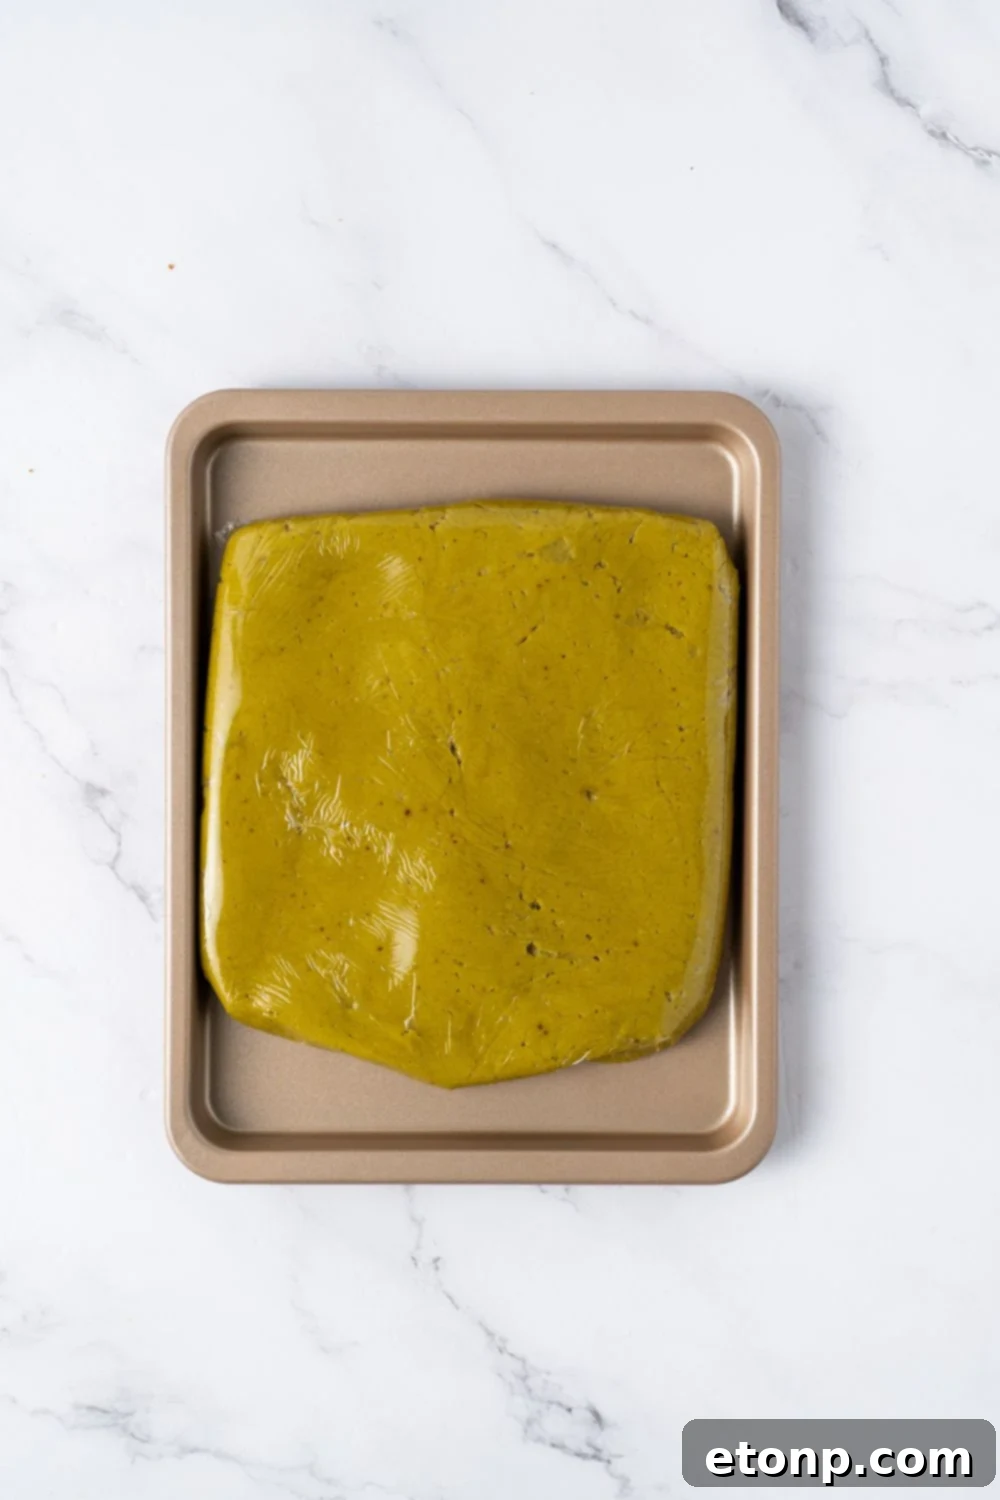
Gather the dough into a ball, flatten it slightly into a disc, wrap it tightly in plastic wrap, and refrigerate for at least 20 minutes. This chilling step is essential to firm up the dough, making it easier to handle and preventing it from spreading too much during baking.
Prep the Almond “Nails”
-
While the cookie dough is chilling, prepare your blanched almonds for the “fingernails.” If your almonds are not already blanched and peeled, you’ll need to do this step.
-
To blanch almonds: Place raw almonds in a microwave-safe bowl with enough water to cover them. Microwave on high for 30–60 seconds, or until the water is hot but not boiling. Carefully drain the hot water, rinse the almonds under cold water, and then gently pinch or rub off their skins. The skins should slip off easily. Set the blanched, peeled almonds aside.
Shape the Spooky Fingers
-
Once the dough is firm from chilling, remove it from the refrigerator. Divide the dough into 30 equal portions. A kitchen scale can help ensure even sizing for consistent baking.
-
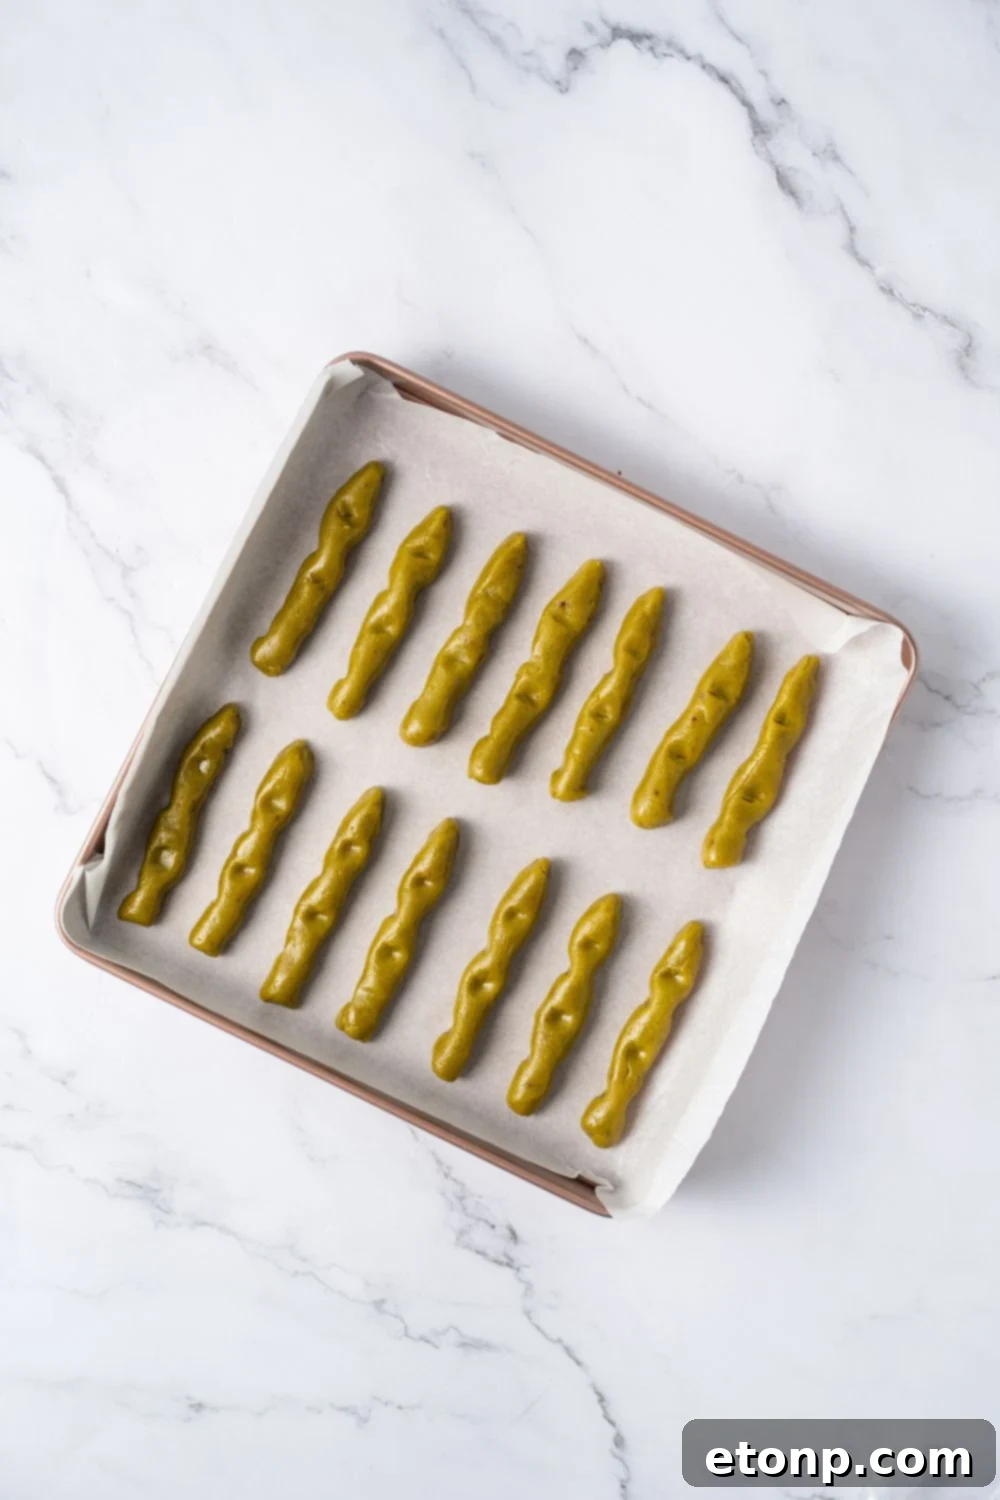
Roll each dough portion into a cylinder approximately 3 inches (7–8 cm) long. Aim for a thickness that resembles a human finger, roughly ½ to ¾ inch in diameter.
-
Place these rolled cylinders onto a baking tray lined with parchment paper, ensuring enough space between each cookie for slight expansion.
-
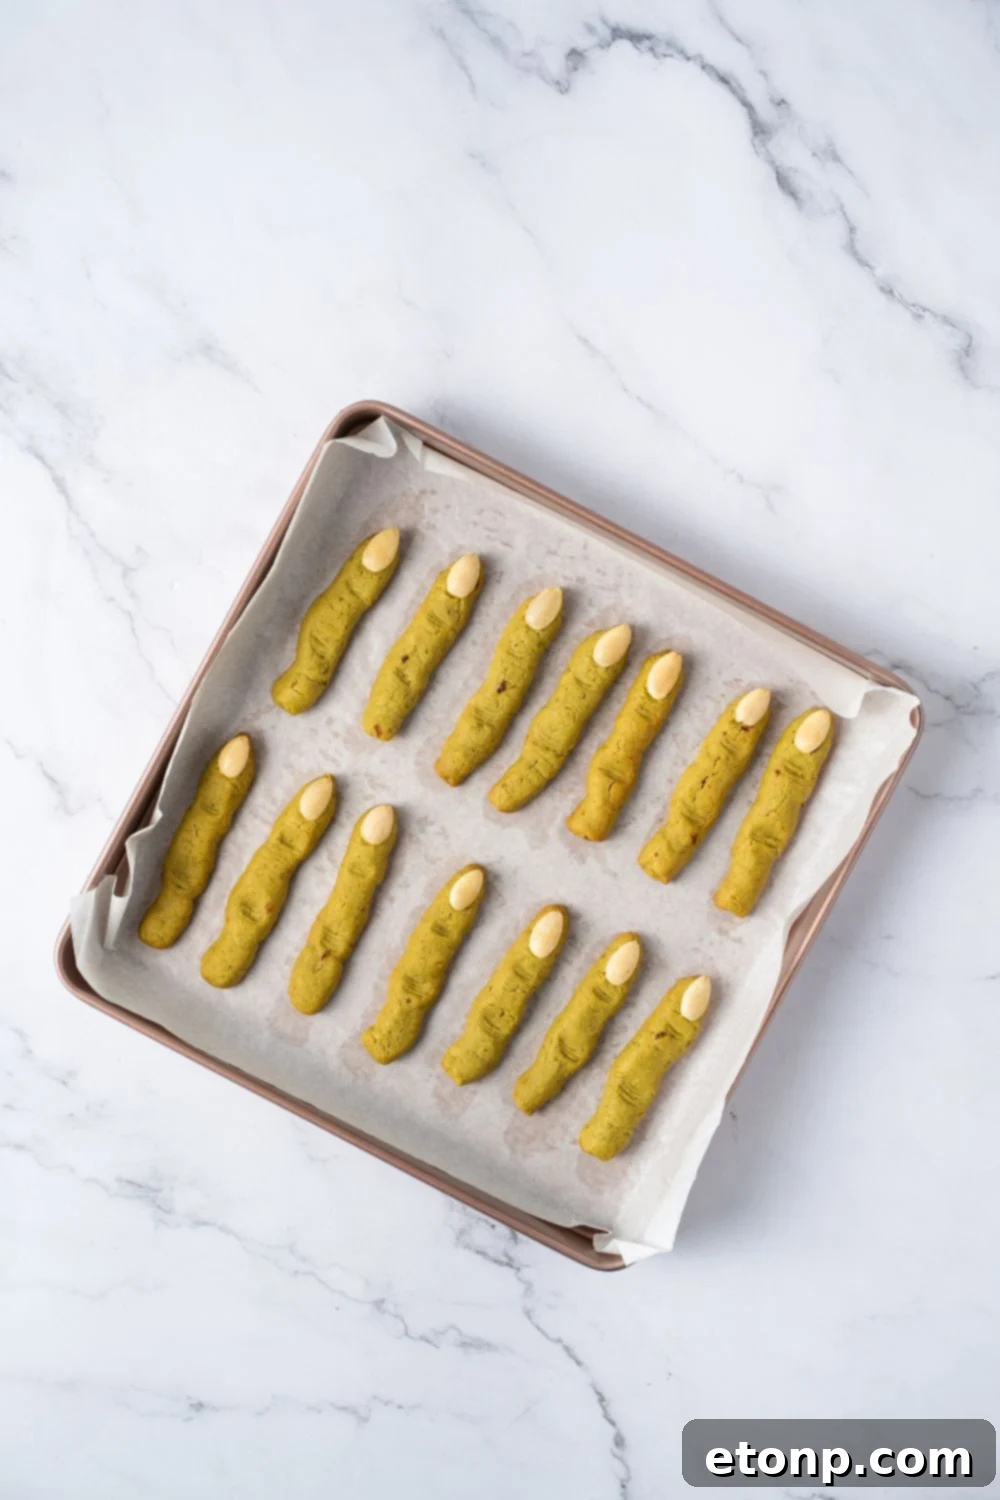
Now comes the fun part: shaping each into a realistic “finger.” Gently press and indent two areas along each cylinder to create “knuckles.” You can use your fingers to pinch the sides slightly, or the back of a butter knife to etch in subtle horizontal lines. Taper one end of the cookie slightly to resemble a fingertip, making it narrower than the base.
-
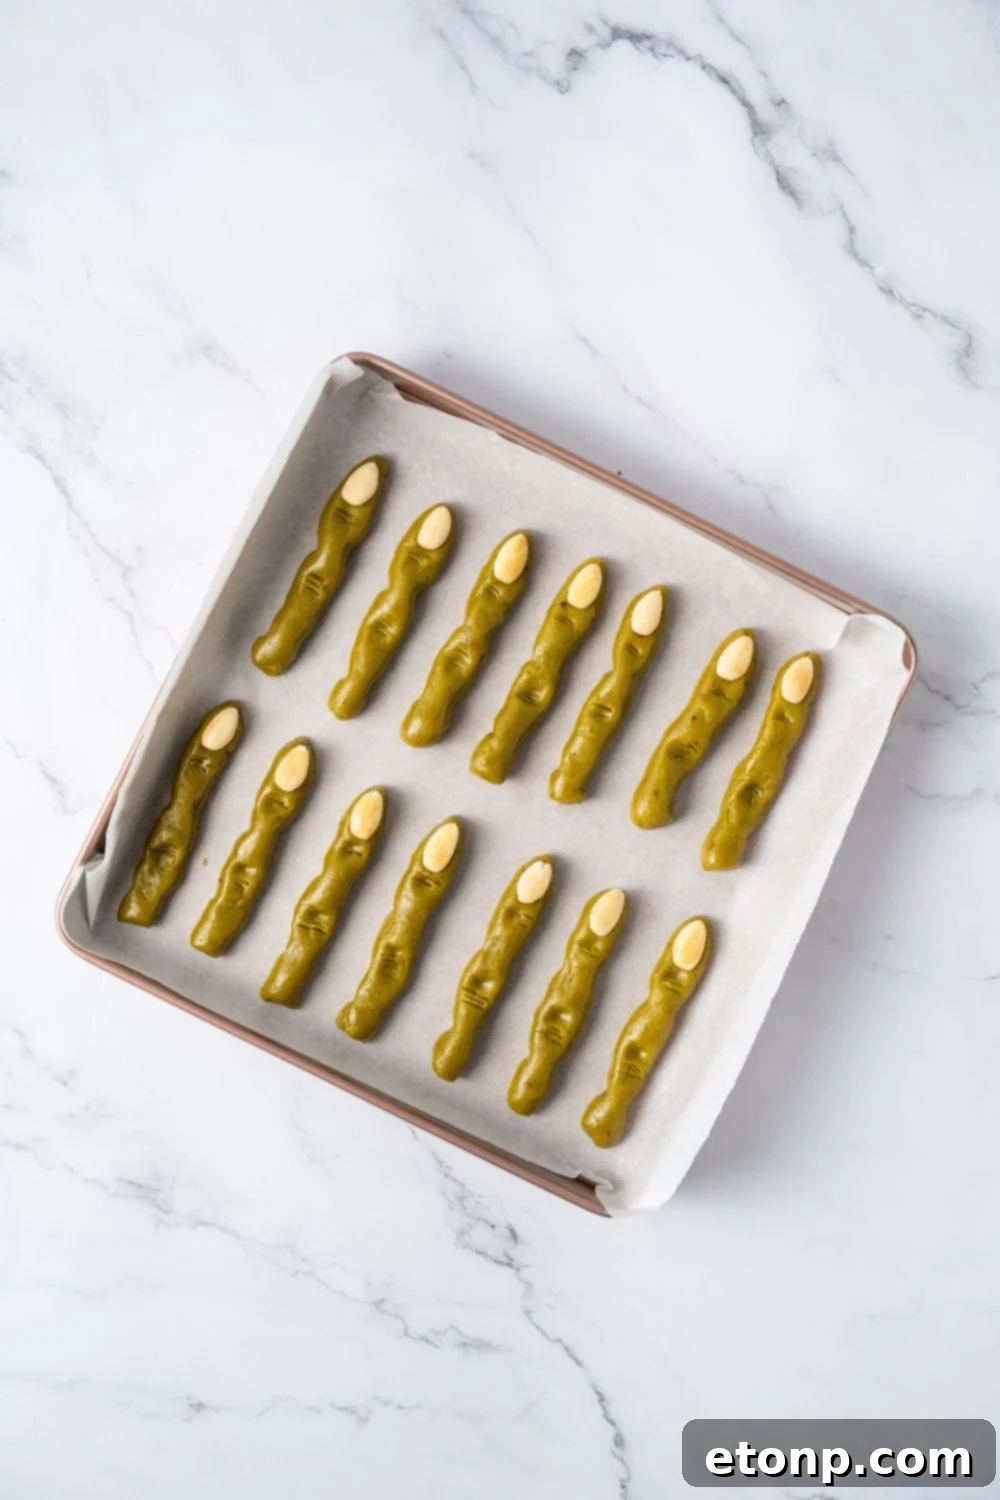
At the tapered fingertip end, firmly press a blanched almond into the dough to create the “nail.” Ensure it’s snugly fitted to prevent it from detaching during baking.
-
Once all fingers are shaped and “nailed,” return the entire baking tray of cookies to the fridge and chill for another 30 minutes. This crucial second chill prevents the cookies from spreading and ensures they hold their intricate, gnarled shapes.
Bake to Perfection
-
Preheat your oven to 375°F (190°C) while the shaped cookies are completing their final chill.
-
Bake the chilled cookies for 20–25 minutes. Keep an eye on them; they should be lightly golden brown around the edges but still appear slightly pale in the center. Avoid overbaking to maintain a tender crumb.
-
Once baked, remove the tray from the oven and let the cookies cool on the baking sheet for a few minutes before transferring them to a wire rack to cool completely.
-
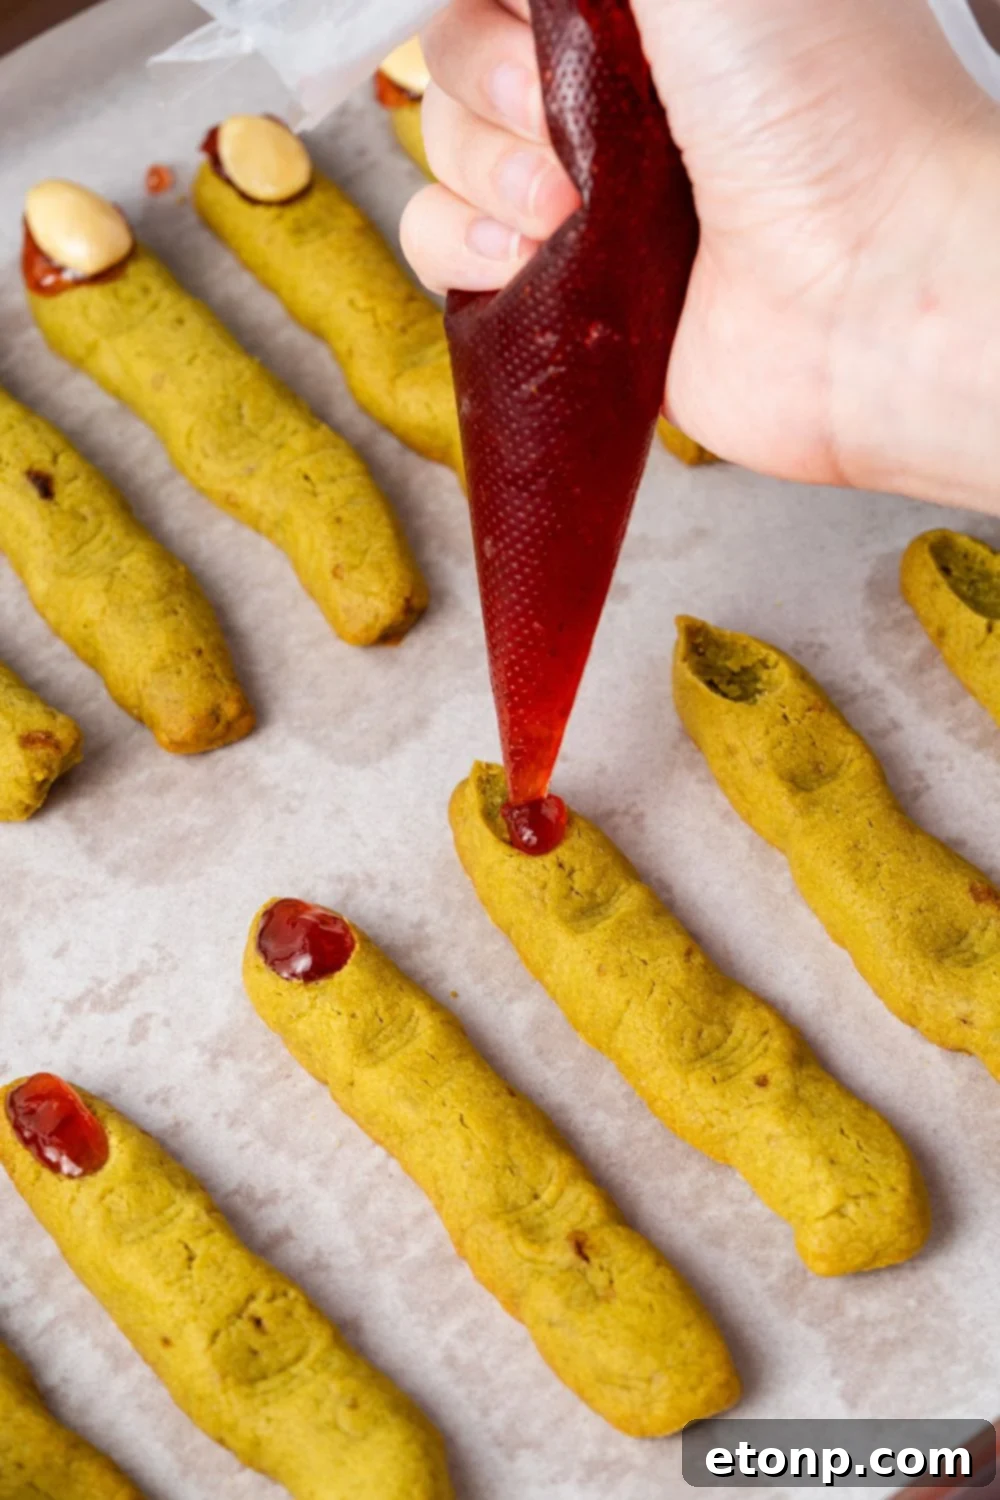
After the cookies have cooled slightly (but are still warm to the touch), gently lift or carefully remove the almond “nail” from each cookie. Using a small spoon, a toothpick, or a piping bag, dab or pipe a small amount of strawberry (or chosen) jam into the cavity created by the almond. Then, carefully press the almond back into place. The jam acts as a realistic “blood” detail and helps secure the nail.
Serve and Garnish for Spooky Delight:
-
For the best texture and maximum creepy effect, allow the Witch Finger Cookies to cool completely before serving. Arrange them artfully on a dark platter or serve individually to delight (and fright) your guests. Enjoy your deliciously ghoulish creations!
Did you make this recipe?
Make sure to follow on Pinterest for more recipes!
Pin Recipe
Share on Facebook