
Easy 3-Ingredient Customizable Fudge: The Ultimate Crowd-Pleasing Treat!
Welcome to the simplest, most versatile fudge recipe you’ll ever encounter! This delightful treat requires just three core ingredients and can be customized with any color you desire, making it absolutely perfect for any occasion or theme. Whether you’re planning a festive holiday gathering, a lively birthday party, a charming baby shower, or simply craving a sweet indulgence, this homemade fudge is your go-to solution. Its effortless preparation means less time in the kitchen and more time enjoying delicious moments with loved ones.

Unleash Your Creativity: A Rainbow of Fudge Possibilities
One of the most exciting aspects of this fudge recipe is its incredible adaptability. While many fudge recipes are fixed in their appearance, ours encourages boundless creativity. You can easily transform a simple batch of white chocolate fudge into a vibrant masterpiece by adding a few drops of food coloring. This allows you to tailor your dessert to match any event’s color scheme, making your treats not only delicious but also visually stunning.
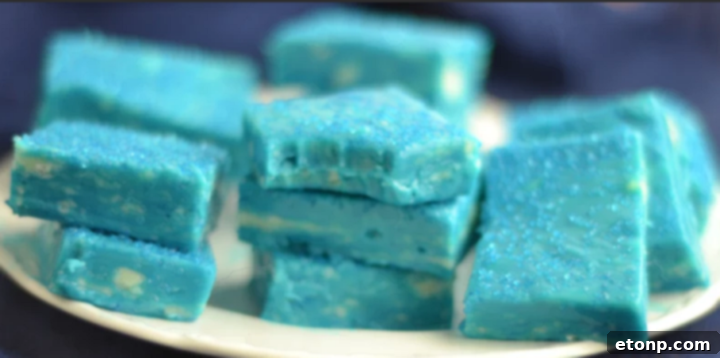
For instance, we were inspired by the popular “Frozen” craze and opted for a beautiful blue shade. Imagine delightful blue fudge squares, reminiscent of an icy wonderland, bringing smiles to children’s faces at a themed party. The shimmering sprinkles add an extra touch of magic, perfectly capturing the spirit of winter enchantment. This simple trick elevates the fudge from a mere dessert to an integral part of your celebration’s decor.
Perfect for Every Celebration: Baby Showers, Holidays, and Beyond!
Beyond popular movie themes, this customizable fudge shines at various celebrations. Its ability to be colored makes it an ideal treat for personalized events. Planning a baby shower? A batch of pastel blue fudge would be an adorable and thematic delight for a boy, while delicate pink fudge would be absolutely perfect for a girl. You could even create a charming mix of both colors for a gender-neutral celebration or if the gender is a delightful surprise! The soft hues of the fudge add a tender touch to the joyous occasion.
Consider the endless holiday possibilities with this versatile recipe:
- Christmas: Create festive red and green layers, or infuse a batch with mint extract and sprinkle with crushed candy canes for a refreshing twist.
- Halloween: Dare to make spooky orange fudge with black sprinkles, or a mysterious purple that adds to the eerie fun.
- Valentine’s Day: Express your love with romantic pinks and reds, perhaps shaped into hearts or topped with edible glitter.
- Easter: Delight guests with soft pastels like sunny yellow, gentle lavender, and fresh light green, reminiscent of spring’s awakening.
- Fourth of July: Layer red, white, and blue fudge for a patriotic showstopper.
The potential for customization is truly limitless, making this recipe a year-round favorite for anyone who loves to add a personal and vibrant touch to their homemade treats.
A Fun Family Activity: Get the Kids Involved!
One of the most delightful aspects of this simple fudge recipe is how easily kids can participate in the making process. With minimal heat involvement and just a few straightforward steps, it’s a fantastic opportunity for young aspiring chefs to get hands-on experience in the kitchen. They can help measure ingredients, stir the mixture (always under careful adult supervision, especially around any heat source), and most excitingly, choose the food coloring and add decorative sprinkles! This interactive experience transforms dessert making into a memorable family activity, fostering creativity, developing fine motor skills, and instilling a love for cooking from an early age. Imagine their joy and immense pride as they share a colorful, delicious treat that they helped create from start to finish! It’s an edible craft that truly brings families together.
Easy 3-Ingredient Customizable Fudge Recipe
Get ready to make the easiest and most delicious fudge you’ve ever tasted! This recipe is foolproof, incredibly quick, and perfect for customizing to fit any theme or craving. Its creamy texture and sweet flavor will make it an instant hit!
Ingredients
- 1 bag (10-12 oz / approx. 280-340g) good quality white chocolate chips
- 1 can (14 oz / approx. 397g) sweetened condensed milk
- 4-5 drops food coloring of your choice (gel food coloring is recommended for vibrant results)
- Sprinkles (optional, for extra fun and decoration)
- Waxed paper or parchment paper for lining the pan
Instructions
- Prepare your pan: Line an 8×8 inch (20×20 cm) square baking pan with waxed paper or parchment paper. Ensure there’s an overhang on the sides; this will act as “handles” to easily lift the set fudge out of the pan later.
- Melt the white chocolate: Place the white chocolate chips in a heatproof bowl. You can melt them using one of two methods:
- Double Boiler: Place the bowl over a saucepan containing about an inch of simmering water, ensuring the bottom of the bowl does not touch the water. Stir occasionally until the chocolate is smooth and fully melted.
- Microwave: Heat the chocolate chips in the microwave in 30-second intervals, stirring well after each interval, until smooth and completely melted. Be careful not to overheat white chocolate, as it can seize and become lumpy.
- Remove from heat: Once the white chocolate is completely melted and smooth, immediately remove the bowl from the heat source.
- Combine with condensed milk: Pour the entire can of sweetened condensed milk into the melted white chocolate. Stir continuously and vigorously with a spatula or spoon until the mixture is thoroughly combined, smooth, and glossy. It should be quite thick.
- Add color: Now for the creative touch! Add 4-5 drops of your chosen food coloring to the fudge mixture. Stir well until the color is evenly distributed throughout. If you desire a more intense or deeper shade, add one drop at a time until you achieve your preferred hue.
- Incorporate sprinkles (optional): If you’re adding sprinkles into the fudge itself, gently fold them into the mixture at this stage. You can reserve some extra sprinkles to sprinkle on top for added visual appeal.
- Pour into prepared pan: Quickly pour the colored fudge mixture into your lined baking pan. Use a spatula to spread it evenly into the pan, ensuring a smooth top. If desired, sprinkle any reserved toppings on top before it starts to set.
- Chill to set: Refrigerate the fudge for at least 20-30 minutes, or until it is completely firm and set. The exact chilling time may vary slightly depending on your refrigerator’s temperature and the thickness of your fudge.
- Cut and serve: Once the fudge is firm, use the parchment paper overhang to gently lift it out of the pan and onto a cutting board. Remove the parchment paper, then cut the fudge into squares of your desired size using a sharp knife.
- ENJOY! Serve your beautiful, homemade, and perfectly customizable fudge.
Tips for Perfect Fudge Every Time
Even though this recipe is incredibly simple and forgiving, a few expert tips can help ensure your fudge turns out perfectly delicious and beautifully consistent every single time:
- Opt for Quality Ingredients: While it’s a 3-ingredient recipe, the quality of those few ingredients profoundly impacts the final taste and texture. Always use good quality white chocolate chips (not baking bars or candy melts, which have different compositions) for the best flavor and melting consistency.
- Melt Gently: White chocolate can be quite finicky and prone to seizing (becoming stiff and clumpy) if overheated. Whether using a double boiler or a microwave, melt it gently and slowly. Low heat and patience are key. Avoid direct high heat.
- Thoroughly Stir: Ensure the sweetened condensed milk is fully and smoothly incorporated into the melted chocolate. Continuous and vigorous stirring will create that characteristic smooth, creamy, and irresistible texture of good fudge. Any streaks of unmixed ingredients can affect the consistency.
- Use Gel Food Coloring: For vibrant, true-to-shade colors without adding excess liquid that could alter the fudge’s texture, gel food coloring is highly recommended over liquid food coloring. It’s more concentrated, so a little goes a long way.
- Don’t Over-mix After Coloring: Once the color is evenly distributed to your satisfaction, stop stirring. Over-mixing can incorporate too much air into the fudge, which might lead to a slightly grainy or less dense texture.
- Chill Time is Crucial: Do not rush the chilling process. Allowing the fudge to set completely in the refrigerator is essential to ensure it’s firm enough to cut cleanly, holds its shape, and has that perfect bite. If it’s still soft, it needs more time.
- Clean Cuts: For neat squares, use a sharp knife and wipe it clean between cuts. Running the knife under hot water and drying it can also help achieve cleaner slices.
Creative Variations and Serving Suggestions
This basic 3-ingredient fudge recipe is a fantastic canvas for countless flavor additions and serving ideas. Don’t be afraid to experiment and make it your own!
- Flavor Extracts: Elevate the taste by adding a teaspoon of flavor extract along with the food coloring. Vanilla extract is a classic, but peppermint extract (especially for holiday fudge), almond extract, or even a hint of citrus zest (like orange or lemon) can add an exciting new dimension.
- Crunchy Add-ins: For added texture and flavor, gently fold in a variety of crunchy ingredients after coloring. Consider chopped nuts (walnuts, pecans, almonds), mini marshmallows, crushed cookies (like Oreos or graham crackers), or even small candies such as M&M’s or toffee bits.
- Decadent Toppings: Before chilling, sprinkle the top of your fudge with more sprinkles, elegant chocolate shavings, a pinch of sea salt flakes (for a delightful sweet and salty contrast), or a drizzle of contrasting melted chocolate. Edible glitter can also add a touch of sparkle.
- Holiday Gifts: This fudge makes an excellent homemade gift. Cut the fudge into festive shapes using small cookie cutters (if it’s thick enough and well-chilled), then package them beautifully in decorative boxes, cellophane bags, or mason jars tied with a ribbon.
- Dessert Platter Extravaganza: Arrange a variety of colored fudge squares on a dessert platter alongside cookies, fresh fruit, and other sweet treats for an eye-catching and appealing display at any gathering.
- Coffee & Tea Companion: Serve small squares of fudge alongside a cup of coffee or tea for a delightful afternoon treat or after-dinner indulgence.
Storage Tips
To keep your delicious, homemade fudge fresh and enjoyable for as long as possible, proper storage is key.
- Room Temperature: Once made and cut, this fudge can be stored at room temperature in an airtight container for up to a week. Place a piece of parchment paper between layers of fudge to prevent them from sticking together.
- Refrigeration: For a slightly firmer texture and extended freshness, store the fudge in an airtight container in the refrigerator for up to two weeks. If storing in the refrigerator, allow it to come to room temperature for about 10-15 minutes before serving. This will ensure the best, melt-in-your-mouth texture.
- Freezing: This fudge freezes beautifully! To freeze, wrap individual squares or small blocks tightly in plastic wrap, then wrap again in aluminum foil. Place the wrapped fudge in a freezer-safe bag or an airtight container. It can be frozen for up to 3 months. When ready to enjoy, thaw the fudge overnight in the refrigerator, then let it sit at room temperature for a few minutes before serving.
Conclusion: Your New Favorite Fudge Recipe!
This 3-ingredient customizable fudge recipe truly stands out for its remarkable simplicity, incredible versatility, and undeniable deliciousness. It’s a sweet, creamy, and visually appealing treat that effortlessly caters to every occasion and every taste preference. Whether you’re a seasoned baker looking for a quick fix or just starting your culinary journey, this foolproof recipe guarantees success, transforming you into a fudge-making superstar. So gather your ingredients, unleash your imagination, pick your favorite color, and get ready to create some magic in your kitchen. We’re confident this will quickly become your go-to recipe for quick, delightful, and perfectly personalized fudge that will impress everyone. Enjoy every colorful, melt-in-your-mouth bite!
Did you make this delightful recipe?
We’d absolutely love to see your vibrant and creative fudge creations! Share your photos and tag us on your favorite social media platforms.
For even more incredible recipes, sweet inspiration, and daily dose of culinary delight, make sure to follow us on Pinterest!