
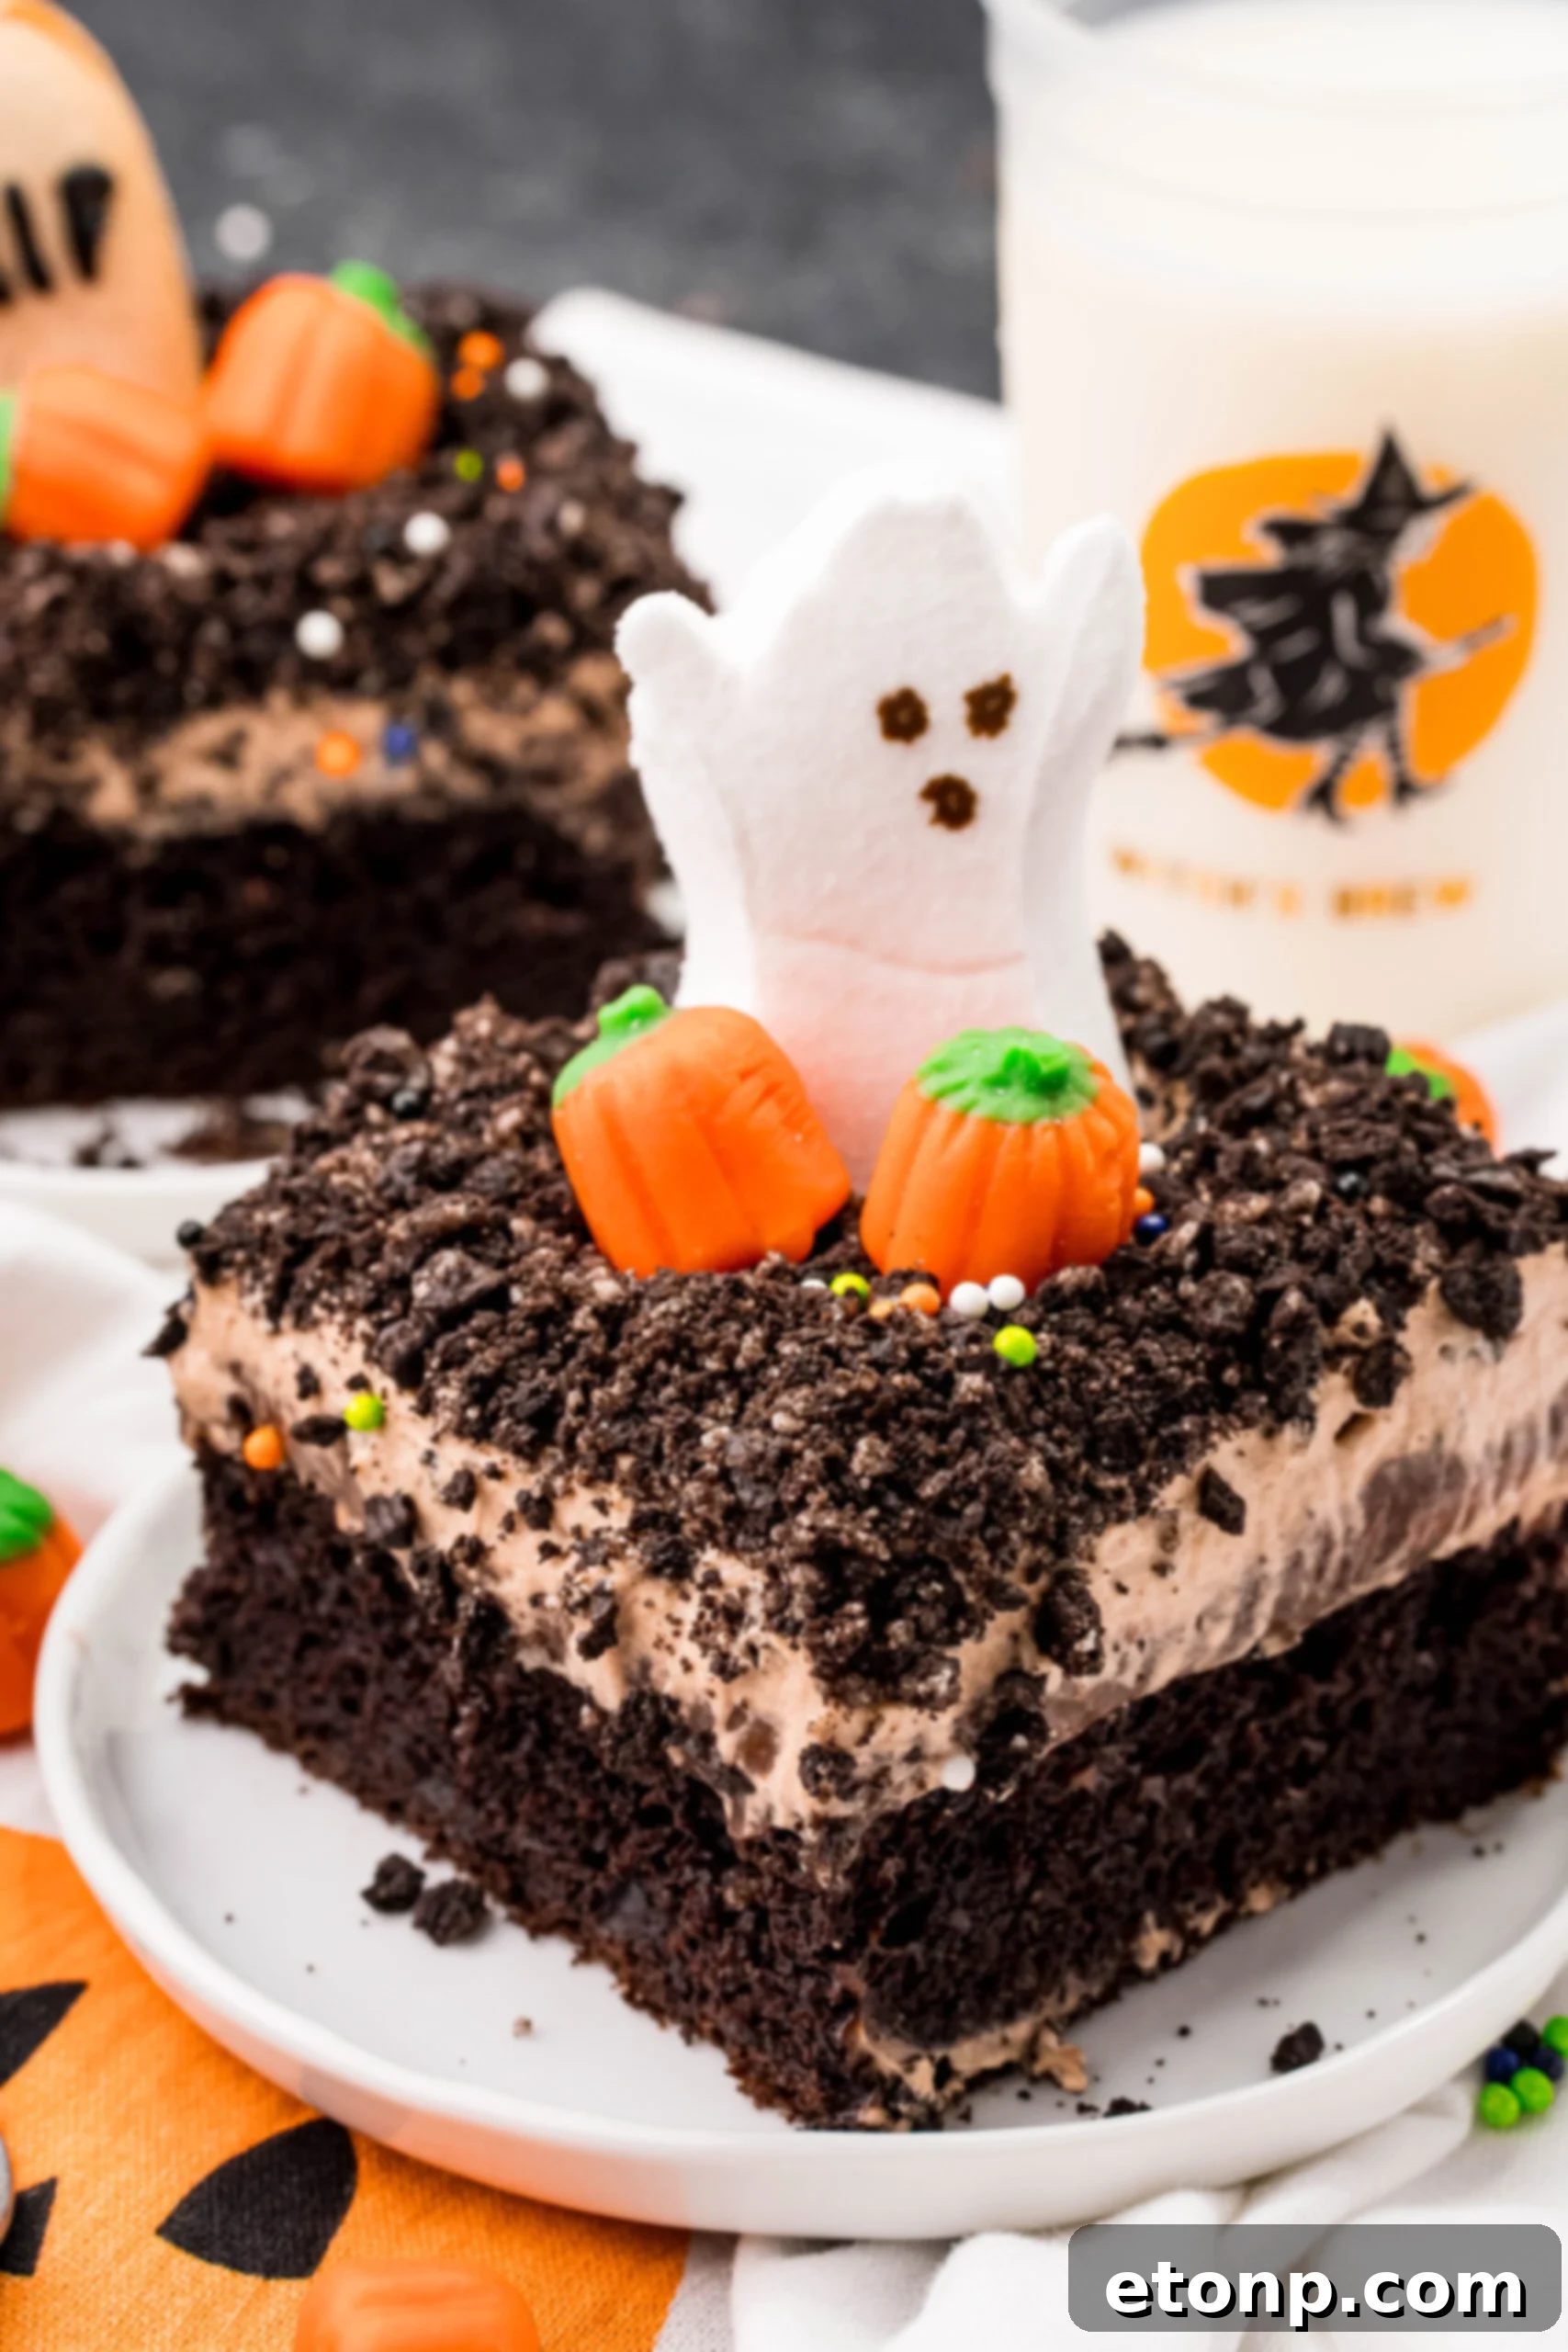
Spooktacular Halloween Dirt Cake: The Ultimate Graveyard Dessert
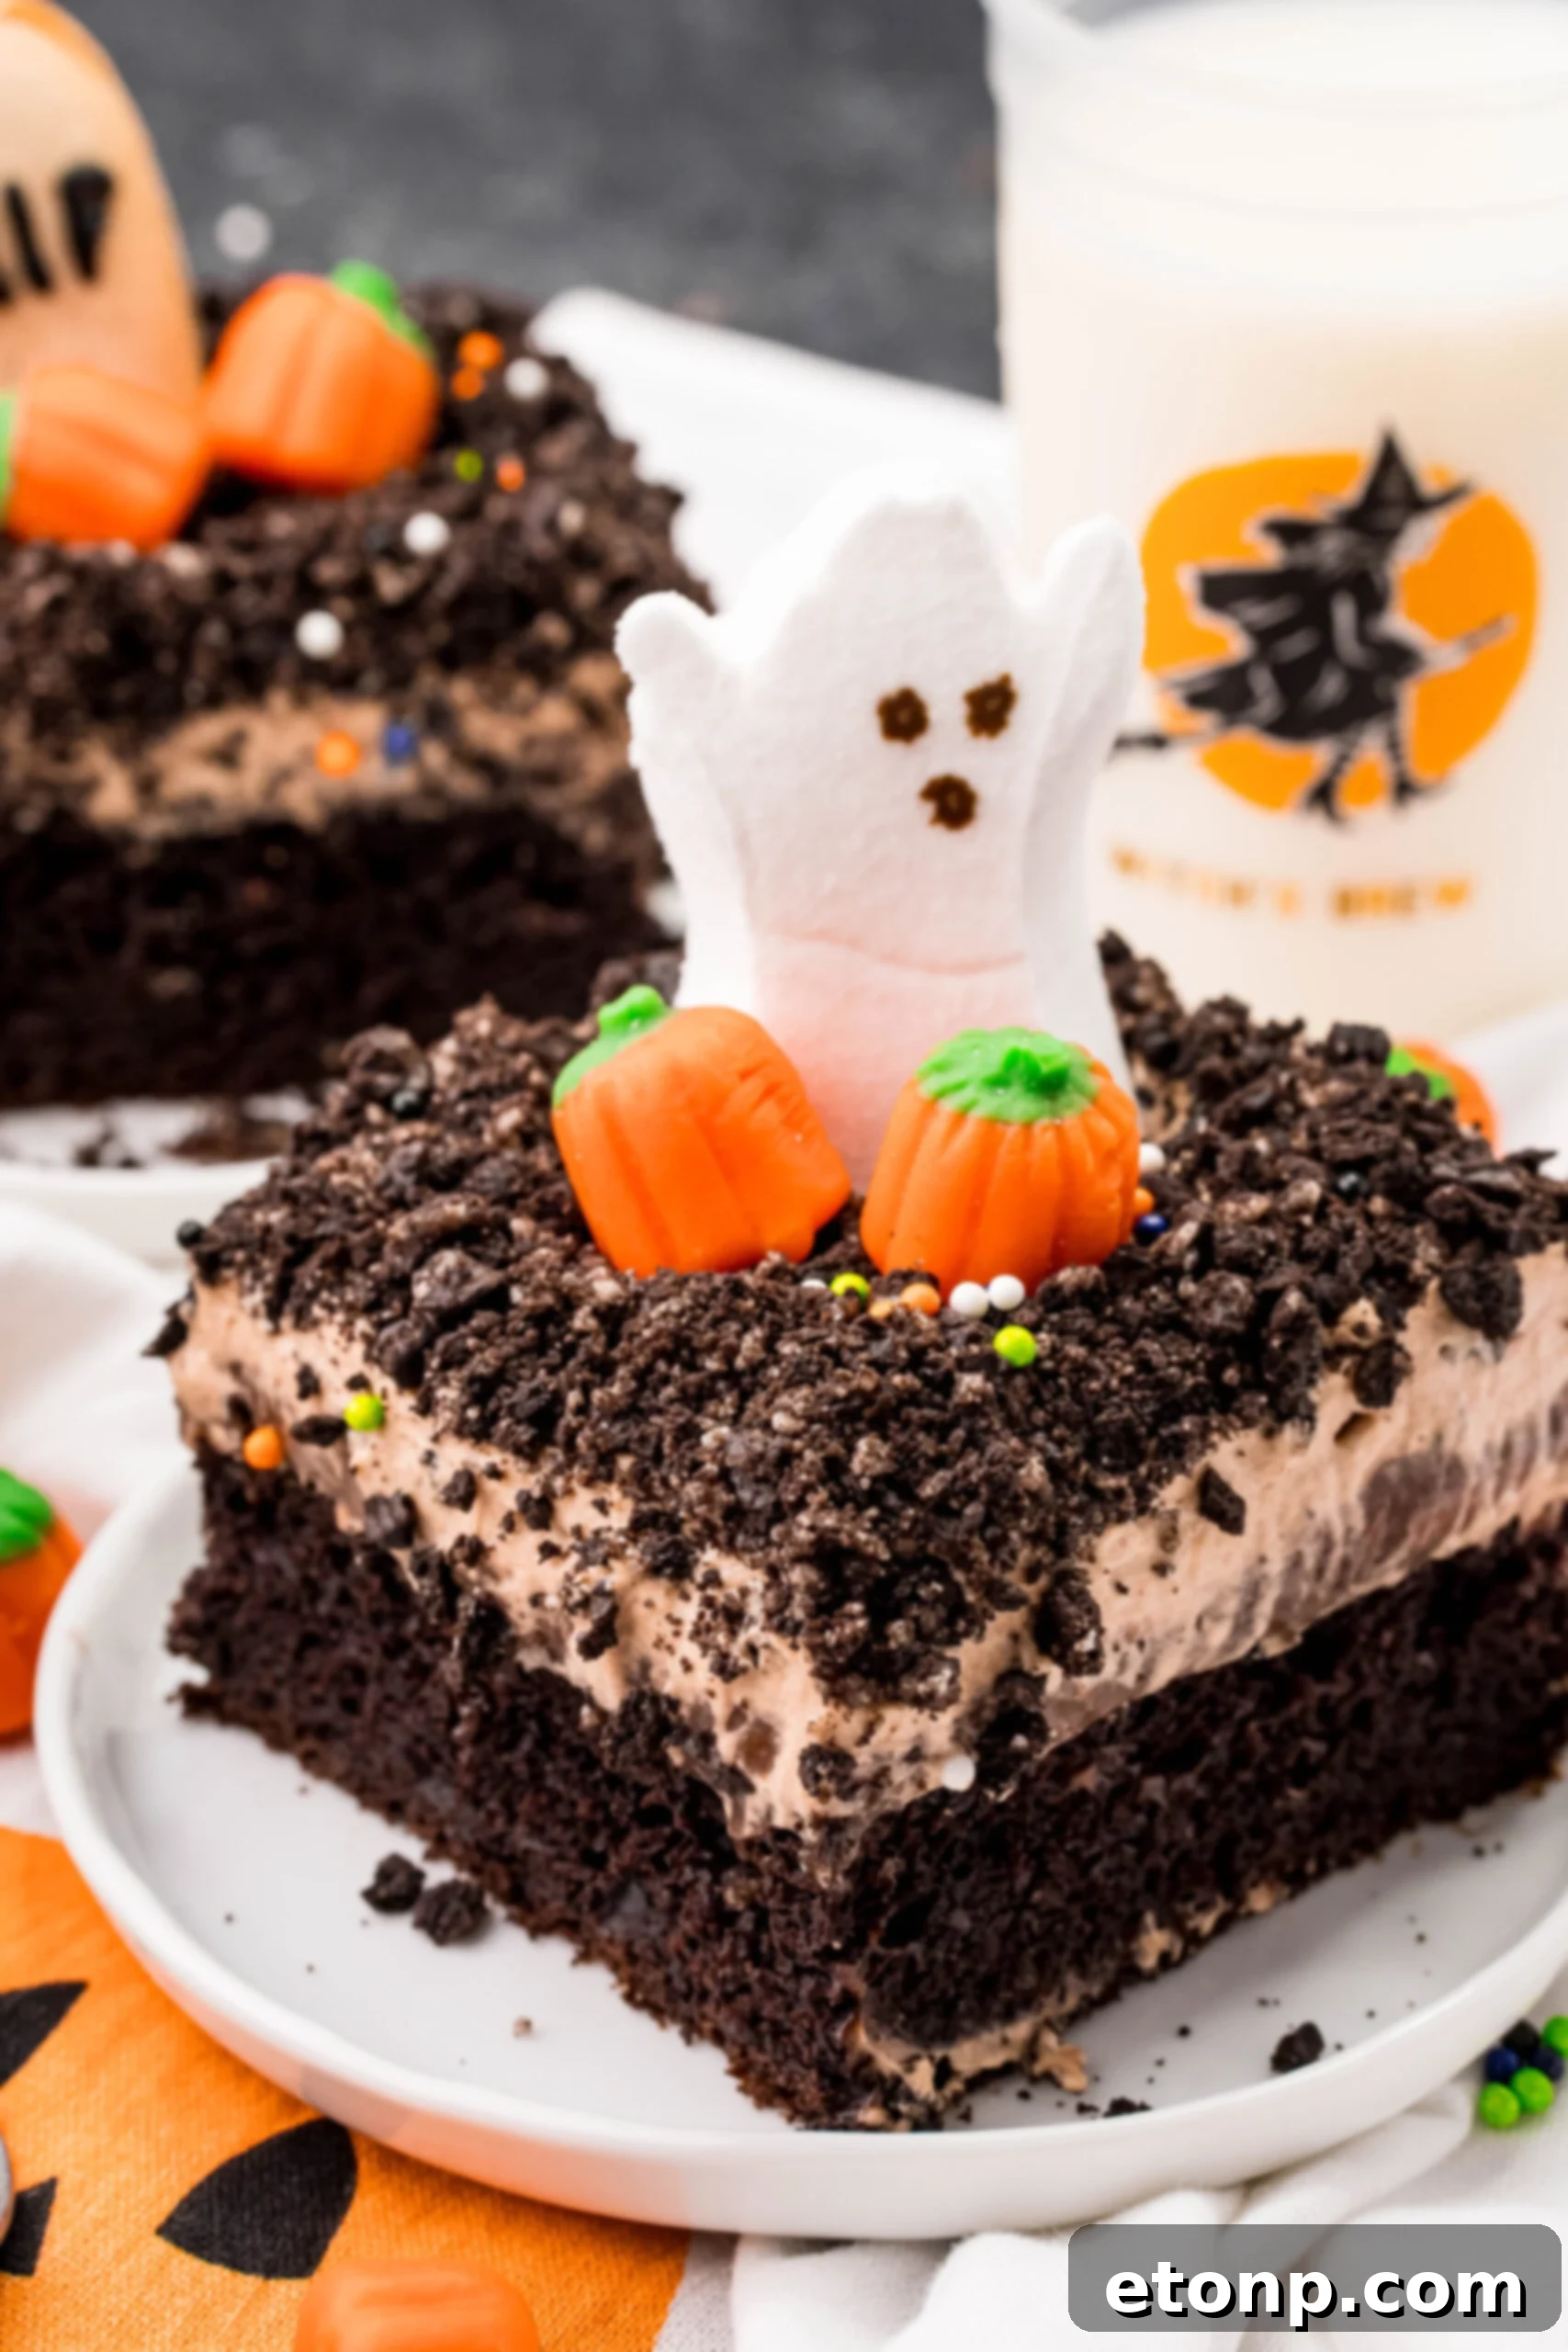
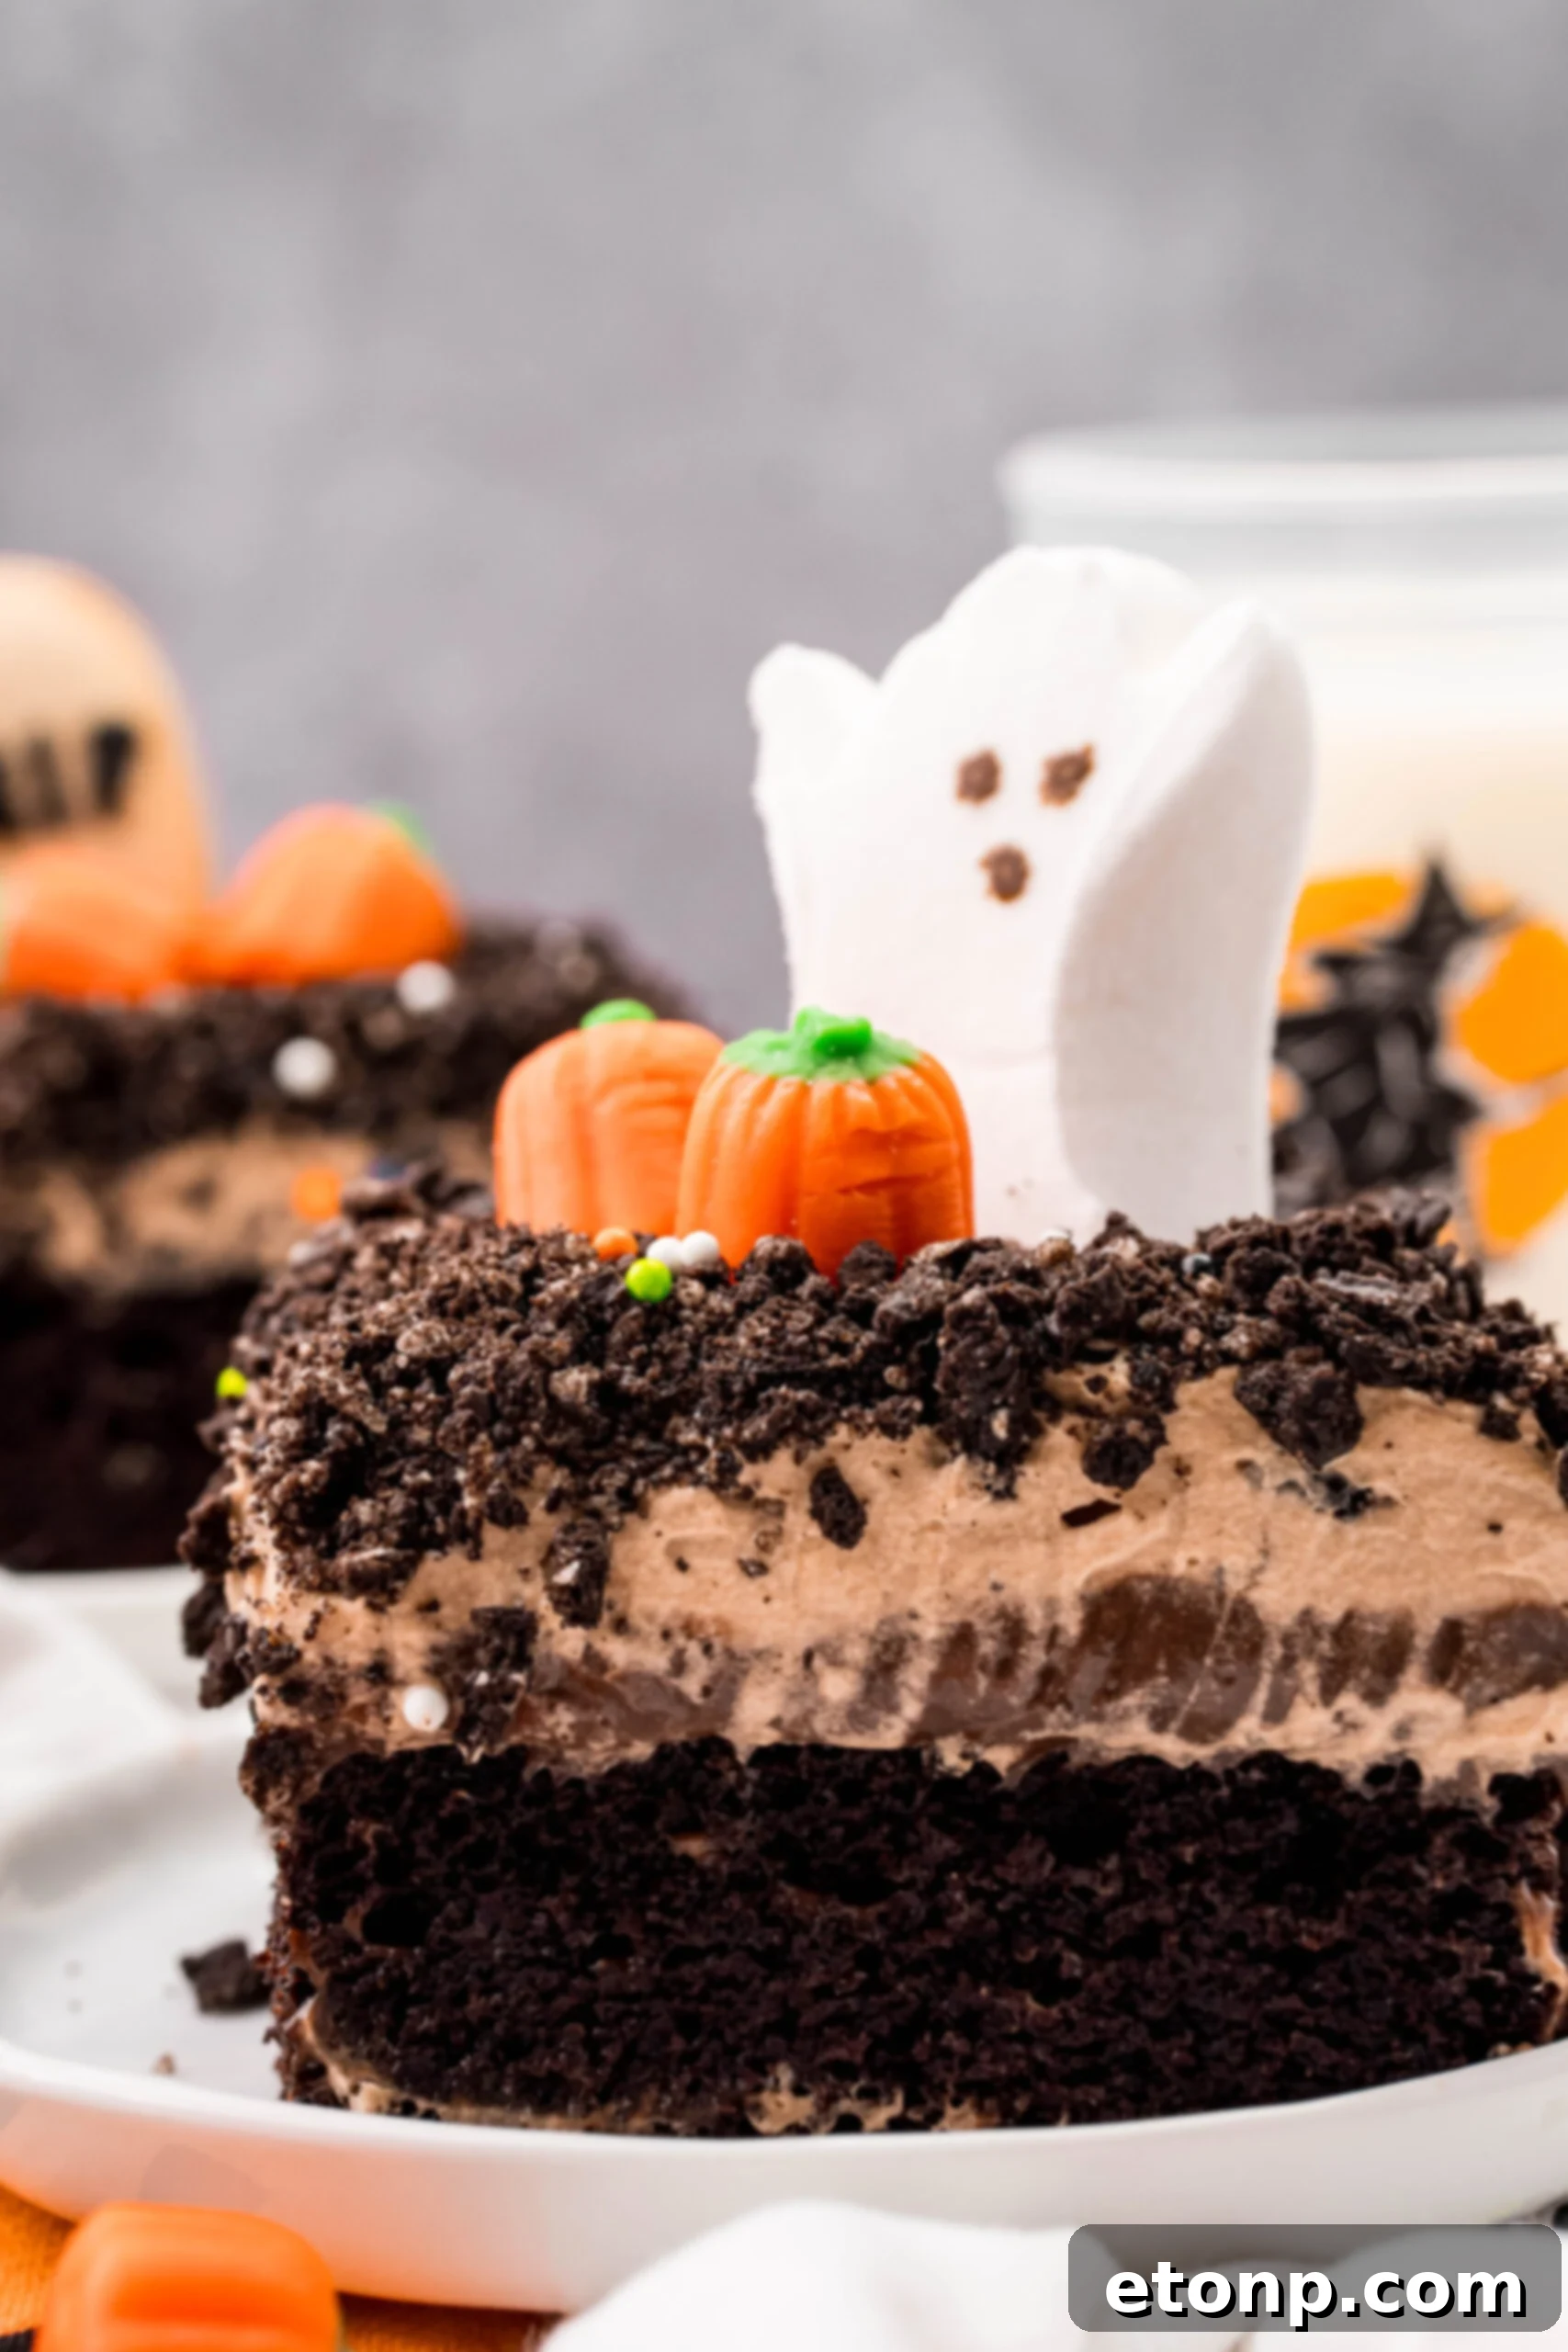
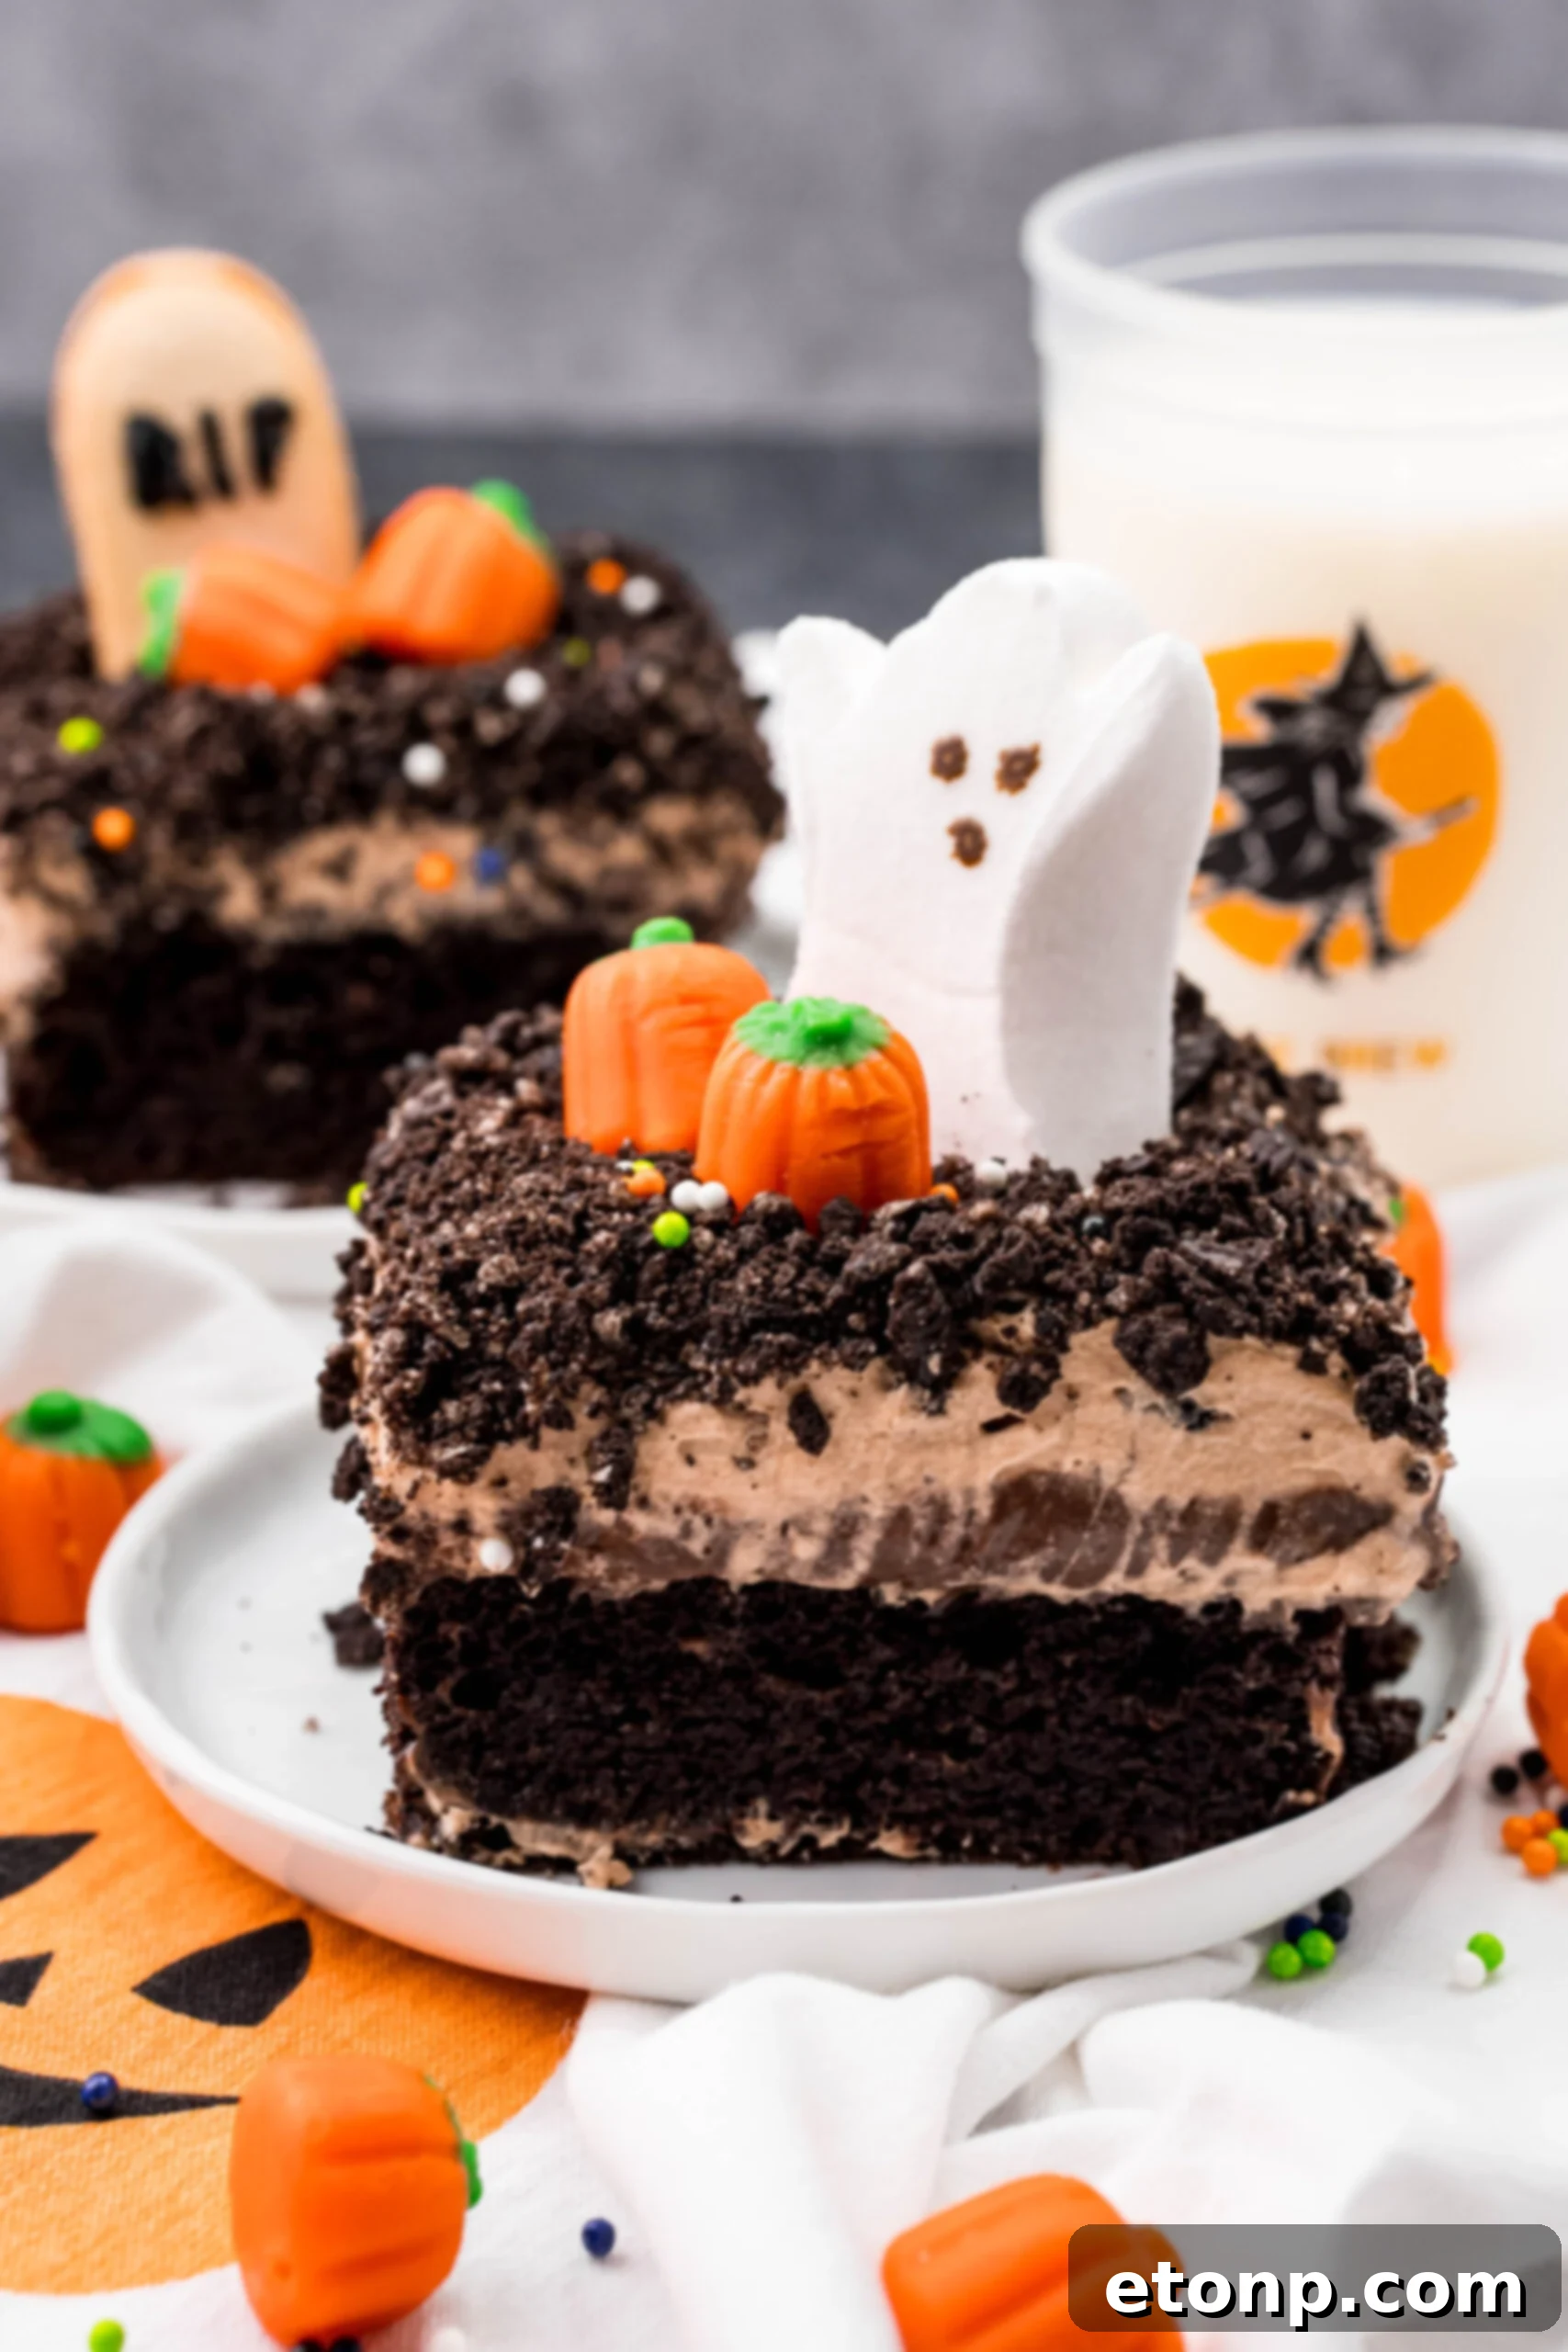
Get ready to elevate your Halloween celebrations with a dessert that’s as delicious as it is delightfully eerie: the Halloween Dirt Cake! This incredible treat transforms a classic favorite into a festive masterpiece, perfect for any spooky gathering. Imagine rich, dark chocolate cake layers, creamy pudding filling, and a generous “dirt” topping made from crushed Oreo cookies, all adorned with playful ghost Peeps and vibrant candy pumpkins. It’s a sensational fall dessert that promises to be a showstopper, leaving everyone raving and asking for more!
Whether you’re hosting a ghoulish gala or simply looking for a fun activity with the kids, this Graveyard Dirt Cake is surprisingly easy to assemble and always a monstrous hit. Its captivating appearance and irresistible flavor make it a perfect centerpiece for your Halloween table, bringing smiles and a touch of spooky charm to both children and adults alike.
What Makes This Halloween Dirt Cake So Special?
While many are familiar with traditional dirt pudding, this recipe takes the concept to an exciting new level by incorporating a moist chocolate cake base. This adds a depth of flavor and a satisfying texture that elevates it beyond a simple no-bake dessert. The combination of rich chocolate cake, smooth pudding, and crunchy cookie “dirt” creates a symphony of textures and tastes that’s truly unforgettable.
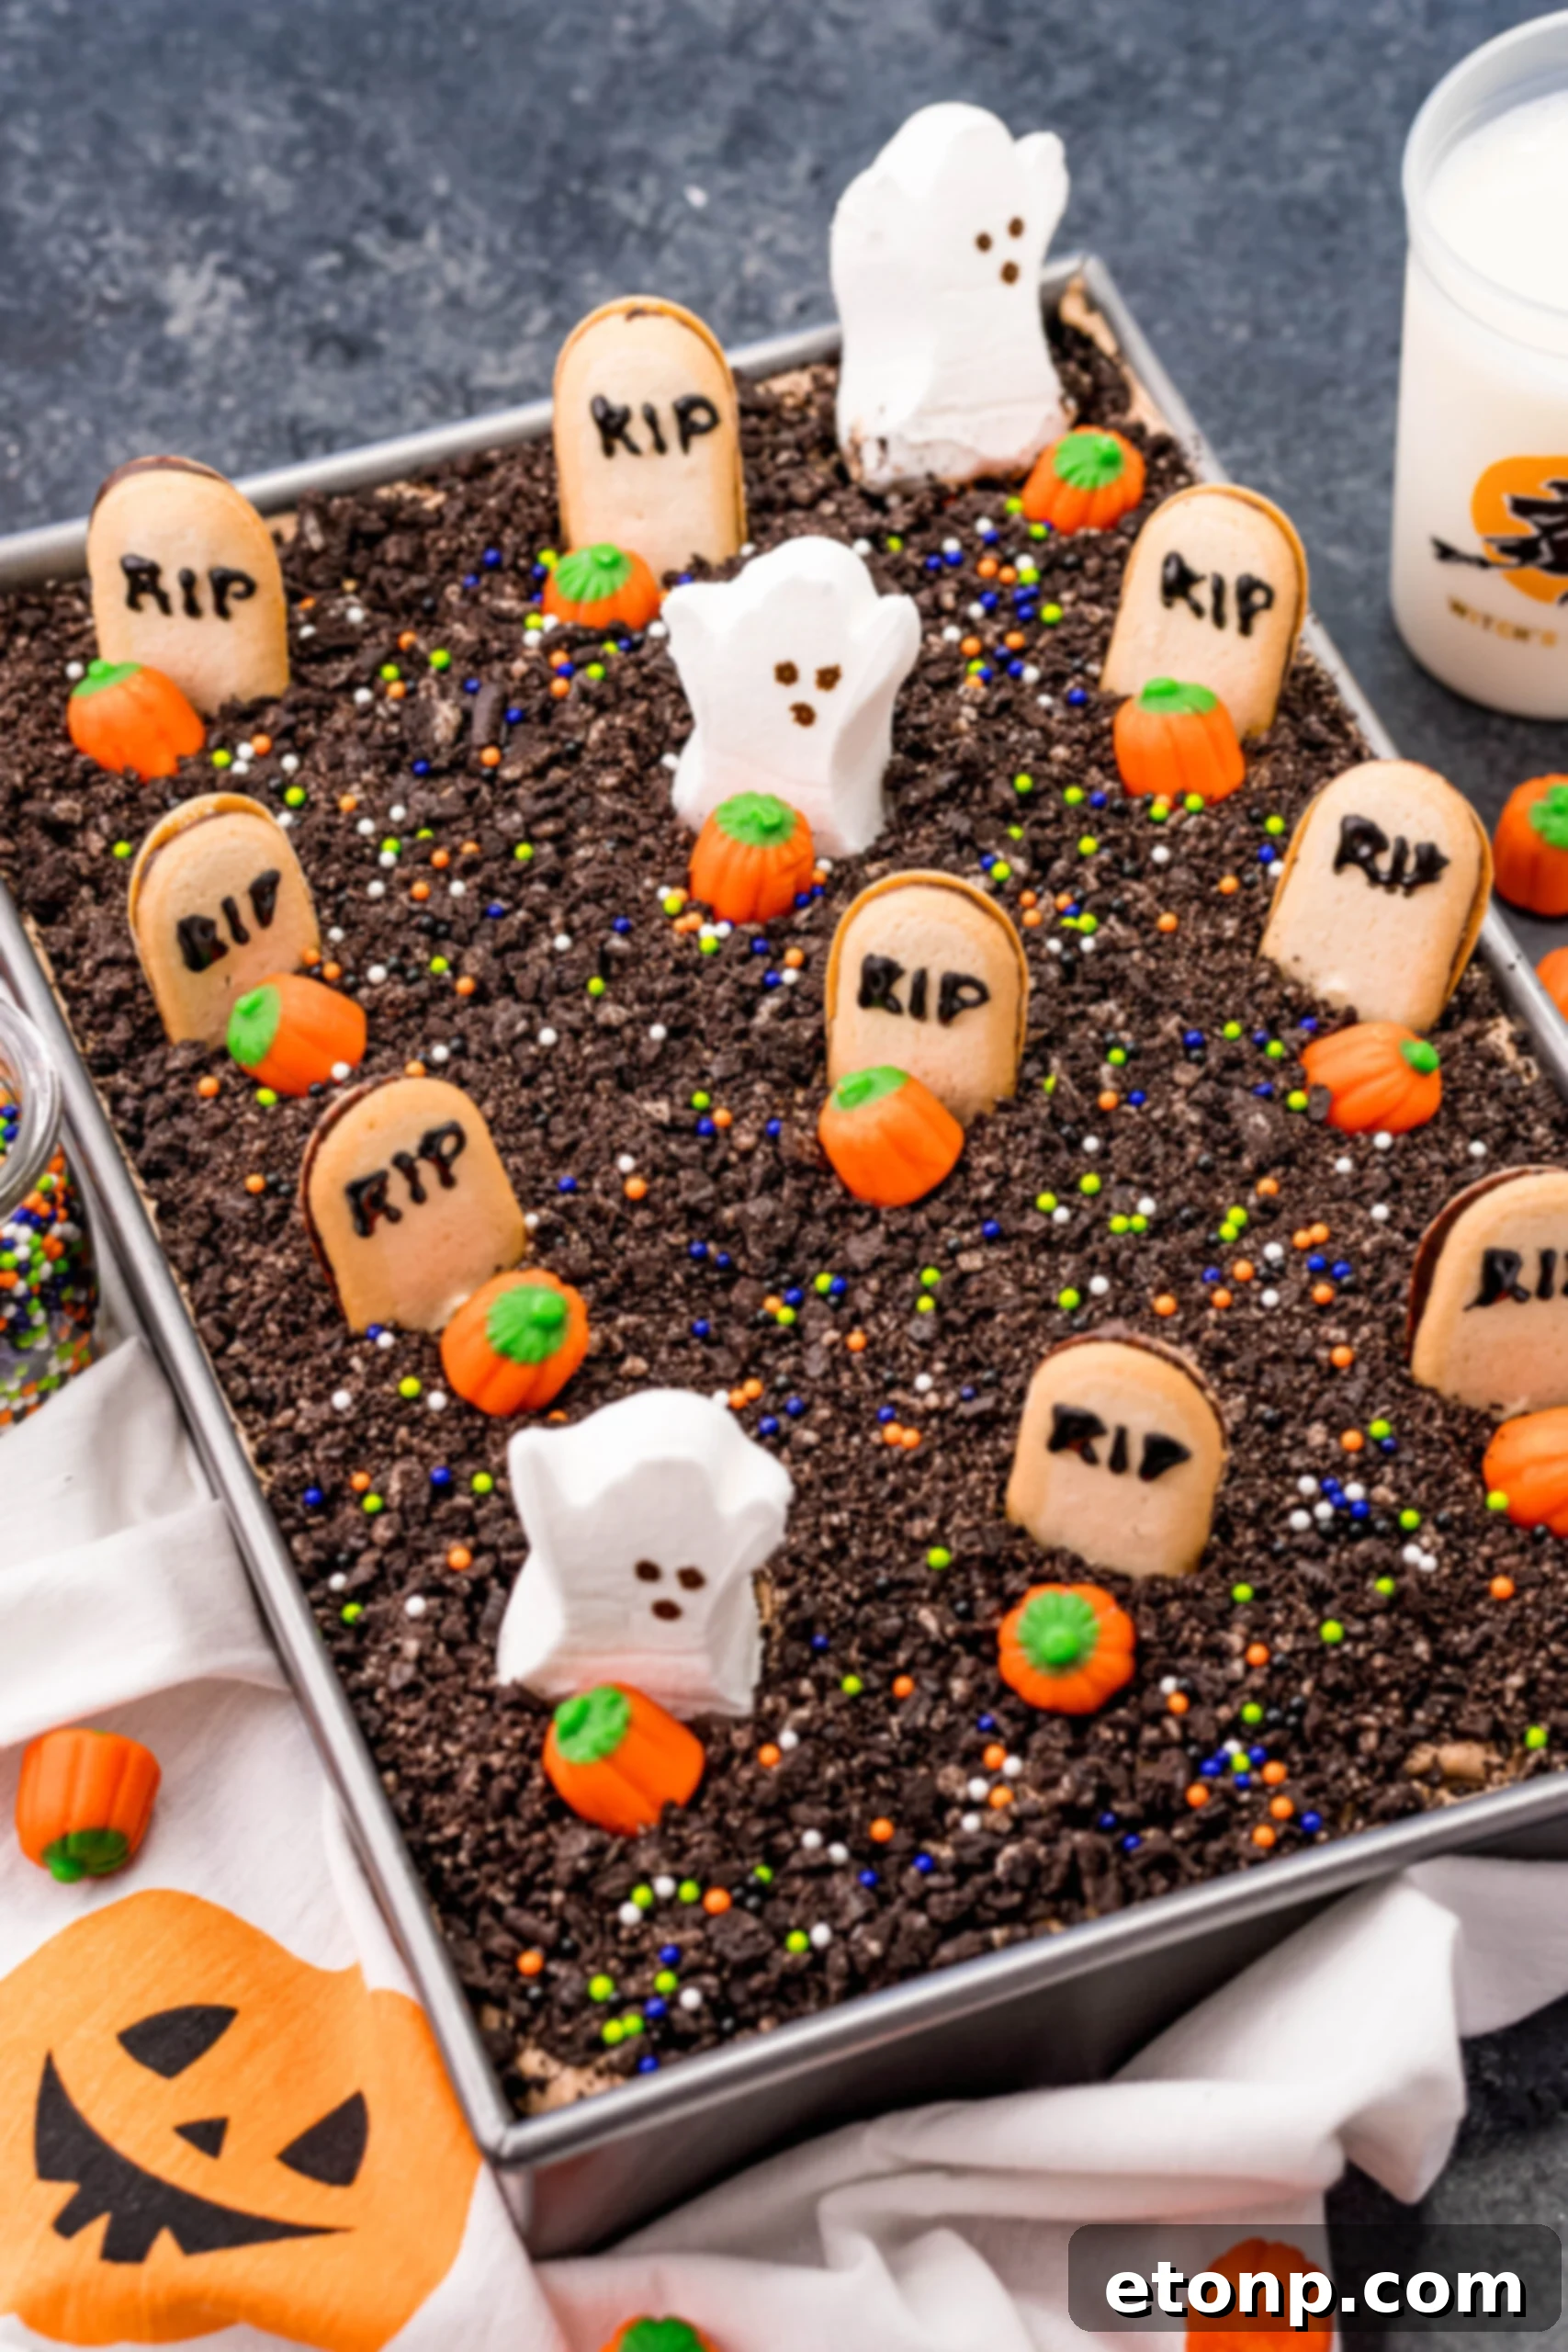
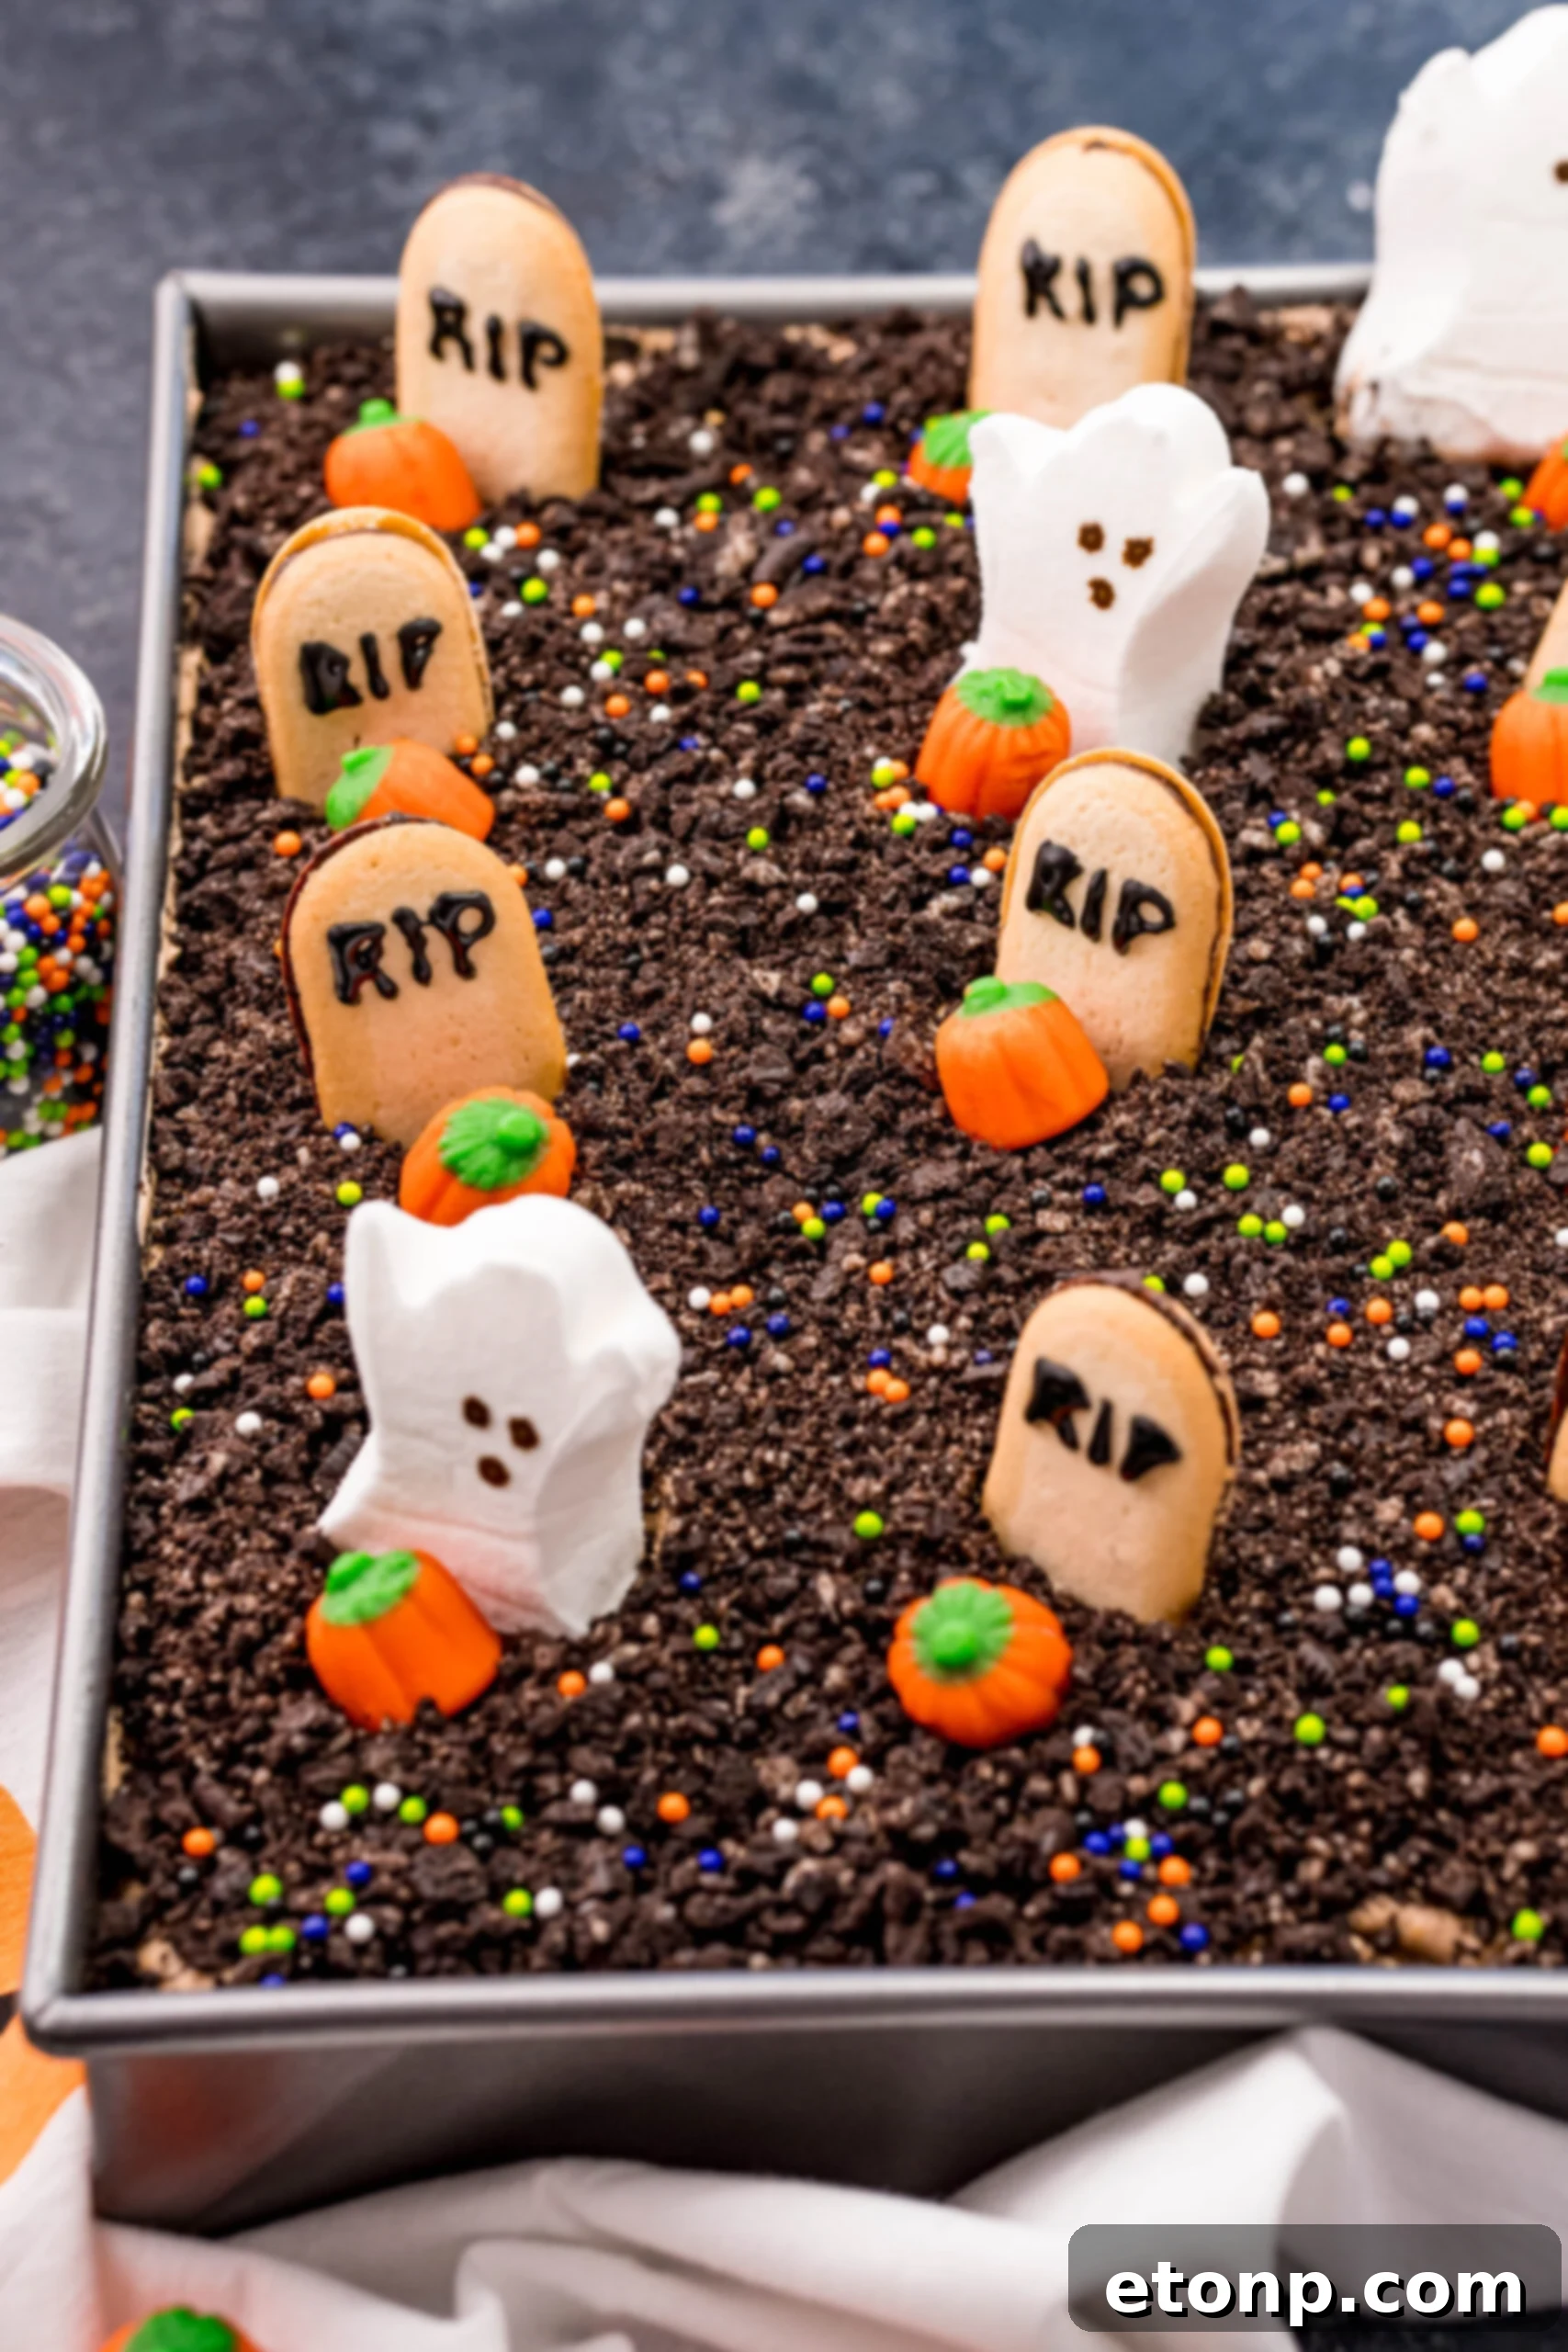
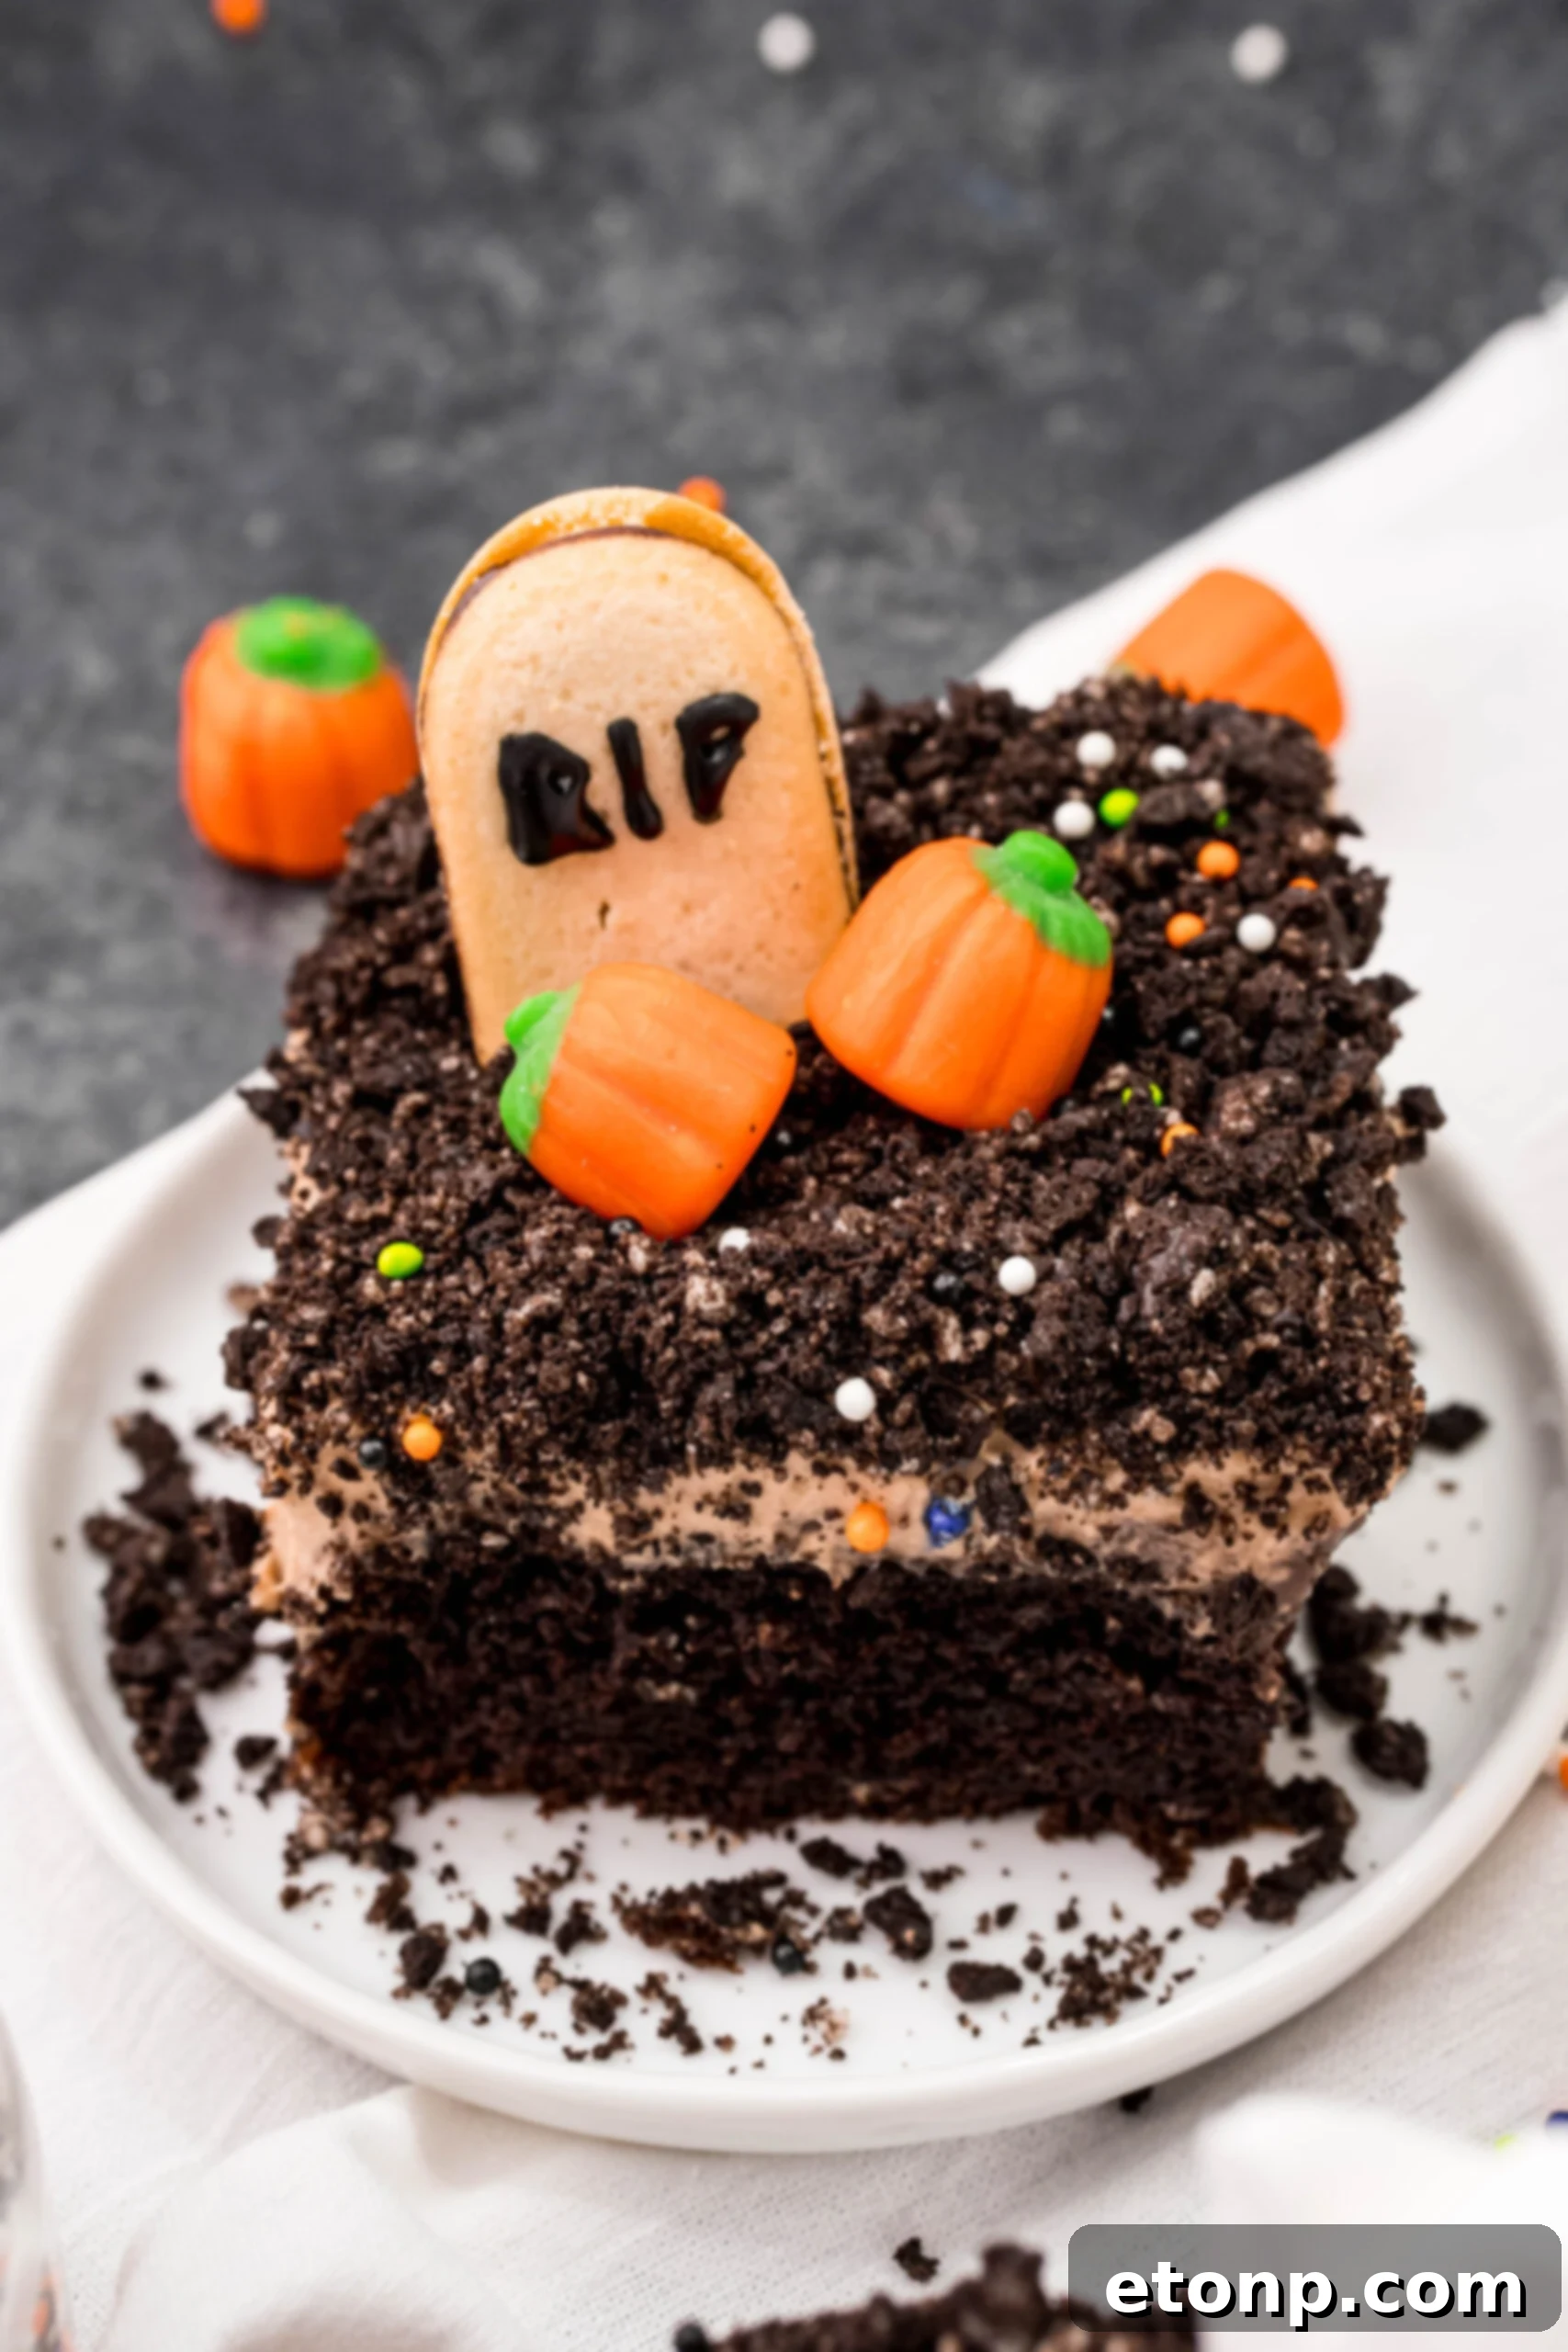
The real magic, however, lies in its presentation. Designed to resemble a spooky graveyard, this cake offers endless opportunities for creative decoration. From edible tombstones crafted from Milano cookies to adorable ghost Peeps rising from the “earth,” every element contributes to a fun and festive theme. Cutting into this cake isn’t just serving dessert; it’s revealing a truly frightful and fun edible scene!
Why You’ll Love This Easy Graveyard Cake
This Halloween Dirt Cake stands out as a unique and enjoyable dessert for several compelling reasons:
- Unforgettable Presentation: It’s more than just a cake; it’s an edible landscape that captures the spirit of Halloween.
- Incredibly Delicious: The blend of rich chocolate cake, creamy pudding, and sweet toppings is a match made in dessert heaven.
- Simple to Make: Despite its impressive appearance, this recipe uses convenient ingredients like cake mix and instant pudding, making it accessible for bakers of all skill levels.
- Kid-Friendly Fun: The decorating process is a fantastic activity for kids, allowing them to express their creativity and get excited about Halloween.
- Perfect for Parties: Easily serves a crowd and is a guaranteed conversation starter at any fall gathering or Halloween party.
- Customizable: Adapt the decorations and even the cake flavors to suit your taste and spooky vision.
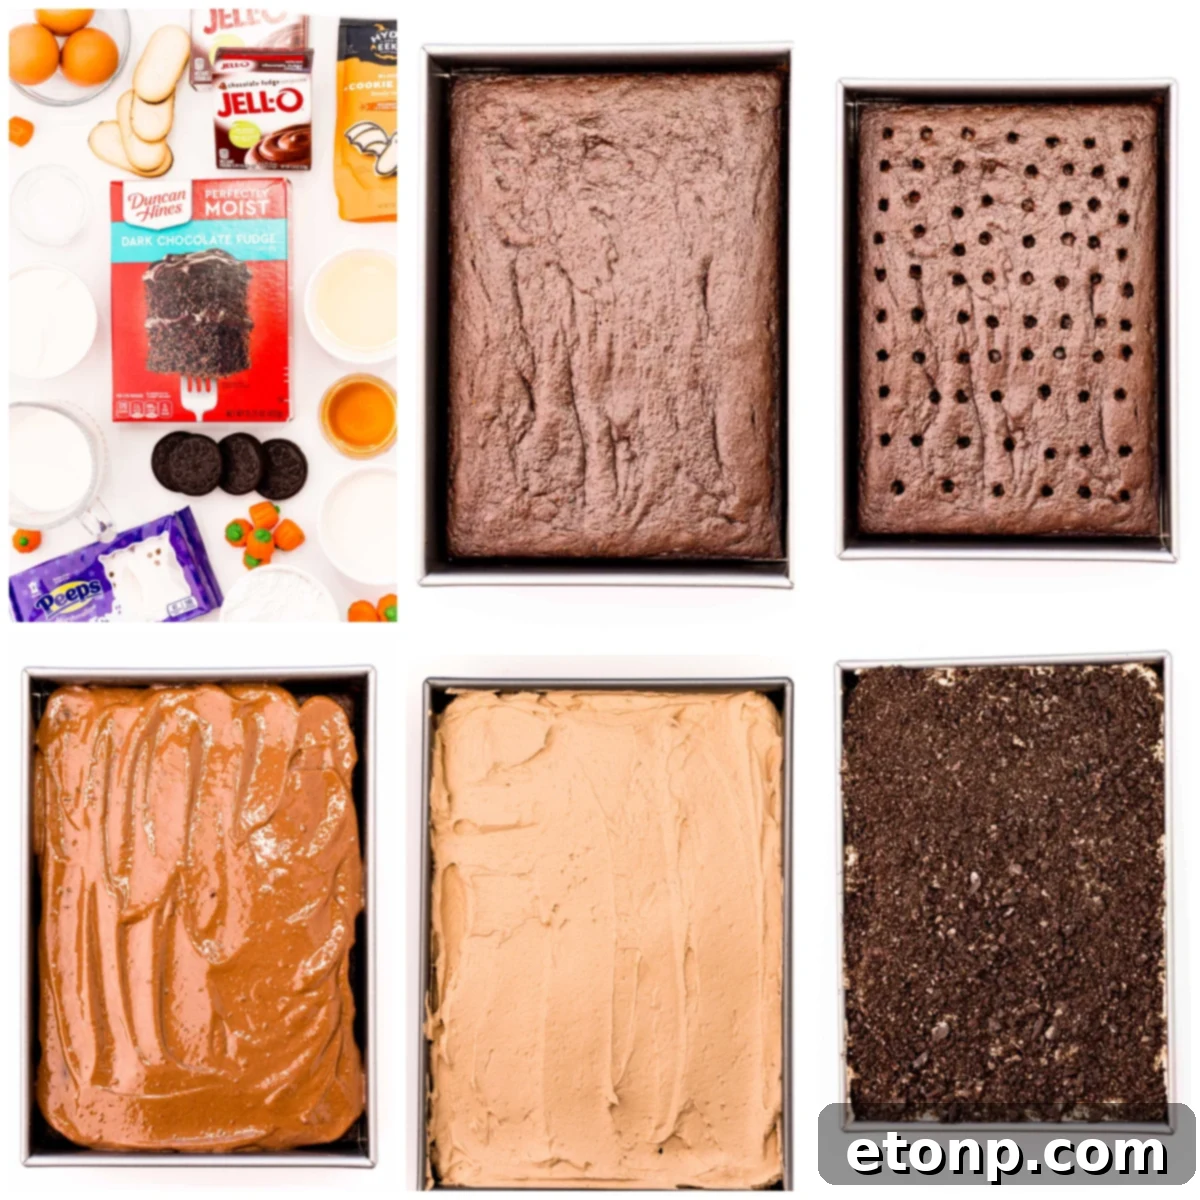
Essential Ingredients for Your Halloween Dirt Cake
Creating this enchanting graveyard cake requires a combination of pantry staples and fun festive additions. Here’s a detailed look at what you’ll need to bring this spooky dessert to life:
For the Rich Chocolate Cake Base:
- 16oz. Box of Chocolate Cake Mix: The foundation of our cake. Using a mix saves time without sacrificing flavor.
- 3oz. Package of Chocolate Fudge Instant Pudding (dry): This secret ingredient adds incredible moisture and a deeper chocolate flavor to the cake.
- 1/2 cup Sour Cream: Enhances the cake’s tenderness and moistness, giving it a delightful richness.
- 3/4 cup Vegetable Oil: Contributes to the cake’s soft crumb.
- 1/2 cup Milk: Adds liquid to the batter, ensuring the right consistency.
- 3 Large Eggs: Bind the ingredients and provide structure.
- 1 Teaspoon Vanilla Extract: A touch of vanilla brightens and complements the chocolate flavor.
- 1/2 Teaspoon Salt: Balances the sweetness and enhances all the other flavors.
For the Creamy Pudding Filling:
- 1 3oz. Box Instant Chocolate Pudding Mix: This forms the creamy, delectable layer over the baked cake.
- 2 Cups Whole Milk: Essential for preparing the instant pudding to its perfect, thick consistency.
For the Light and Fluffy Frosting:
- 2 Cups Heavy Cream: The base for our homemade whipped cream frosting, providing a light and airy texture.
- 1/2 cup Powdered Sugar: Sweetens the cream and helps stabilize the frosting.
- 1/2 cup Chocolate Instant Pudding Mix: A brilliant addition that stabilizes the whipped cream, prevents it from weeping, and infuses it with extra chocolatey goodness.
For the Spooktacular Topping and Decorations:
This is where the fun truly begins! The toppings allow you to create a miniature Halloween scene that goblins and ghouls will adore.
- 16 Oreos (crushed): These are key to creating the “dirt” effect, providing a delicious crunch and authentic graveyard look. Consider using Halloween-themed Oreos for extra color!
- 9 Milano Cookies: These rectangular cookies are perfect for transforming into eerie tombstones.
- 6 Ghost Peeps: Adorable marshmallow ghosts that bring a playful, spooky element to your graveyard.
- 12 Candy Pumpkins: Classic Halloween candies that add pops of orange and complete the autumn aesthetic.
- Sprinkles (optional): Orange, black, or even green sprinkles can add extra flair and color.
- Black Gel Icing (for writing): Ideal for adding spooky messages like “R.I.P.” to your Milano tombstones.
Step-by-Step Instructions to Create Your Halloween Dirt Cake
Follow these simple steps to bring your delicious and spooky graveyard masterpiece to life:
Part 1: Baking the Moist Chocolate Cake
- Prepare Your Oven and Pan: Preheat your oven to 350°F (175°C). Lightly grease a 9×13-inch cake pan. This is a crucial step to prevent sticking.
- Mix the Cake Batter: In a large mixing bowl, combine the chocolate cake mix, dry chocolate fudge instant pudding mix, sour cream, vegetable oil, milk, eggs, vanilla extract, and salt. Beat with an electric mixer on medium speed for about 2 minutes, until all ingredients are fully combined and the batter is smooth.
- Pour and Spread: The batter will be quite thick, so use a rubber spatula to carefully spread it evenly into the prepared cake pan.
- Bake to Perfection: Bake for 28-32 minutes, or until a wooden skewer or cake tester inserted into the center comes out clean. Be careful not to overbake, which can lead to a dry cake.
- Cool and Poke: Allow the cake to cool in the pan for about 30 minutes. Once slightly cooled, use the handle of a wooden spoon or a similar round object to poke holes all over the top of the cake. These holes will allow the pudding filling to seep in, adding extra moisture and flavor.
Part 2: Preparing the Creamy Pudding Filling
- Whisk the Pudding: In a medium bowl, whisk together the 3oz. instant chocolate pudding mix and 2 cups of whole milk for 2 minutes. Continue whisking until the mixture begins to thicken slightly.
- Spread the Filling: Carefully pour and spread the prepared chocolate pudding evenly over the top of the cooled, poked cake, ensuring it fills all the holes.
Part 3: Crafting the Light Chocolate Frosting
- Combine Frosting Ingredients: In a large bowl or the bowl of a stand mixer fitted with a whisk attachment, combine the heavy cream, powdered sugar, and 1/2 cup of chocolate instant pudding mix.
- Whip Until Fluffy: Whisk on high speed until the mixture becomes thick, light, and fluffy, forming soft peaks. This usually takes 3-5 minutes. Be careful not to overmix.
- Spread the Frosting: Gently spread the chocolate frosting over the pudding layer on the cake, creating a smooth, even canvas for your decorations.
Part 4: Decorating Your Graveyard Masterpiece
- Create the “Dirt”: Add the Oreos to a food processor and pulse until fine crumbs form, resembling dark soil. Alternatively, place them in a Ziploc bag and crush them with a rolling pin. Sprinkle these Oreo crumbs generously over the entire surface of the frosted cake.
- Fashion Tombstones: Use the black gel icing to write “R.I.P.” or other spooky messages on the Milano cookies to create tombstones. Gently press the decorated cookies into the frosting so they stand upright in the “dirt.”
- Place Your Ghosts: Press the ghost Peeps into the frosting, positioning them as if they are emerging from the ground. If they have trouble standing, you can use small toothpicks (removed before serving!) to help secure them.
- Add Candy Pumpkins: Arrange the candy pumpkins around the ghosts and tombstones, adding splashes of vibrant color to your spooky scene.
- Final Flourish (Optional): Sprinkle additional Halloween-themed sprinkles if desired for an extra festive touch.
- Serve and Enjoy! Your spectacular Halloween Dirt Cake is now complete and ready to impress!
Creative Decoration Ideas to Spook Up Your Cake
The beauty of this Halloween Dirt Cake lies in its versatility for decoration. Unleash your inner ghoul and get creative!
- Spider Web Wonders: Use black gel icing to pipe a delicate spider web design around the edges of the cake, then strategically place plastic spiders (or edible gummy spiders) on top for a creepy-crawly effect.
- Pumpkin Patch Perfection: Sprinkle orange and black sprinkles in a designated area to create a “pumpkin patch.” Place several candy pumpkins in the center of this patch for a vibrant autumn scene.
- Emerging Ghosts: Crush extra Oreos and sprinkle them heavily around the edges of the cake to create a denser “dirt” border. Then, arrange your ghost Peeps to look like they are rising from this dark earth.
- Detailed Graveyard Scene: Expand on the basic graveyard. Use Milano cookies for tombstones and black gel icing to draw intricate cracks or moss. Employ green gel icing to pipe “grass” around the tombstones, adding depth to your eerie landscape.
- Worm Invasion: Add gummy worms slithering out of the “dirt” or peeking out from under tombstones for an extra gross-out factor.
- Candy Corn Borders: Outline the cake with candy corn for a traditional Halloween border.
Remember, Halloween is all about fun and imagination. Don’t be afraid to let the kids take the lead in decorating; their unique ideas often result in the most memorable and charmingly spooky creations!
Storing Your Halloween Dirt Cake
Proper storage ensures your Halloween masterpiece stays fresh and delicious for as long as possible.
- Fridge: This cake is at its absolute best when served on the day it’s made, allowing the textures to be perfect. However, if you have leftovers, store them in an airtight container in the refrigerator for up to 3 days. The crushed cookies might soften slightly over time, but the flavor will remain fantastic.
- Freeze: Freezing this cake is generally not recommended. The cookies tend to become soggy and lose their appealing crunch once thawed, affecting the overall texture.
Expert Tips and Tricks for Making the Best Graveyard Cake
Achieve graveyard greatness with these helpful hints and creative twists:
- Oreo Choice Matters: Feel free to use your favorite type of Oreos! While standard Oreos work wonderfully, Halloween-themed Oreos with orange or green cream add an extra festive touch that perfectly complements the holiday.
- Make Ahead Option: If you’re planning a party, you can definitely prepare this cake the day before. Assemble it completely, including decorations, and store it in the fridge overnight. The cookies will soften slightly, creating a delicious, cake-like texture, but the flavors will meld beautifully.
- Marshmallow Ghost Variations: If you can’t find ghost Peeps, get creative! You can use regular marshmallows and dip them in melted white candy melts, then use an edible marker or chocolate chips for eyes. Alternatively, use store-bought marshmallow cream to pipe on ghost shapes.
- Serving Temperature is Key: This is a dense cake, so for easier cutting and a softer bite, let it sit out at room temperature for about 15-20 minutes before serving.
- Adult Halloween Treat: For a sophisticated twist, add a shot of espresso or a tablespoon of instant espresso powder to your chocolate pudding mix (for the filling). This will infuse the cake with a delightful coffee flavor that adults will absolutely adore.
- Simplify Cleanup: Don’t hesitate to use a disposable 9×13-inch aluminum baking pan for this cake. It makes cleanup a breeze, especially after a busy Halloween party.
- Flavor Variations: Experiment with different pudding flavors! Vanilla or white chocolate pudding could create an interesting contrast with the chocolate cake. You could even use a different cake mix flavor, though chocolate is classic for “dirt.”
- Alternative Tombstones: Besides Milano cookies, consider using graham crackers or even store-bought chocolate-covered pretzels for tombstones. Decorate them with edible food markers or piping gel.
- “Bone” Decorations: For an extra spooky touch, pipe white chocolate into bone shapes on parchment paper, let them harden, and then arrange them on your cake.
- Keep it Cool: Because of the pudding and whipped cream, always store this cake in the refrigerator, especially if made ahead of time.
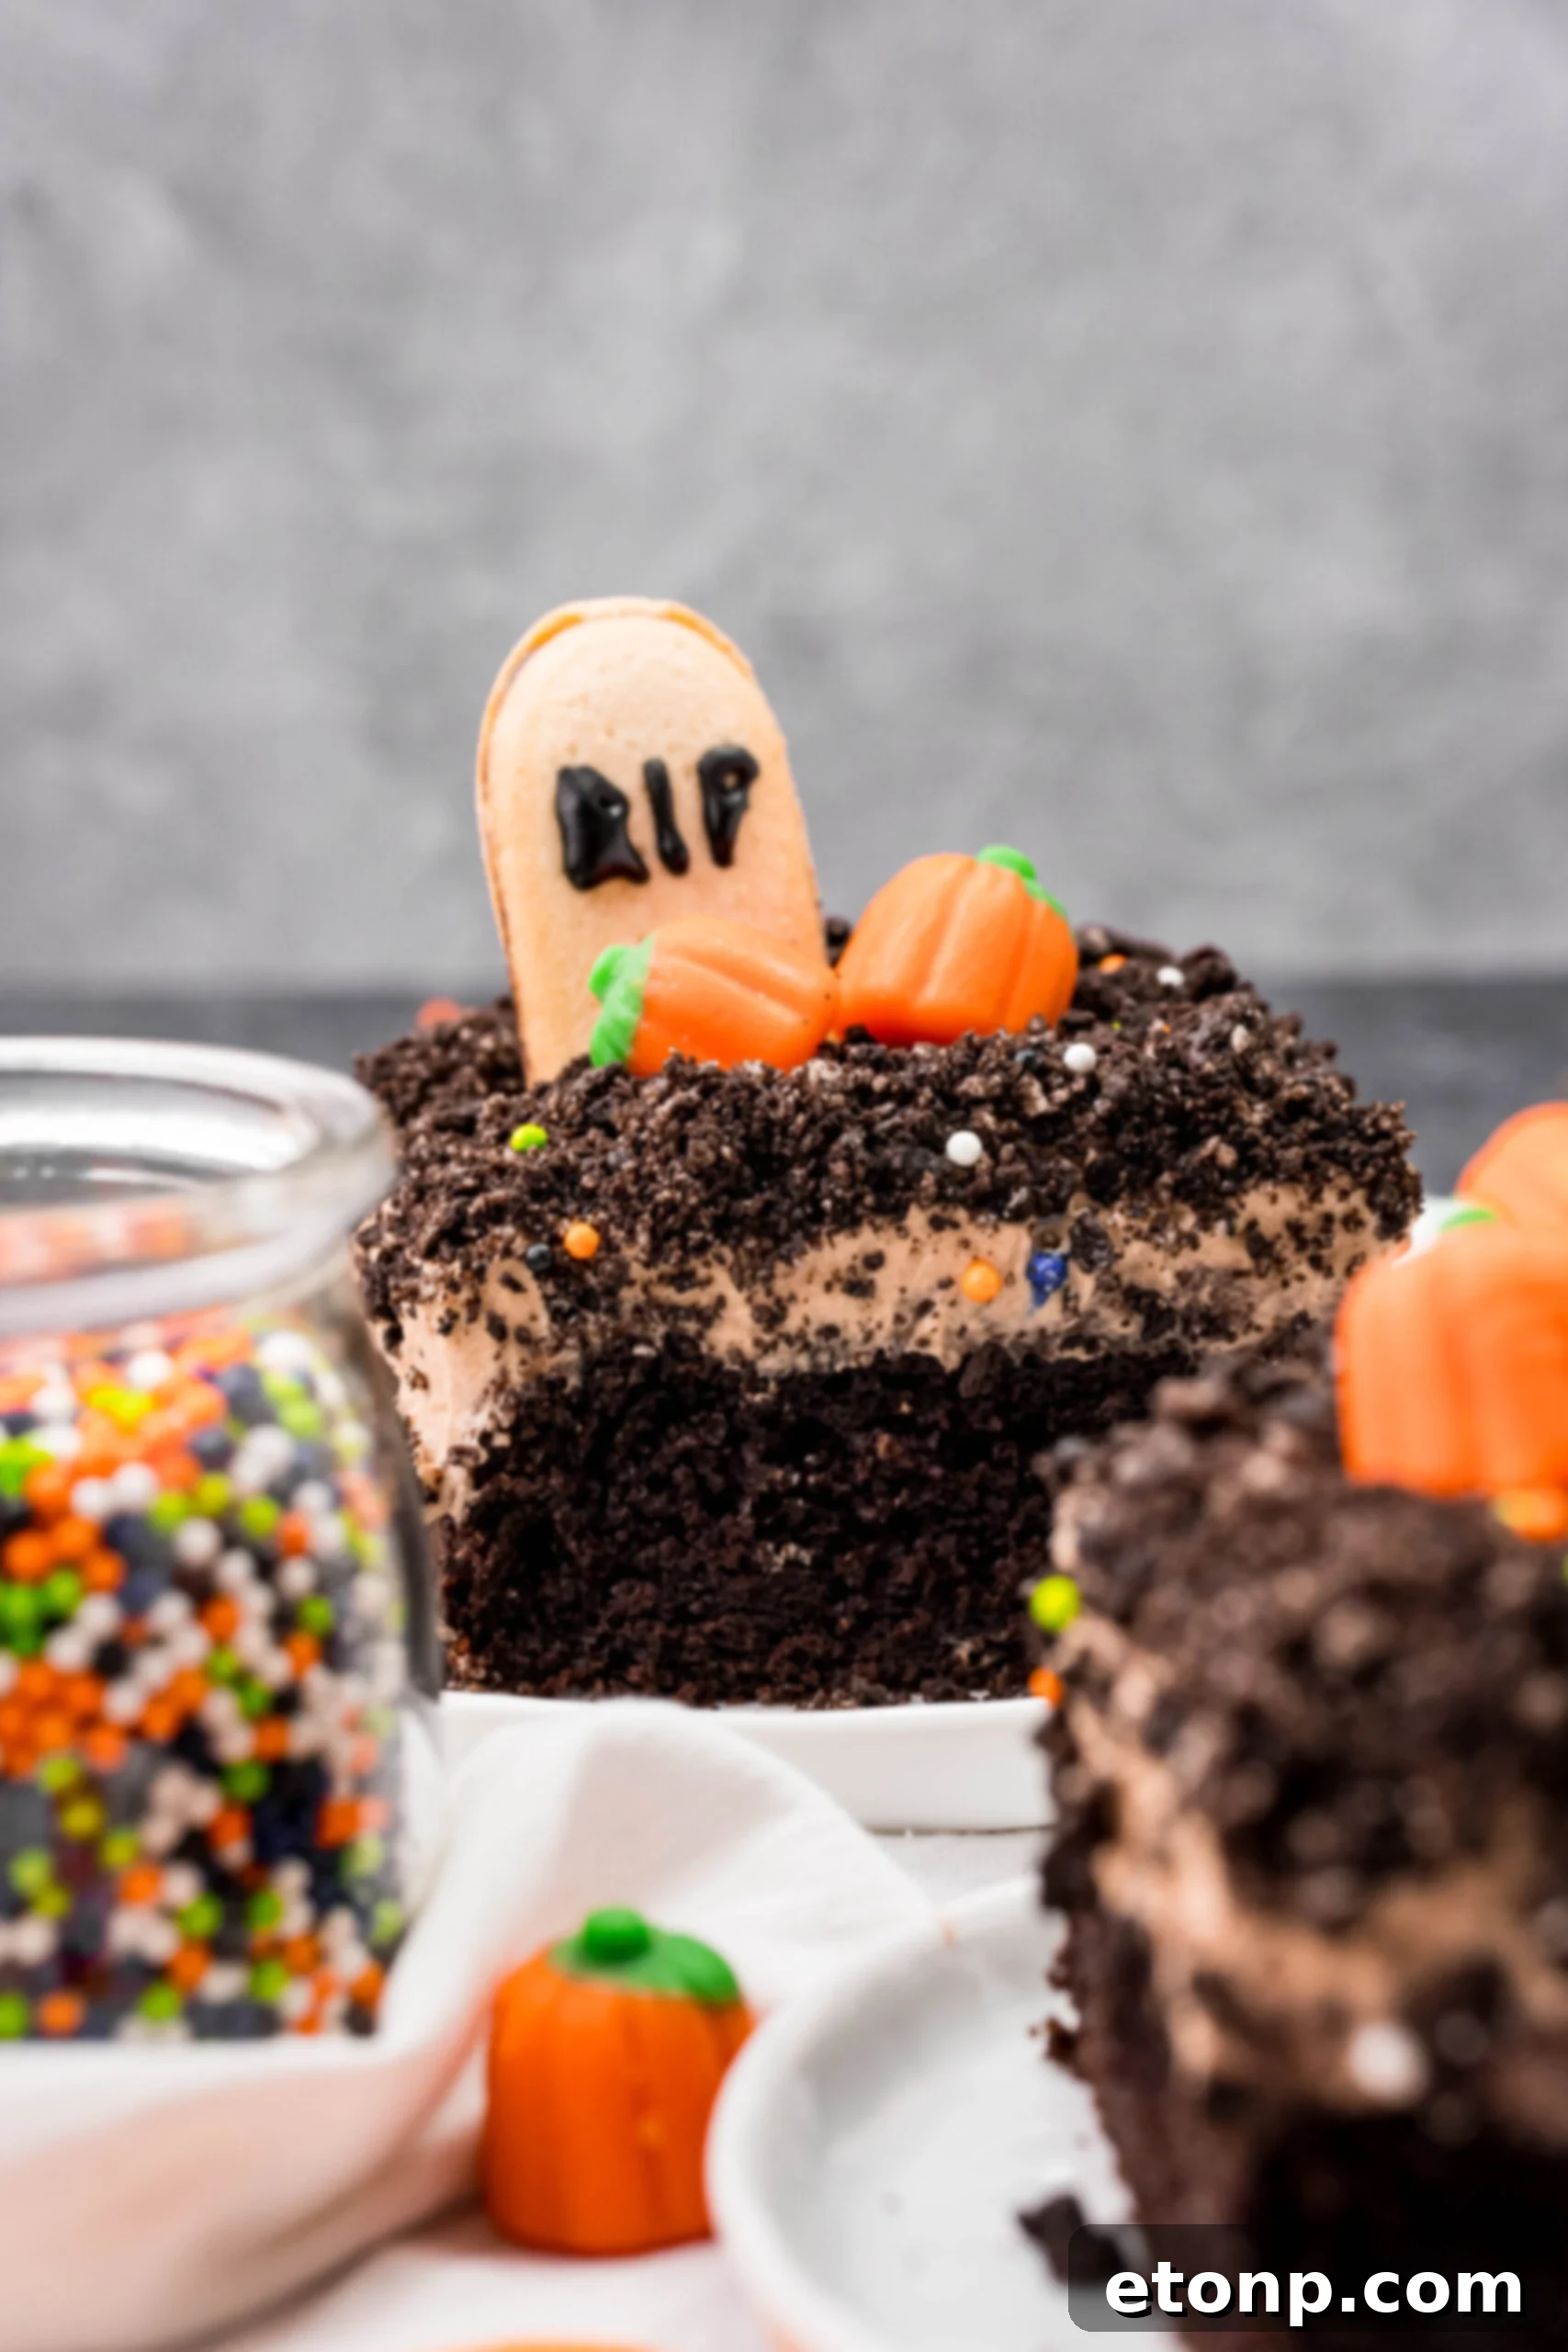
Without a doubt, this Halloween Dirt Cake is a fantastic canvas for creativity. Each time you make it, let your imagination run wild – or even better, let the kids take the reins with decorating. They will absolutely love the freedom to create their own spooky scenes!
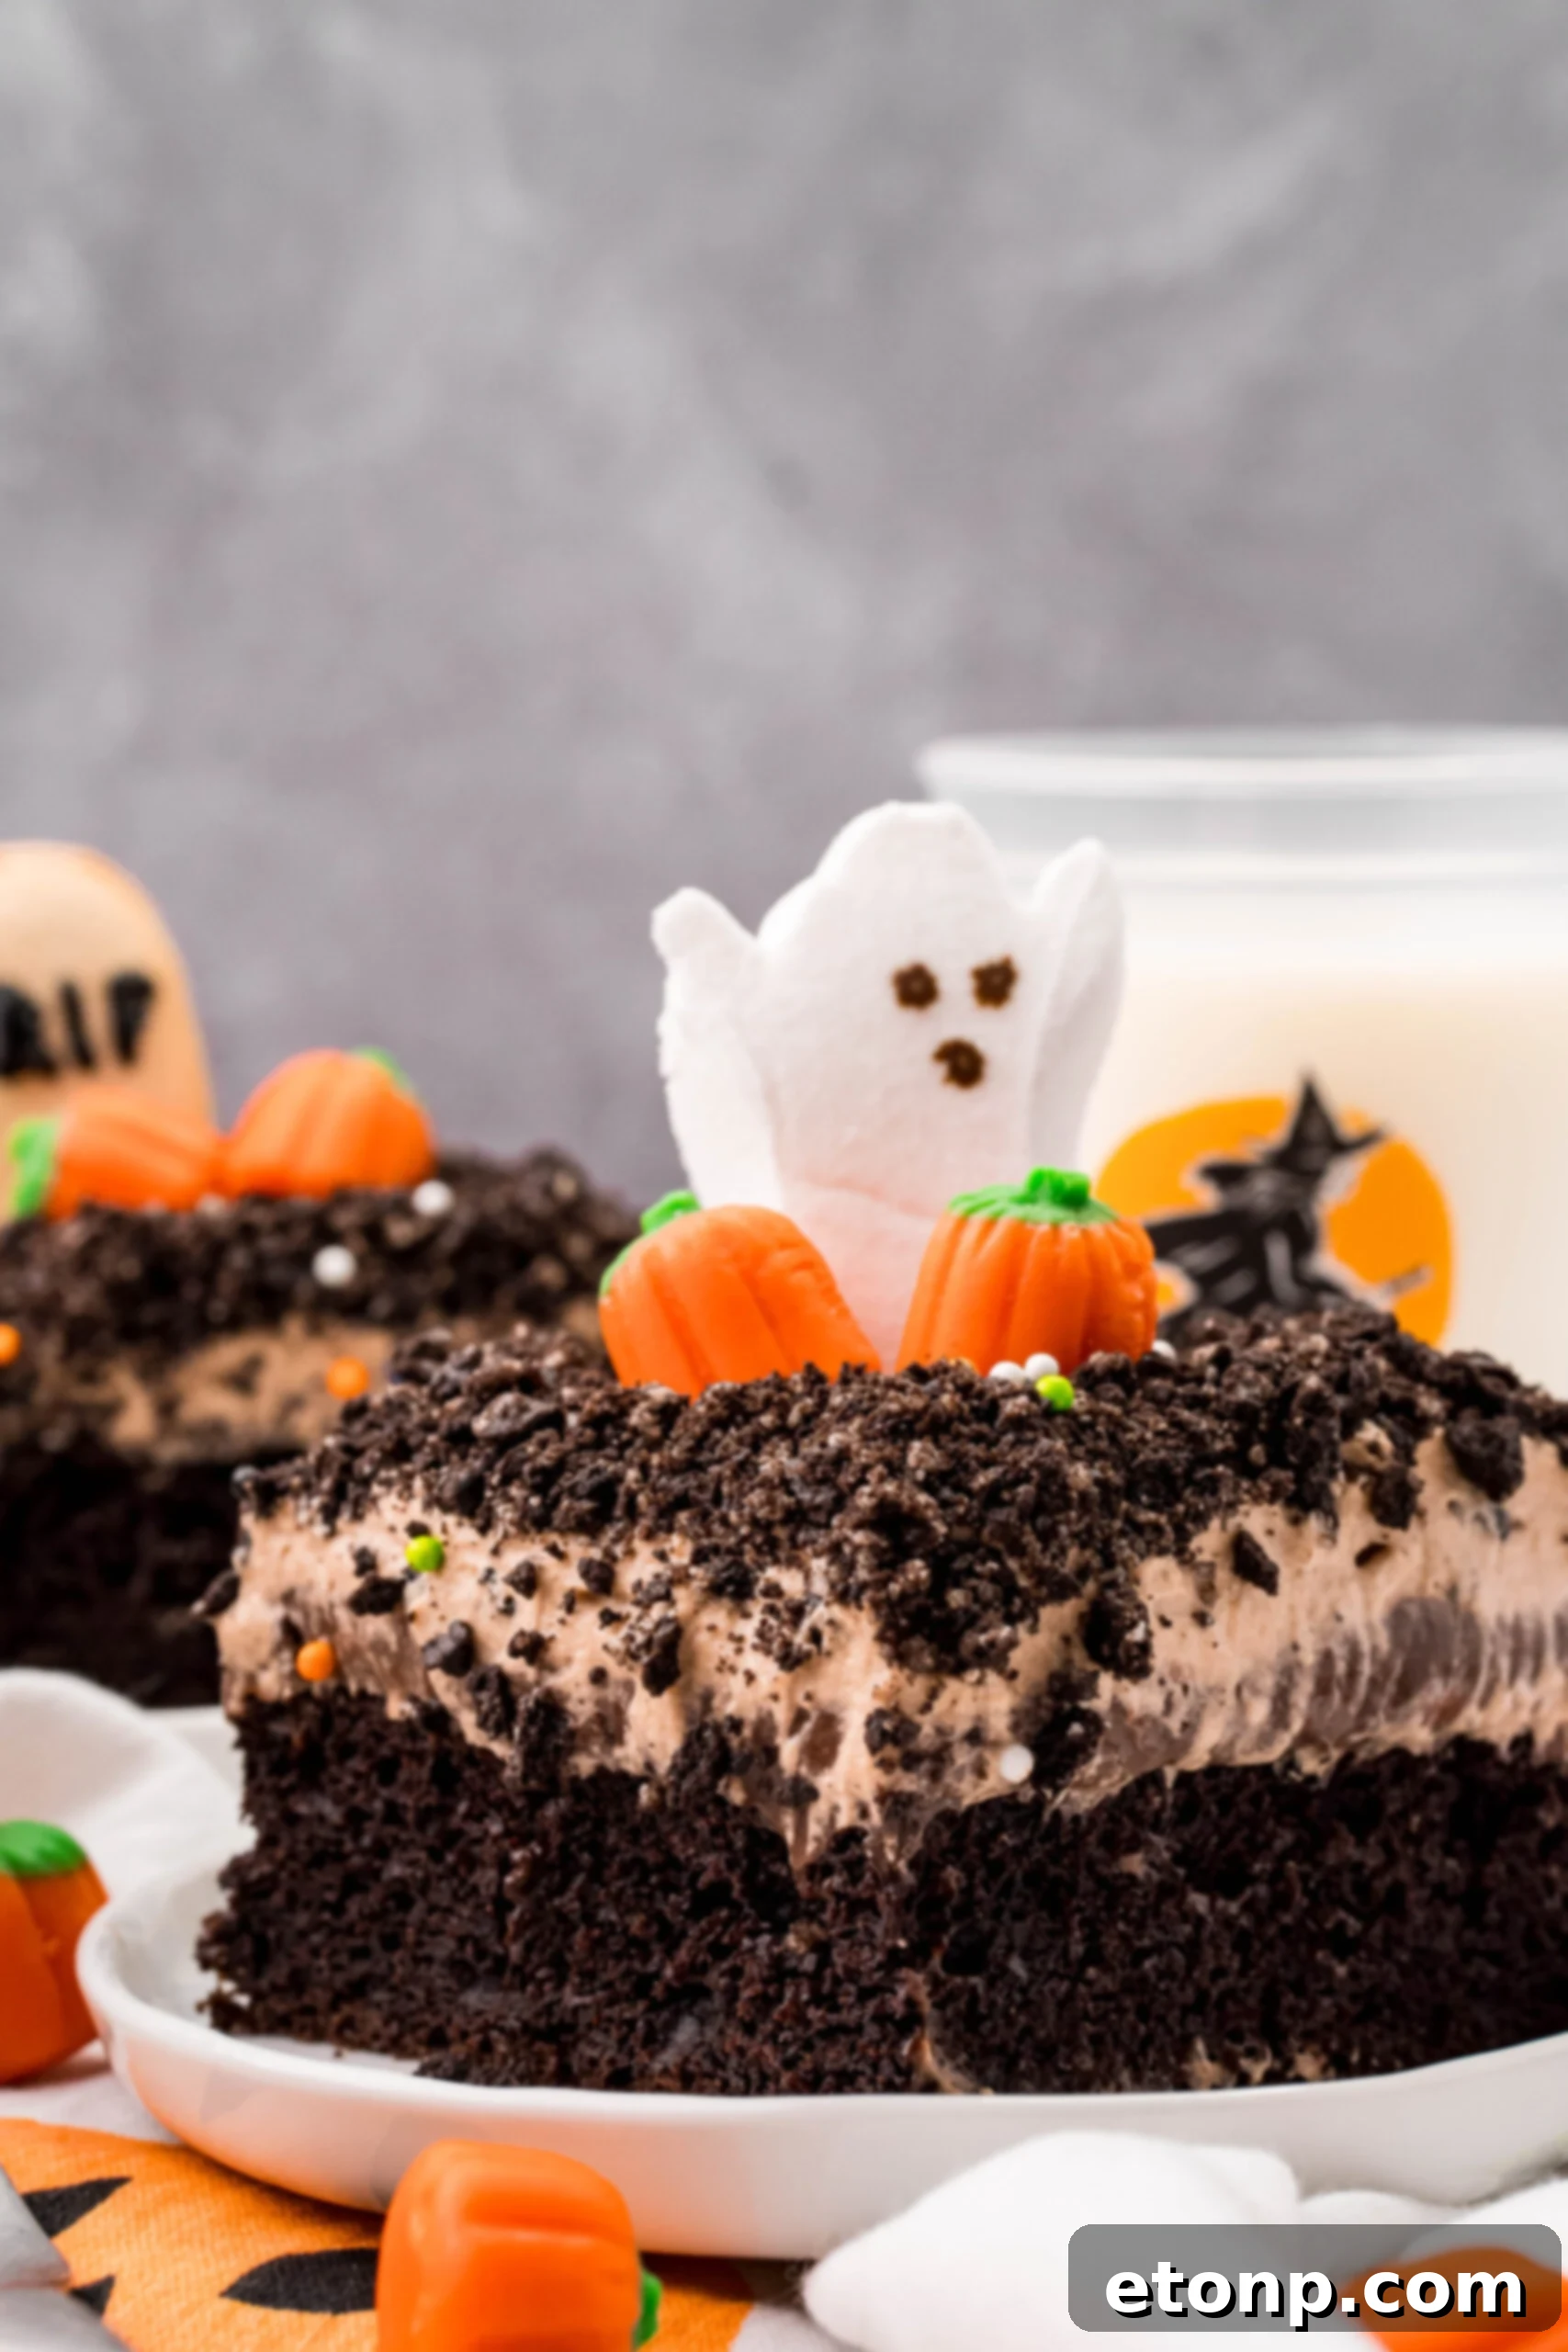
Embrace the festive spirit and don’t be afraid to add your unique spin to this cake! It’s an ideal treat for your fall and Halloween parties, gatherings, or just a fun family activity. Both kids and adults adore this kind of festive fun, making it a staple for your spooky season celebrations.
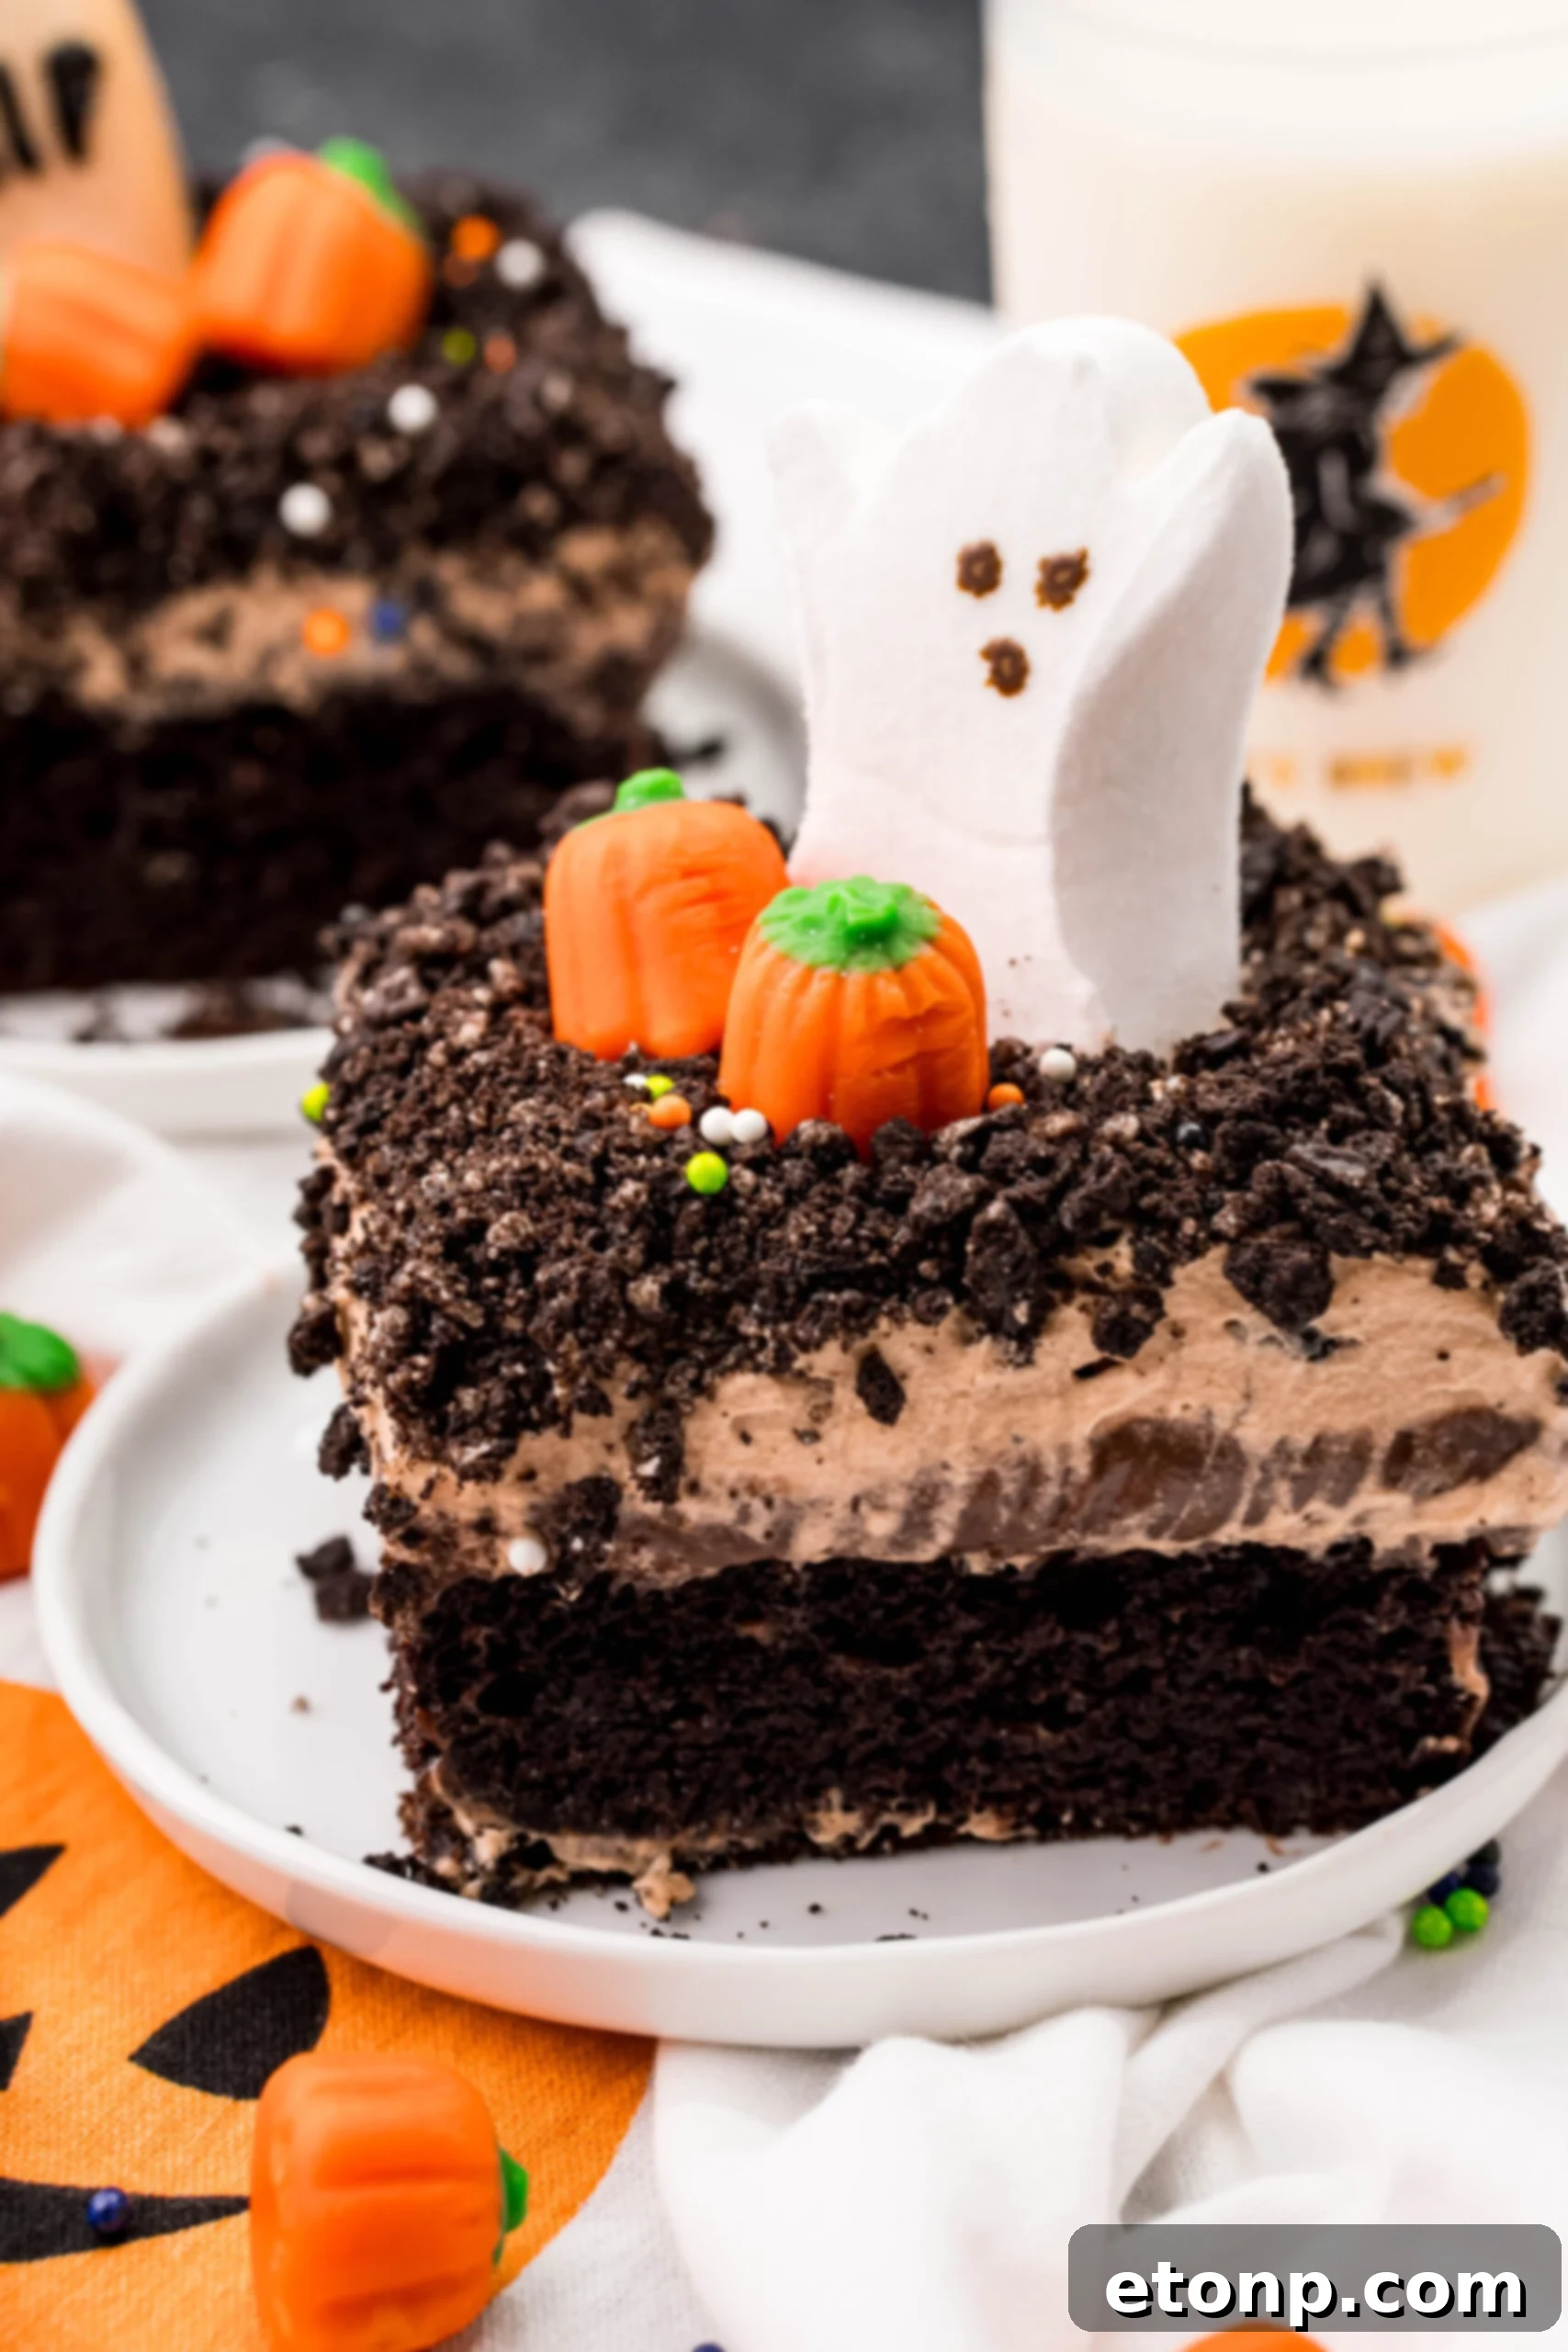
Share Your Spooktacular Creations!
We hope you loved making this incredible Halloween Dirt Cake! Don’t forget to SHARE your creations and tag us!
For more amazing recipes and inspiration, make sure to FOLLOW US ON PINTEREST!
Halloween Dirt Cake
Cook Time: 30 minutes
Serving Amount: 12 slices
Ingredients
Cake:
- 1 16oz. box of chocolate cake mix
- 1 3oz. package of chocolate fudge instant pudding, dry
- 1/2 cup sour cream
- 3/4 cup vegetable oil
- 1/2 cup milk
- 3 large eggs
- 1 teaspoon vanilla
- 1/2 teaspoon salt
Filling:
- 1 3oz. box instant chocolate pudding mix
- 2 cups whole milk
Frosting:
- 2 cups heavy cream
- 1/2 cup powdered sugar
- 1/2 cup chocolate instant pudding mix
Topping:
- 16 Oreos, crushed
- 9 Milano cookies
- 6 Ghost Peeps
- 12 candy pumpkins
- Sprinkles (optional)
- Black gel icing for writing
Instructions
Cake:
- Preheat the oven to 350 degrees F and grease a 9×13-inch cake pan; set aside.
- Mix together all cake ingredients until fully combined and transfer to the prepared cake pan. The batter will be thick, so use a rubber spatula to spread it out evenly.
- Bake for 28-32 minutes or until a cake tester inserted into the center comes out clean.
- Let cool for 30 minutes, then poke holes all over the top with the handle of a wooden spoon.
Filling:
- Whisk together the pudding mix and milk for 2 minutes, then allow to thicken slightly.
- Spread the pudding over the top of the cake, ensuring it fills the poked holes.
Frosting:
- In a large bowl or stand mixer fitted with a whisk attachment, whisk together the heavy cream, powdered sugar, and chocolate instant pudding mix until thick and fluffy.
- Spread the frosting evenly over the top of the cake.
Topping:
- Add the Oreos to a food processor and pulse until fine crumbs form. Sprinkle the Oreo crumbs generously over the top of the cake.
- Write “R.I.P.” on the Milano cookies using black gel icing to make tombstones, then press them into the frosting so they stand up.
- Press the ghost Peeps into the frosting so they stand up. If needed, use toothpicks to help secure them (remember to remove them before serving).
- Add the candy pumpkins near the ghosts and tombstones to complete your graveyard scene.
- Add sprinkles, if desired.
- ENJOY!
Did you make this recipe?
Make sure to follow on Pinterest for more recipes and inspiration!
Pin Recipe
Share on Facebook