
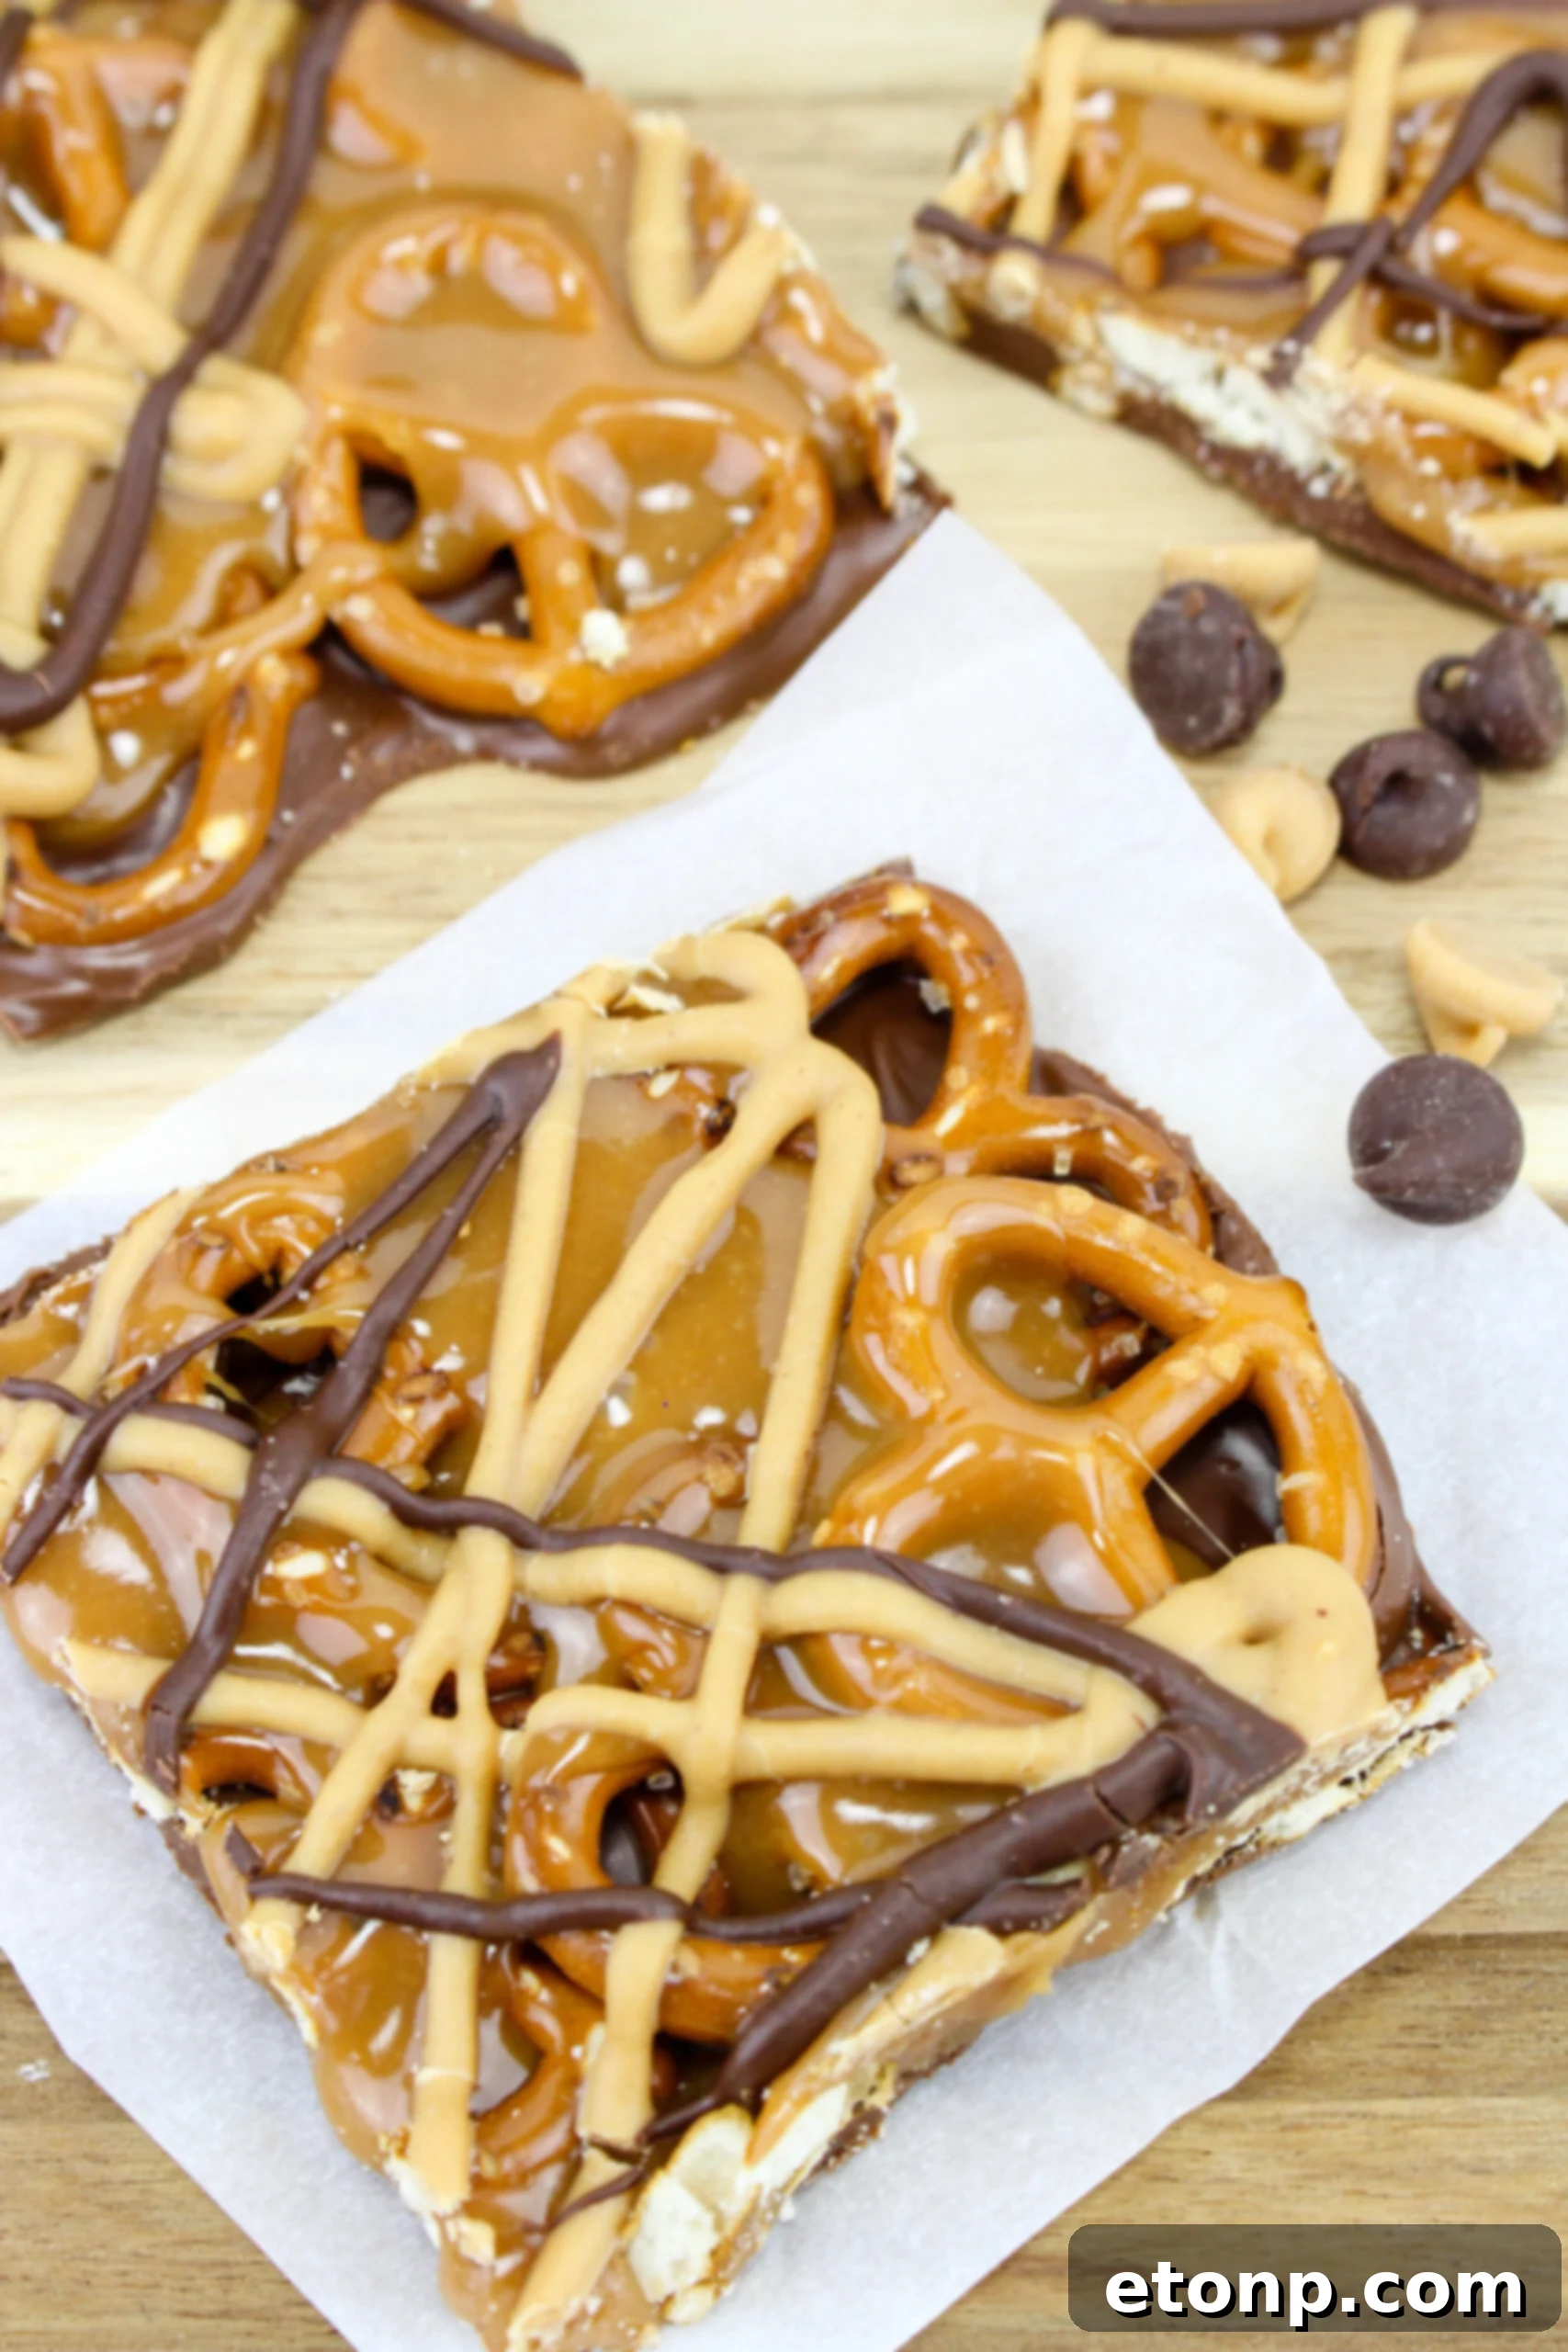
No-Bake Caramel Pretzel Bars are the ultimate sweet-and-salty sensation that delivers incredible flavor without ever needing to touch your oven. Imagine layers of crisp, salty pretzels, rich, buttery caramel, and a smooth blanket of melted chocolate, all coming together in a dessert that’s ridiculously easy to make yet tastes like a gourmet confection. This recipe isn’t just a treat; it’s a lifesaver for busy holidays, spontaneous gatherings, or those undeniable late-night cravings. In our home, these bars disappear almost instantly. My husband, James, can’t resist snatching a corner piece before it’s fully set, while Ariya meticulously picks off the pretzels, and Cameron simply points and squeals until a piece magically appears in his hand. They’ve earned their spot as a cherished family favorite because they are unbelievably simple, require no baking whatsoever, and swiftly conquer even the most intense sweet tooth.
Unveiling the Magic: What Makes These Bars So Irresistible?
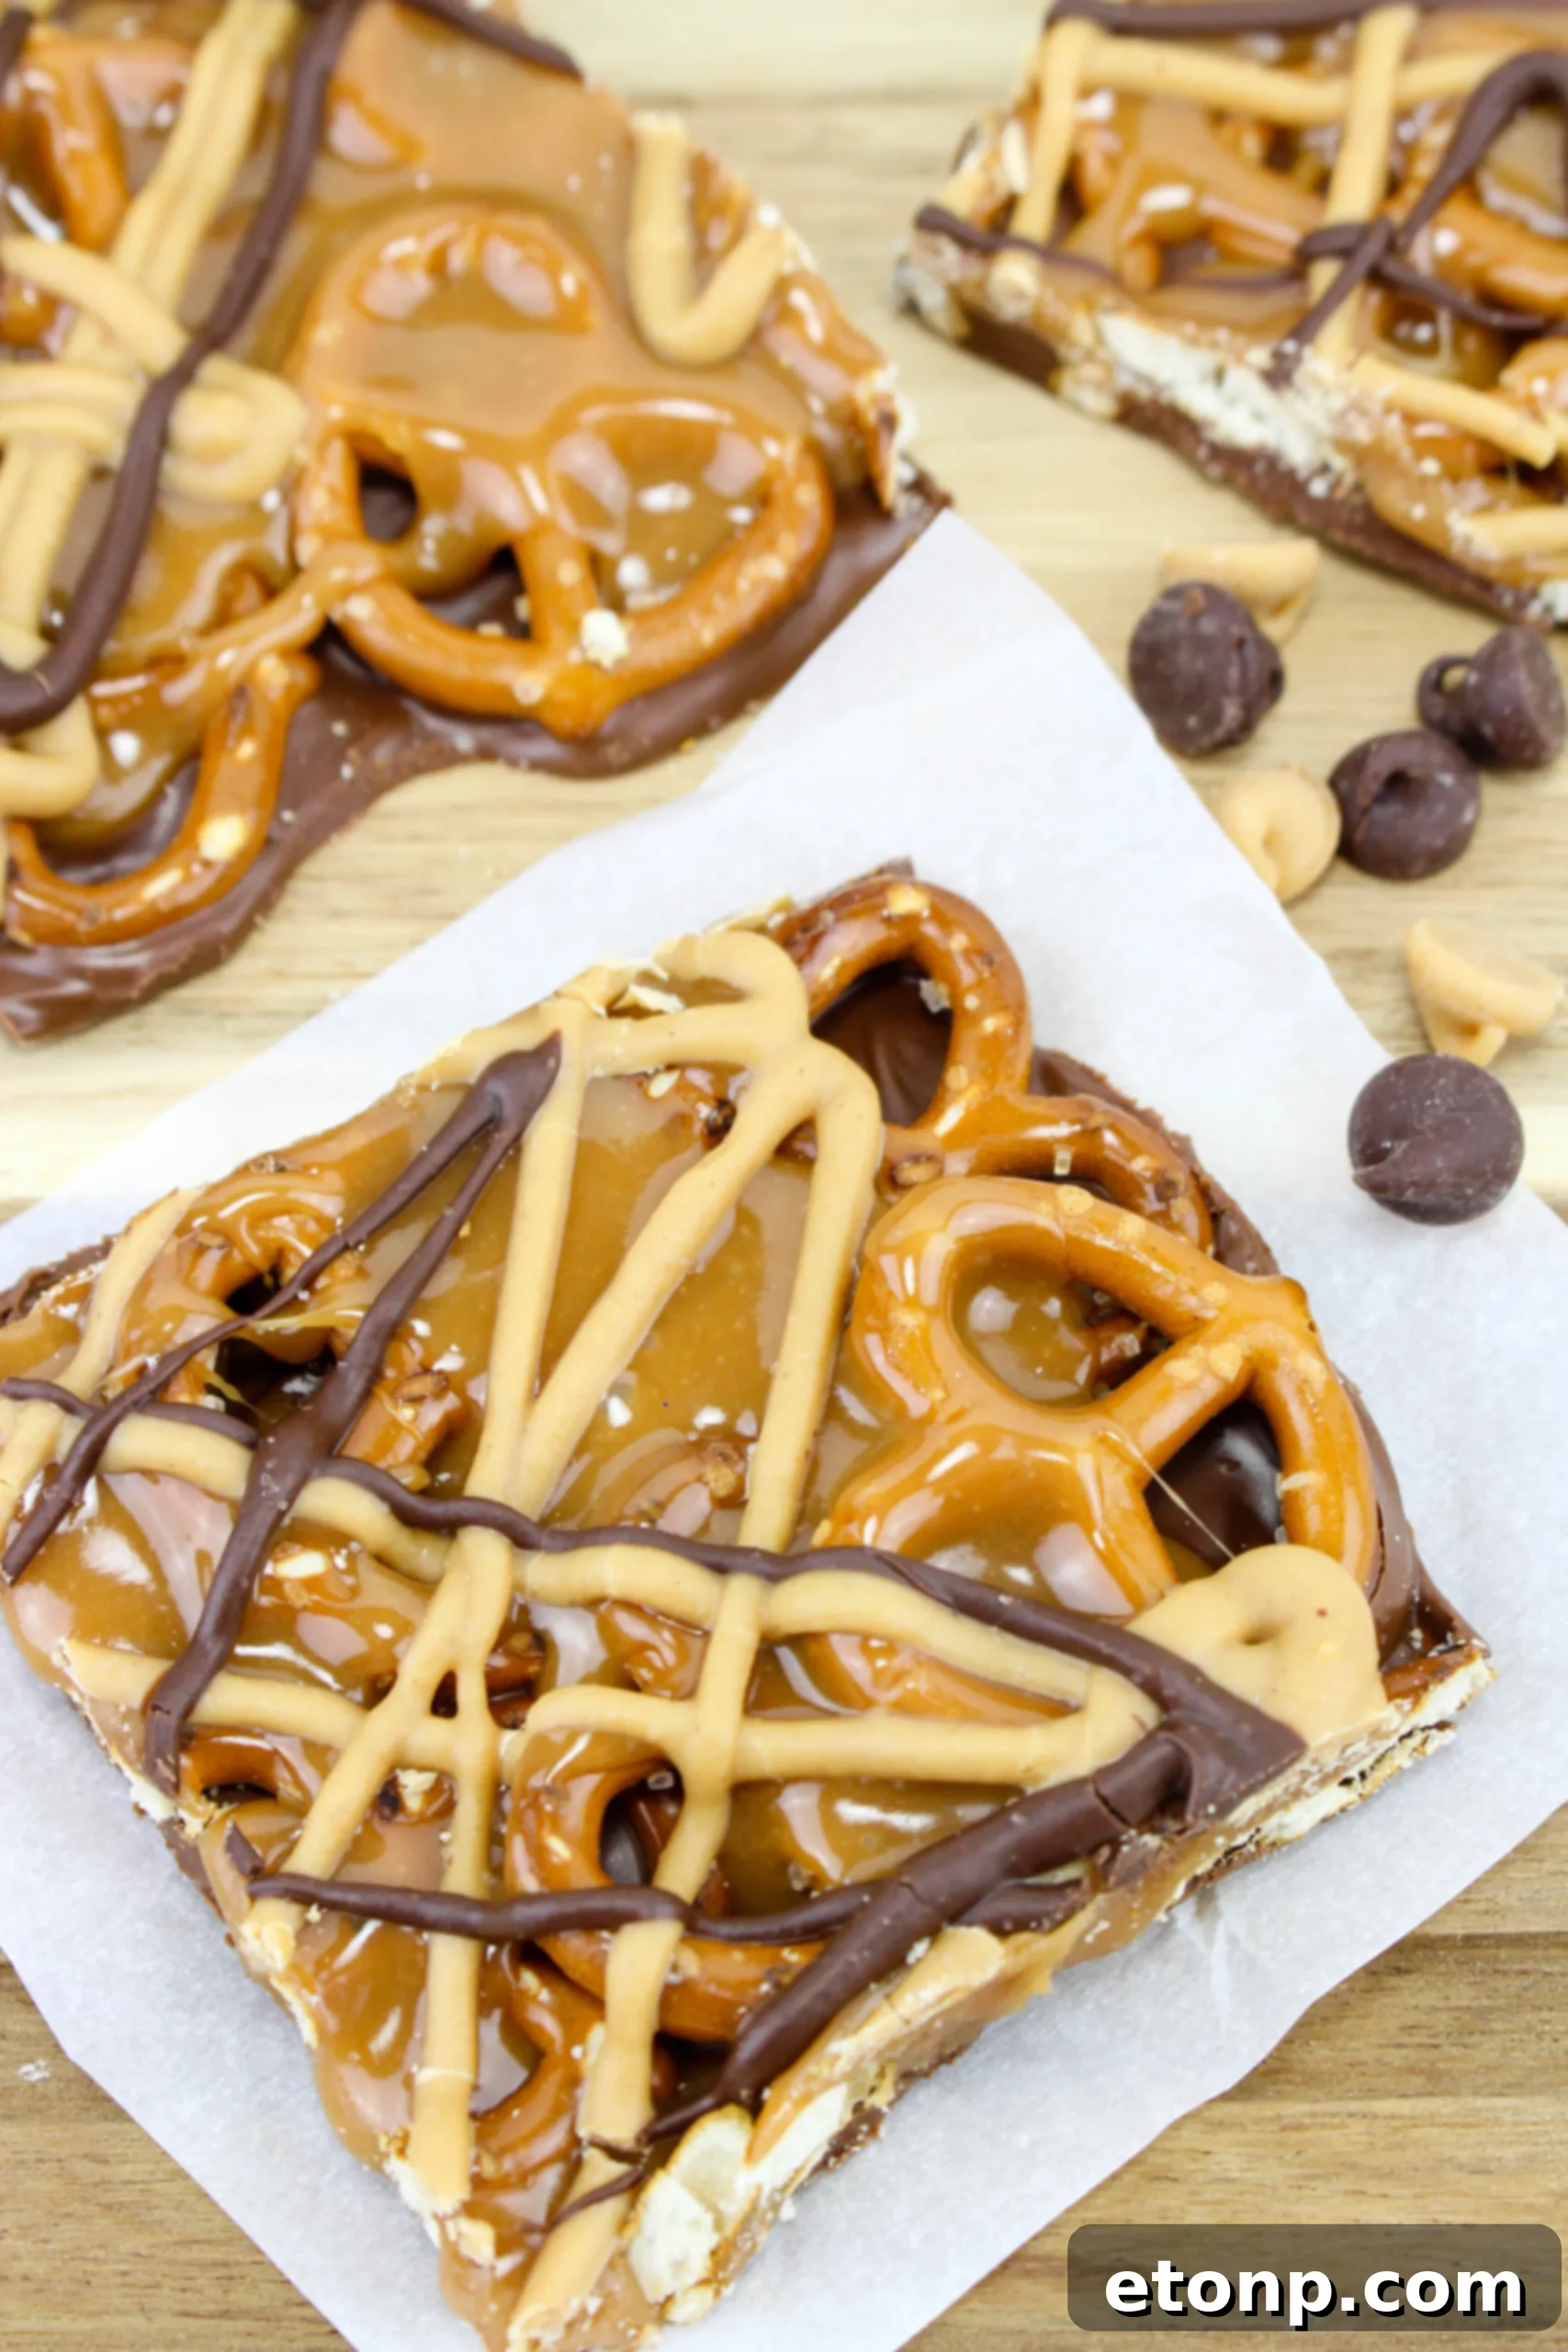
At its heart, this recipe is a celebration of simplicity and contrasting textures, making it an extraordinary 4-ingredient dessert recipe. Each bar is a symphony of flavor and texture: the delightful crunch of pretzels provides a robust, salty foundation, perfectly balanced by a generous, chewy layer of rich, homemade caramel. This gooey middle is then crowned with a smooth, glossy melted chocolate topping that hardens to a satisfying snap. A final sprinkle of sea salt amplifies every note, transforming a simple dessert into an unforgettable experience. When you slice into these bars, you’re greeted with distinct, yet harmoniously blended layers that offer a crispy, chewy, and utterly satisfying bite every single time.
Why You’ll Fall in Love with This Recipe
- Effortless No-Bake Convenience: Forget heating your kitchen or hogging the oven, especially during the bustling holiday season when oven space is prime real estate. These bars come together on your countertop with minimal fuss.
- Remarkably Simple Ingredients: You only need four core items, all of which are readily available and likely already in your pantry. This eliminates extra grocery trips and simplifies prep.
- A Symphony of Textures: Prepare for a multi-sensory experience with every bite. The crispy pretzels, gooey caramel, and firm chocolate create an addictive combination that’s crunchy, chewy, and smooth all at once.
- Fast & Foolproof Success: This recipe is designed for instant gratification. It’s incredibly quick to assemble, and the forgiving nature of the ingredients makes it virtually impossible to fail, even for novice bakers.
- Endlessly Customizable: While perfect as is, these bars are a fantastic canvas for creativity. Easily adapt them for any holiday or occasion by adding sprinkles, nuts, a drizzle of white chocolate, or different flavored chips.
- Crowd-Pleasing Powerhouse: The universal appeal of sweet and salty makes these bars a guaranteed hit at any gathering, disappearing quickly and earning you rave reviews.
Decoding the Deliciousness: A Closer Look at the Ingredients
Every ingredient in these No-Bake Caramel Pretzel Bars plays a crucial role in creating their addictive quality. Understanding their function helps ensure perfect results every time.
- Pretzels: These form the essential salty, crunchy base. Their inherent saltiness beautifully cuts through the sweetness of the caramel and chocolate, creating that coveted sweet-and-salty dynamic. They also provide vital structural integrity, holding everything together. Mini twist pretzels work wonderfully as they offer a great surface area for the caramel.
- Caramel: The heart of the bars! Caramel delivers that intensely rich, buttery, and deeply satisfying flavor profile. When melted with a touch of butter, it transforms into a wonderfully gooey, chewy layer that acts as the perfect adhesive, binding the pretzels and chocolate into one irresistible treat. Using individual caramel candies or “caramel bits” ensures a consistent, smooth texture.
- Chocolate Chips: These melt down into a luxurious, glossy topping. As they cool, they solidify, providing a beautiful finish that allows for clean, crisp slices. The type of chocolate can be customized to your preference, from classic milk chocolate to more intense dark chocolate.
- Butter (for Caramel): A small amount of butter is key to achieving the perfect caramel consistency. It adds an extra layer of richness, enhances the smooth texture, and prevents the caramel from becoming too stiff or sticky, making it easier to spread and chew.
While these four ingredients are the foundation, feel free to experiment with optional add-ins like finely chopped pecans, walnuts, or festive sprinkles. These enhancements can elevate the bars without complicating the simple preparation process.
When and Where to Serve These Delights
These versatile No-Bake Caramel Pretzel Bars are perfect for almost any occasion, making them a go-to recipe year-round.
- Potlucks & Parties: They are a dream for gatherings! Since no refrigeration is strictly needed, they travel exceptionally well and maintain their delicious texture at room temperature for hours, making them an ideal bring-along dessert.
- Thanksgiving Dessert Table: When your oven is already overflowing with turkey, pies, and casseroles, these no-bake bars are a genius solution. They offer a quick, sweet counterpoint without demanding precious oven space.
- Christmas Cookie Exchanges: Cut into elegant small squares, they make a unique and highly appreciated addition to any holiday cookie platter, standing out from traditional baked goods.
- Game Day Snacks: The irresistible sweet and salty combination makes them a fast favorite during sporting events, disappearing swiftly between touchdowns and goals.
- Kids’ Parties: Easy to eat and universally loved, they’re a stress-free option for children’s celebrations.
- Movie Nights & Casual Gatherings: Perfect for a relaxed evening, offering a gourmet snack experience with minimal effort.
Mastering Make-Ahead & Smart Storage Tips
One of the many joys of No-Bake Caramel Pretzel Bars is how well they can be prepared in advance, making your life easier, especially during busy times. Proper storage ensures they remain fresh and delicious for days.
- Freezer-Friendly: For long-term enjoyment, these bars freeze beautifully. Once fully set and sliced, wrap individual squares tightly in plastic wrap, then place them in an airtight freezer-safe container or bag. They can be stored in the freezer for up to 2 months. To serve, simply thaw them on the kitchen counter for about 30-60 minutes, or enjoy them slightly chilled for a firmer bite.
- Perfect Make-Ahead Dessert: Planning ahead? Assemble the bars completely the day before your event. Allow them to chill overnight in the refrigerator. This extended chilling time is crucial for achieving perfectly firm layers and clean, crisp edges when sliced, making presentation a breeze.
- Optimal Storage: Store the bars in an airtight container at room temperature for 3-4 days. This keeps the pretzels wonderfully crunchy. If you prefer a firmer texture or live in a warmer climate, refrigerate them for up to a week. Just be aware that refrigeration can make the pretzels slightly less crisp over time, but the overall flavor remains excellent.
- Preventing Stickiness: To prevent individual bars from sticking together during storage, you can place small squares of parchment paper between them in the container.
Frequently Asked Questions (FAQ)
Here are answers to common questions about making these delectable No-Bake Caramel Pretzel Bars:
Can I use store-bought caramel sauce instead of melting candies?
For the best results and a truly firm, chewy layer, we highly recommend using individually wrapped caramel candies (like Kraft Caramels) melted with a touch of butter. Store-bought caramel *ice cream topping* is generally thinner and contains more liquid, which might prevent the bars from setting up as firmly as desired. If you absolutely must use jarred caramel, consider reducing the amount of added butter slightly and extend the chilling time significantly to help it firm up for cleaner slicing. The texture might still be softer than with traditional caramels.
Do these bars need to be refrigerated?
No, not necessarily. These bars hold up beautifully at room temperature for several days, maintaining a perfectly delightful texture. However, refrigerating them will make the chocolate layer extra firm and result in even cleaner, sharper slices. If your kitchen is particularly warm, refrigeration is a good idea to prevent the chocolate from getting too soft.
Can I double the recipe for a larger crowd?
Absolutely! This recipe scales up effortlessly. Simply double all the ingredients and use a larger 9×13-inch baking pan, or for truly massive parties, a rimmed half-sheet pan will work perfectly. Ensure your pan is adequately lined with parchment paper for easy removal.
What kind of chocolate works best for the topping?
Semi-sweet or dark chocolate chips are often preferred as they provide a lovely depth of flavor that beautifully balances the sweetness of the caramel. However, if you have an extra sweet tooth or are serving to children, milk chocolate chips are a perfectly delicious option. White chocolate can also be used for a different flavor profile and aesthetic.
Can I add nuts or other toppings?
Yes, please do! This is where customization truly shines. Chopped pecans, walnuts, or almonds can be pressed into the caramel layer before the chocolate goes on, adding extra crunch and flavor. Festive sprinkles, a drizzle of white chocolate, or a sprinkle of sea salt flakes (if not already added) are wonderful additions for holidays or special occasions.
How do I cut these bars cleanly without making a mess?
The key to neat, bakery-style squares is patience and the right tools. Ensure the bars are fully set and well-chilled (preferably refrigerated for at least 2-3 hours). Use a very sharp chef’s knife. For even cleaner cuts, lightly coat the knife blade with nonstick cooking spray or wipe it with a little neutral oil, especially if the caramel is sticky. Wipe the knife clean between each cut to prevent dragging and messy edges.
Can I make this recipe gluten-free?
Definitely! Simply swap out regular pretzels for your favorite brand of gluten-free pretzels. The rest of the ingredients are naturally gluten-free, making this a fantastic dessert option for those with dietary restrictions.
Endless Creativity: Variations & Substitutions
These No-Bake Caramel Pretzel Bars are incredibly versatile, allowing you to easily adapt them to your taste or for different occasions.
- Nutty Indulgence: For an extra layer of crunch and rich flavor, sprinkle about ½ cup of finely chopped pecans or almonds over the pretzel layer before pouring on the caramel.
- Festive Holiday Flair: Elevate them for Christmas by drizzling white chocolate over the top along with the regular chocolate, and then sprinkling crushed peppermint candies or red and green sprinkles for a visually stunning and delicious treat.
- Dark Chocolate Lover’s Dream: Swap out milk chocolate chips for a high-quality dark chocolate (60-70% cacao) for a more intense, less sweet, and sophisticated flavor profile.
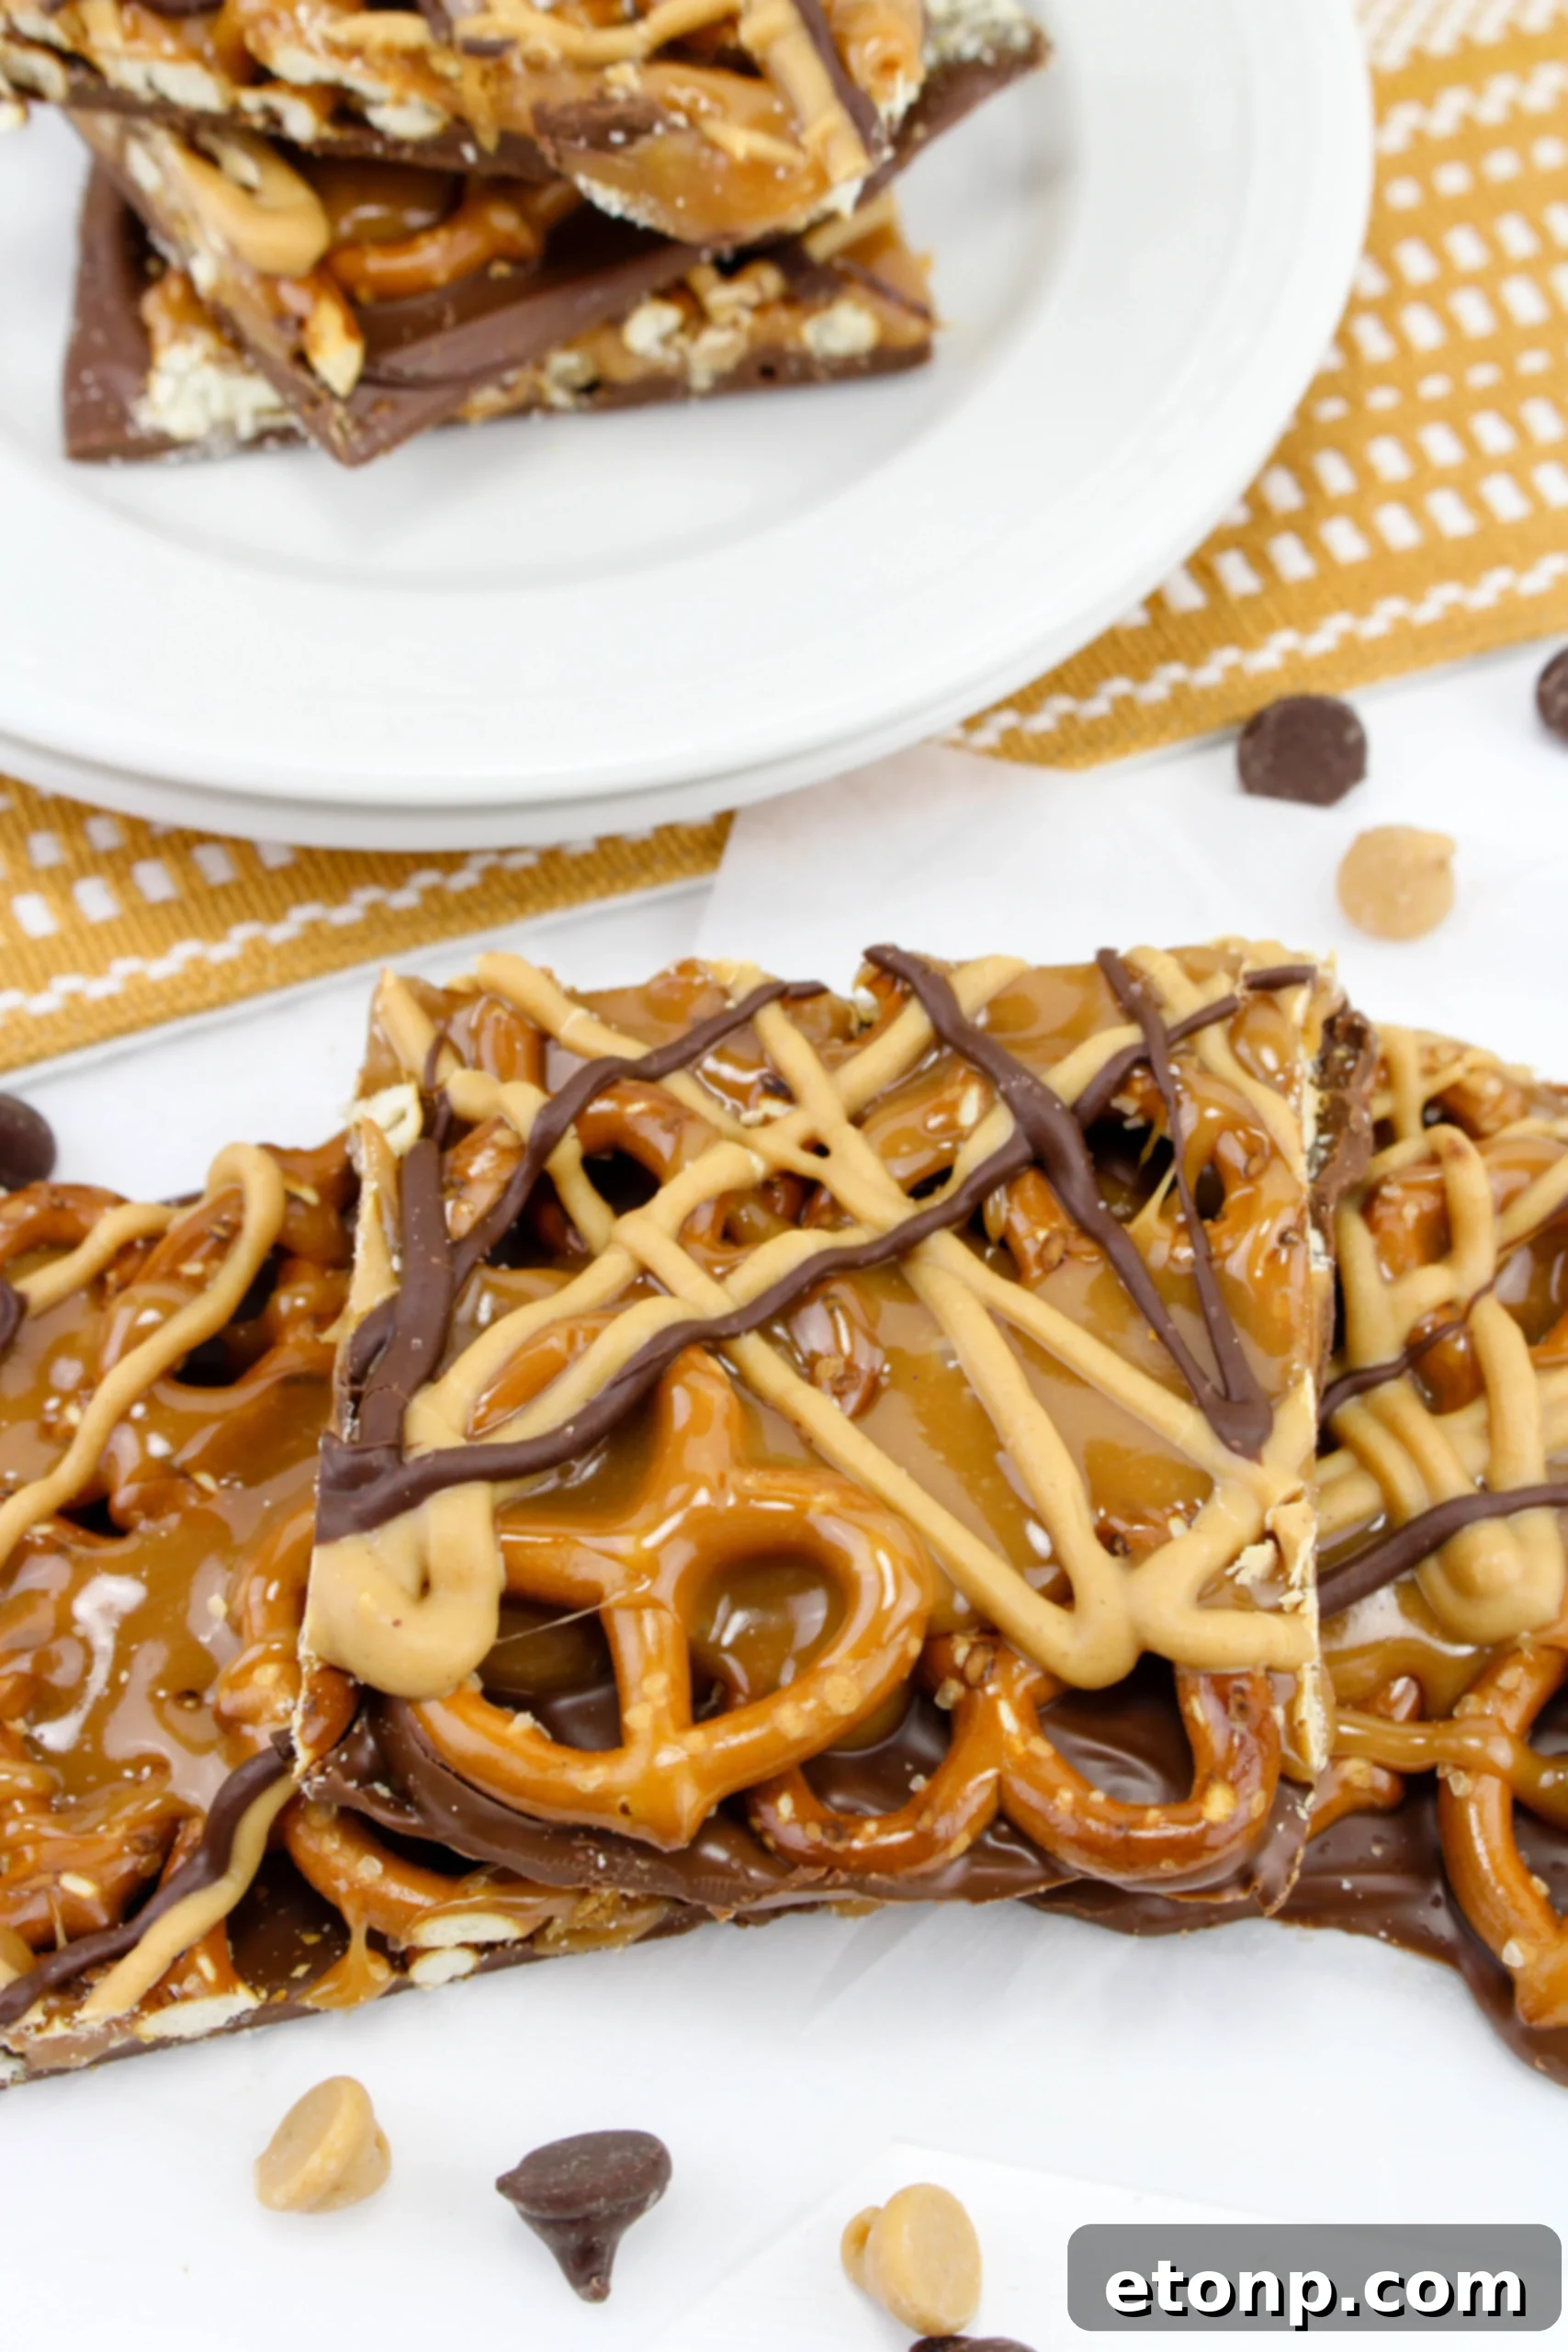
- Peanut Butter Caramel Twist: For a delightful Reese’s-inspired flavor, stir 2-3 tablespoons of smooth peanut butter into the melted caramel mixture before spreading it over the pretzels. You can also drizzle melted peanut butter chips over the cooled chocolate topping.
- Spice It Up: A tiny pinch of flaky sea salt on top after the chocolate sets not only enhances the flavor but also adds a beautiful professional touch. You could also sprinkle a tiny bit of cinnamon into the caramel for a warm spice note.
- Butterscotch Bliss: Replace half or all of the chocolate chips with butterscotch chips for a different sweet, buttery flavor.
Creative Leftover Ideas (If There Are Any!)
It’s rare to have leftovers of these addictive bars, but if you do, here are some delicious ways to repurpose them:
- Holiday Cookie Tray Addition: They are a fantastic no-bake alternative to traditional cookies and fudges, offering variety and ease during holiday baking marathons.
- Ice Cream Mix-In: Chop any remaining bars into bite-sized pieces and fold them into homemade vanilla or chocolate ice cream for a gourmet treat.
- Yogurt Parfait Topping: Crumble a few pieces over yogurt parfaits layered with fresh fruit for an elevated breakfast or snack.
- Dessert Pizza Topping: Break them into small shards and sprinkle over a sweet dessert pizza (e.g., with a cream cheese base and fruit) for added texture.
Budget Breakdown: Affordable Indulgence
One of the many appealing aspects of these bars is their cost-effectiveness. Using simple, pantry-friendly ingredients, you can whip up a batch that serves a crowd without breaking the bank.
- Pretzels: Approximately $1.50 (for an 8 oz bag)
- Caramel candies: Approximately $3.00 (for an 11 oz bag)
- Chocolate chips: Approximately $2.00 (for an 11.5 oz bag)
- Butter: Approximately $0.75 (for a few tablespoons)
Estimated Total Cost: Around $7.25. This yields at least 16 generous squares, bringing the cost per serving to well under $0.50 each – an incredible value for such a decadent treat!
Lighten-Up Version / Lower Calorie Considerations
While these bars are an indulgent treat, there are small adjustments you can make if you’re looking to reduce the calorie or sugar content:
- Opt for Dark Chocolate: Using dark chocolate chips (70% cacao or higher) will naturally reduce the sugar content compared to milk chocolate, while still providing a rich flavor.
- Sugar-Free Caramel Alternatives: Explore sugar-free caramel candies or sugar-free caramel sauces. Be mindful that these may alter the texture slightly and often contain artificial sweeteners, so test a small batch first.
- Mindful Portion Control: The simplest way to “lighten up” any dessert is through portion control. Cut the bars into smaller squares, making it easier to enjoy a taste without overindulging.
- Reduced Butter: You can slightly reduce the amount of butter used in the caramel, but avoid removing it entirely as it’s crucial for texture.
Tried and True: Reader Favorite Tips & Ideas
From countless batches made by home bakers, here are some favorite tips for mastering these No-Bake Caramel Pretzel Bars:
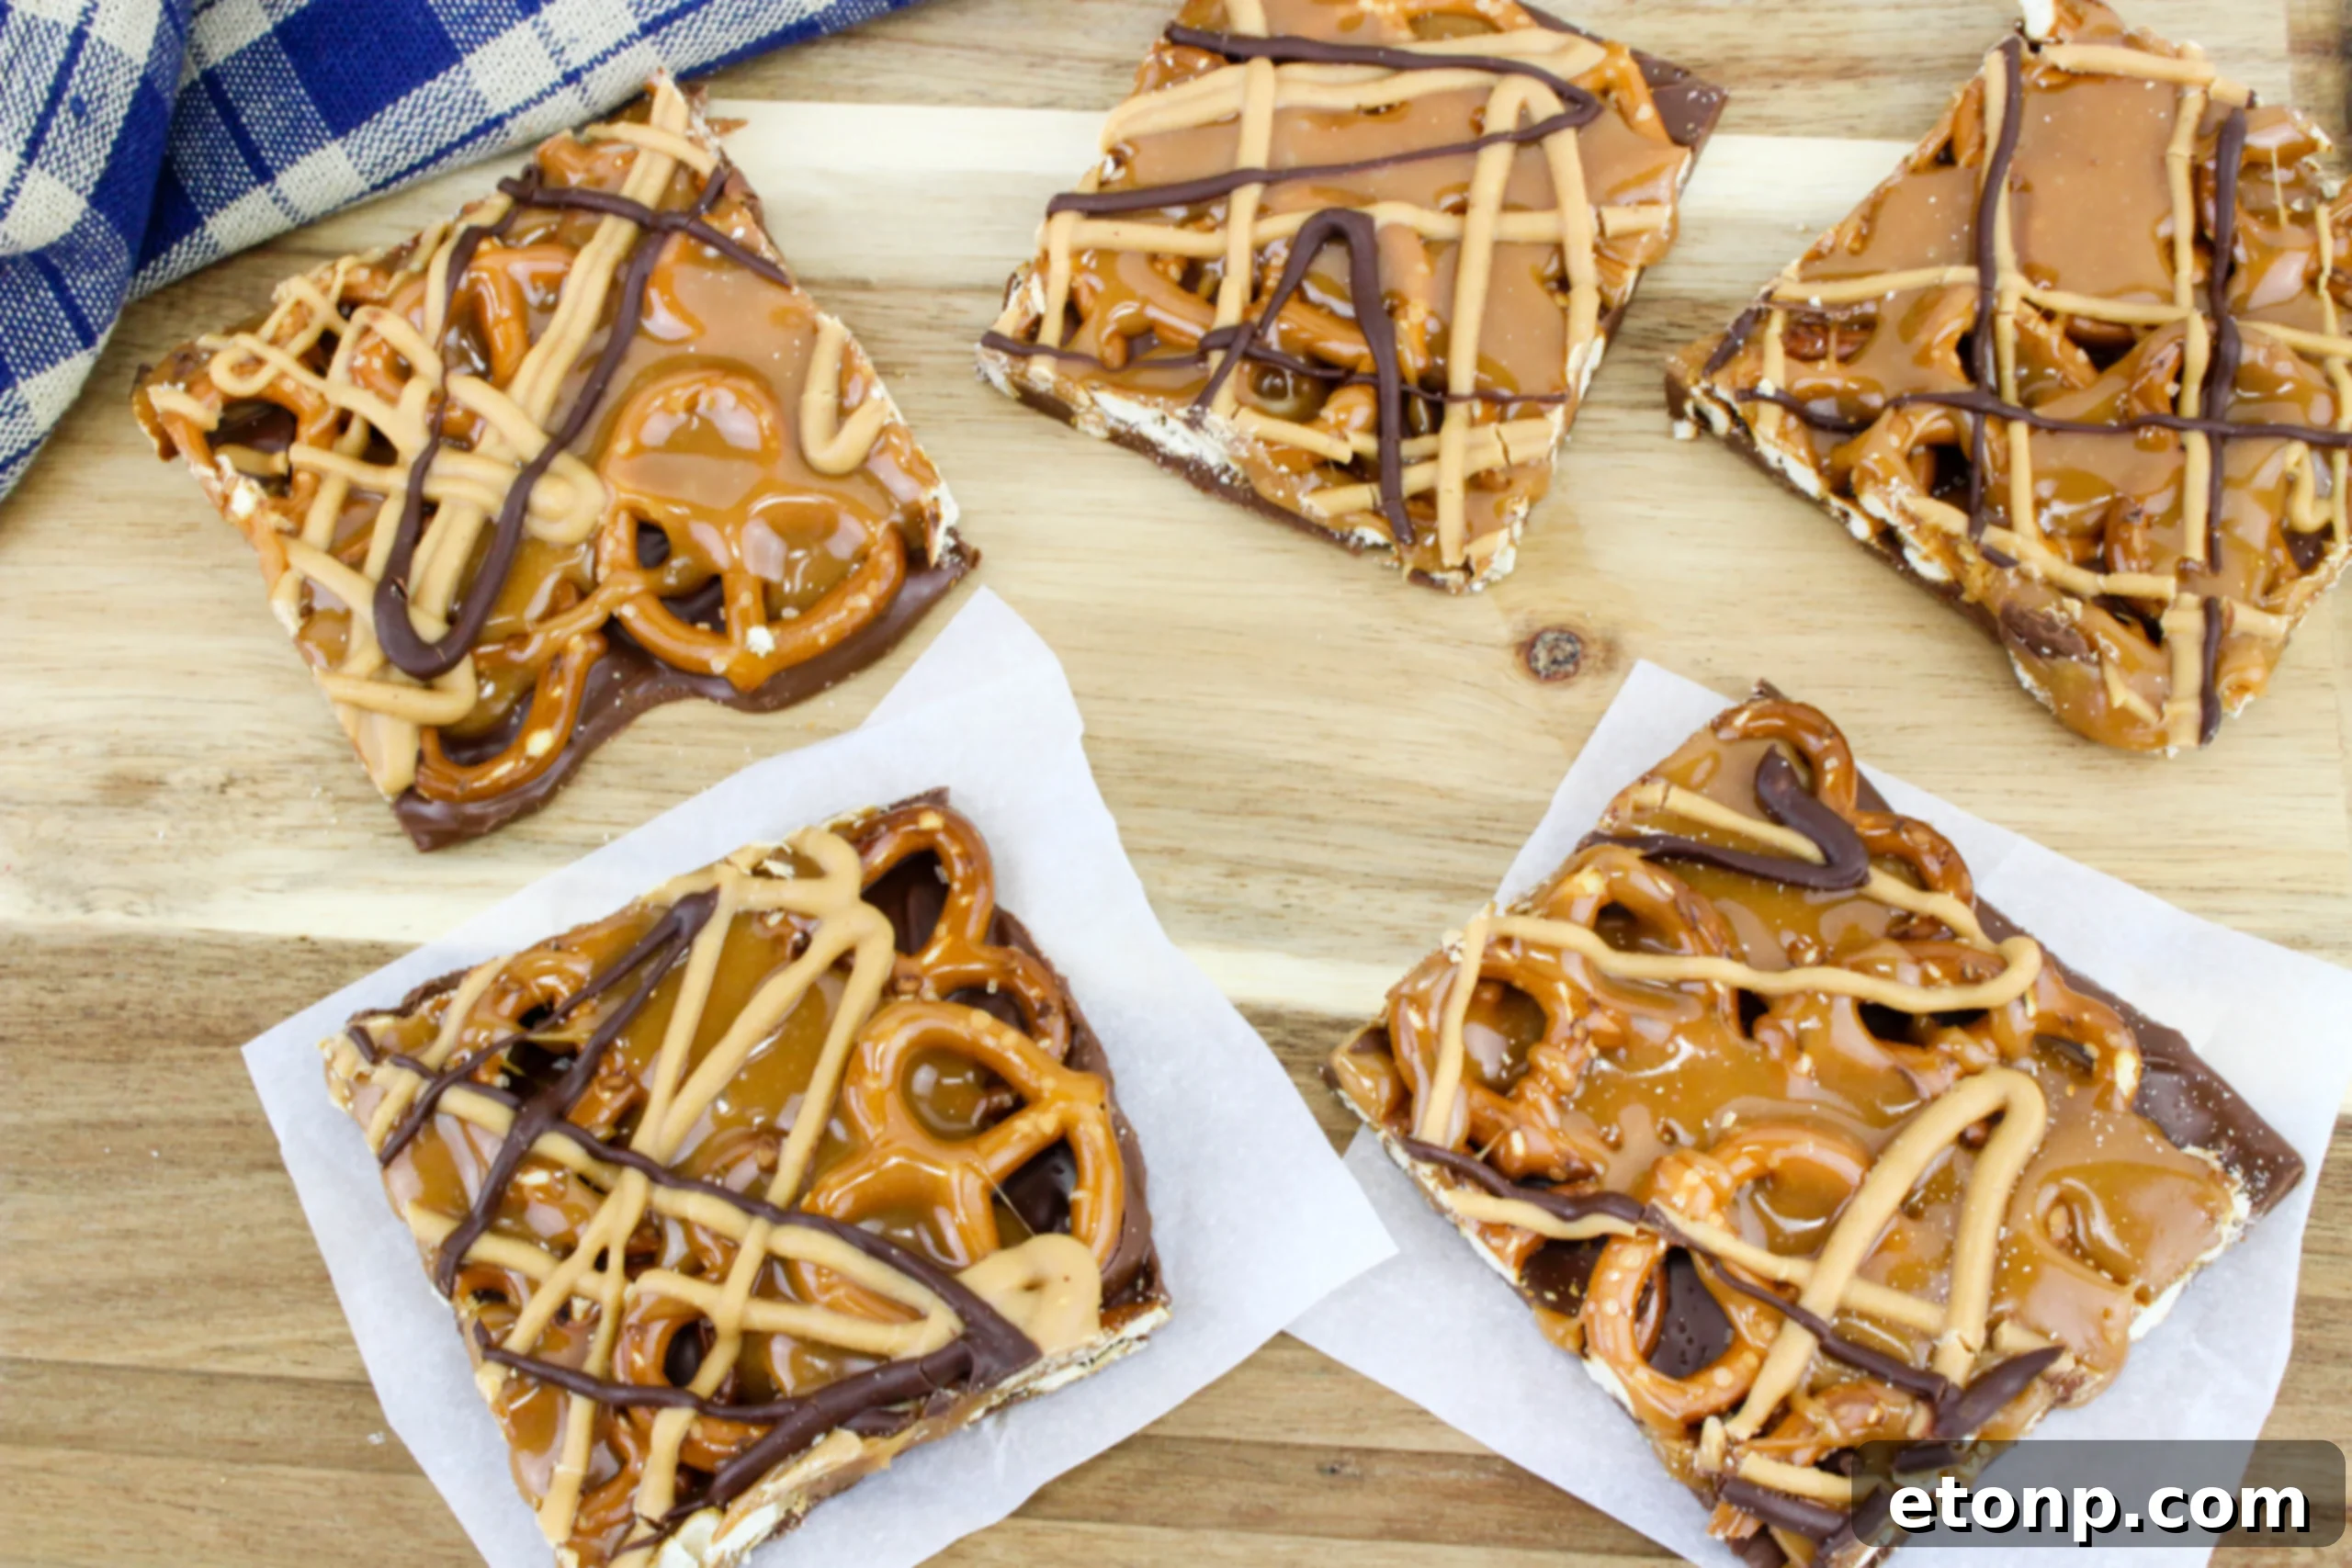
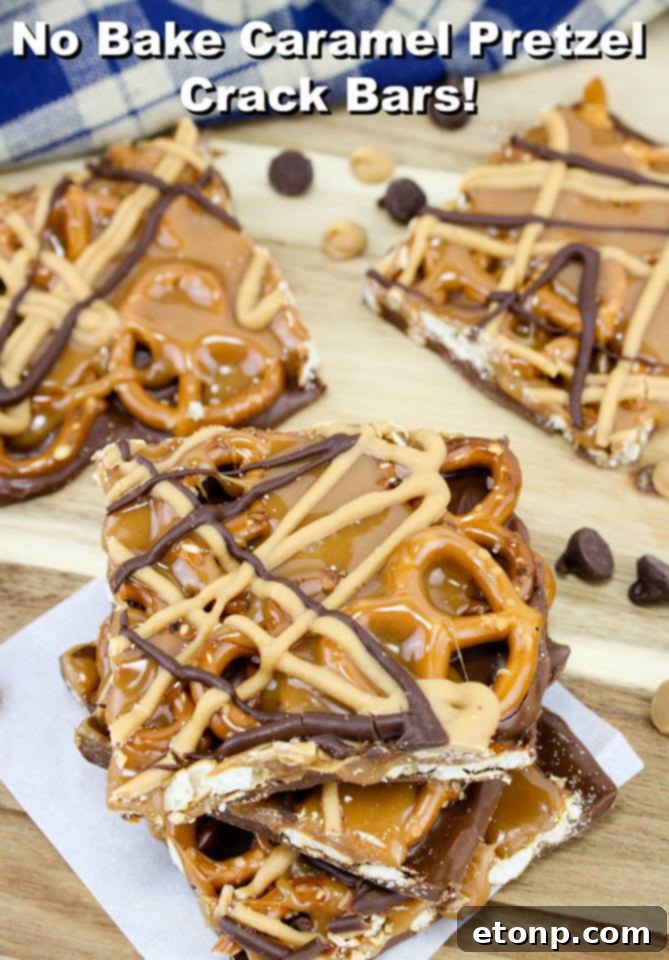
- Bakery-Style Drizzle: For an elegant, professional finish, drizzle both white chocolate and dark chocolate in contrasting patterns over the final chocolate layer.
- Parchment Paper is Your Best Friend: Always, always line your baking pan with parchment paper, leaving an overhang on the sides. This creates “handles” for the easiest, mess-free removal of the entire slab of bars once set.
- The Pizza Cutter Trick: Once the bars are fully firm and chilled, a pizza cutter can be a surprisingly effective tool for slicing through the layers quickly and cleanly, especially if you want perfectly straight lines.
- Slightly Crushed Pretzels: Some readers prefer to slightly crush a portion of their pretzels before laying them down. This can create a more solid, less gap-filled pretzel base.
Nutrition Information (Approx. Per Square, based on 16 servings)
Please note that these values are approximate and can vary based on specific brands and exact measurements used.
- Calories: 220
- Fat: 11g
- Carbohydrates: 28g
- Sugar: 19g
- Protein: 2g
My Personal Kitchen Notes & Secret to Success
These No-Bake Caramel Pretzel Bars have become such a staple in my kitchen that I usually make at least two pans for every major holiday – one for the party, and a secret stash for my family to snack on while I’m still busy cooking the main feast. Through countless batches, I’ve discovered a few secrets to achieving absolute perfection.
The number one rule? Let them chill long enough. Seriously, resist the urge to cut into them too soon. A minimum of 2 hours in the fridge is ideal, but an overnight chill yields superior results, creating distinct layers that don’t squish or crumble. This patience is rewarded with beautifully defined, easy-to-handle squares. My second golden rule is the power of a sharp, lightly oiled knife. It makes an astonishing difference! Every single time I use this trick, I get those pristine, bakery-perfect squares that look like they’ve been crafted by a professional. Don’t skip wiping the knife between cuts, it really makes a difference. These bars are proof that sometimes, the simplest recipes create the most memorable and beloved desserts.
The Ultimate Holiday Sweet: Perfect for Thanksgiving and Christmas with Just 4 Easy Ingredients!
When the holidays sweep in, my focus shifts to recipes that promise maximum impact with minimal effort – and these No-Bake Caramel Pretzel Bars effortlessly tick every single box. With an astonishingly short list of just 4 simple ingredients (yes, really!), you can create a dessert that will earn you endless compliments without adding an ounce of stress to your already bustling holiday agenda.
These bars have become a non-negotiable tradition in my household, gracing our dessert tables every single Thanksgiving and Christmas. They possess that rare, magical ability to be sweet, salty, crunchy, and chewy all at once – a texture and flavor profile that appeals to absolutely everyone. Best of all, they come together in mere minutes, freeing me up to devote my attention to the elaborate roasts, casseroles, and savory dishes that demand oven space, while dessert practically takes care of itself in the fridge.
But perhaps the greatest charm of these bars is their incredible customizability. They are a blank canvas for your festive imagination! Picture them drizzled with elegant white chocolate for a winter wonderland aesthetic, or adorned with vibrant red and green sprinkles for a festive Christmas celebration. For Thanksgiving, a layer of finely chopped pecans nestled within the caramel adds a touch of autumnal sophistication. With just one pan and a handful of pantry staples, you can conjure up a dessert that looks like it’s been plucked straight from a high-end bakery display – but only you need to know just how incredibly effortless it was to create!
My Final, Heartfelt Thoughts
Every single time I prepare these glorious No-Bake Caramel Pretzel Bars, I’m profoundly reminded why they’ve ascended to the status of a cherished holiday tradition in my home. They effortlessly meet every demand of this demanding time of year – they’re remarkably easy, astonishingly fast, and crucially, they require absolutely no oven space, which is a blessing when the turkey, casseroles, and pies already have it operating on overtime. With just 4 simple ingredients and a mere few minutes of hands-on preparation, I can present a dessert that exudes bakery-quality sophistication, yet takes less time to assemble than it does to brew a fresh pot of coffee.
Beyond their ease, their versatility is truly remarkable. I whip up batches for Thanksgiving, needing a delightful sweet treat that won’t compete for oven real estate. They feature prominently on my Christmas cookie platters, offering a unique, non-baked gem amongst the sea of sugar cookies and fudges. And for those inevitable, last-minute party invitations, they are my go-to, never-fail recipe. My children adore the captivating sweet-salty crunch, while James vehemently declares the gooey caramel layer to be the absolute best part. As for me, I relish the opportunity to customize them with festive holiday sprinkles, a sprinkle of chopped nuts, or even an elegant drizzle of white chocolate when I’m feeling a touch fancy.
Honestly? These bars are my culinary saviors during the most hectic holiday seasons. I can effortlessly prepare a batch well in advance, store them confidently in the fridge or freezer, and have a truly stress-free dessert ready to slice and serve at a moment’s notice when unexpected guests arrive. Whether your intention is to prepare them for a grand party, thoughtfully wrap them as homemade gifts, or simply keep a tray on hand for a cozy weekend indulgence, this recipe stands as undeniable proof: sometimes, the simplest desserts are unequivocally the most delicious and deeply satisfying.
Trust me on this — make one pan for the party and one entirely for yourself. Your future self will be eternally grateful.
Please remember to SHARE on Facebook and PIN IT!
FOLLOW ME ONPINTERESTBY CLICKING HERE <——

No Bake Caramel Pretzel Bars
Easy 4-ingredient No-Bake Caramel Pretzel Bars are a huge holiday favorite and perfect for any occasion!
Ingredients
- 11.5 oz bag of Hershey’s Milk Chocolate Chips
- 11 oz bag of Kraft Caramel Bits (or equivalent soft caramel candies)
- ½ Cup Reese’s Peanut Butter Chips (optional, for extra flavor)
- 8 oz of Mini Twist Pretzels
- 2 Tablespoons Water (for melting caramel)
- Optional: 1-2 Tablespoons Butter (for melting caramel, if needed for creaminess)
Instructions
- Line a 9×13 inch baking pan with parchment paper, allowing an overhang on the sides for easy lifting.
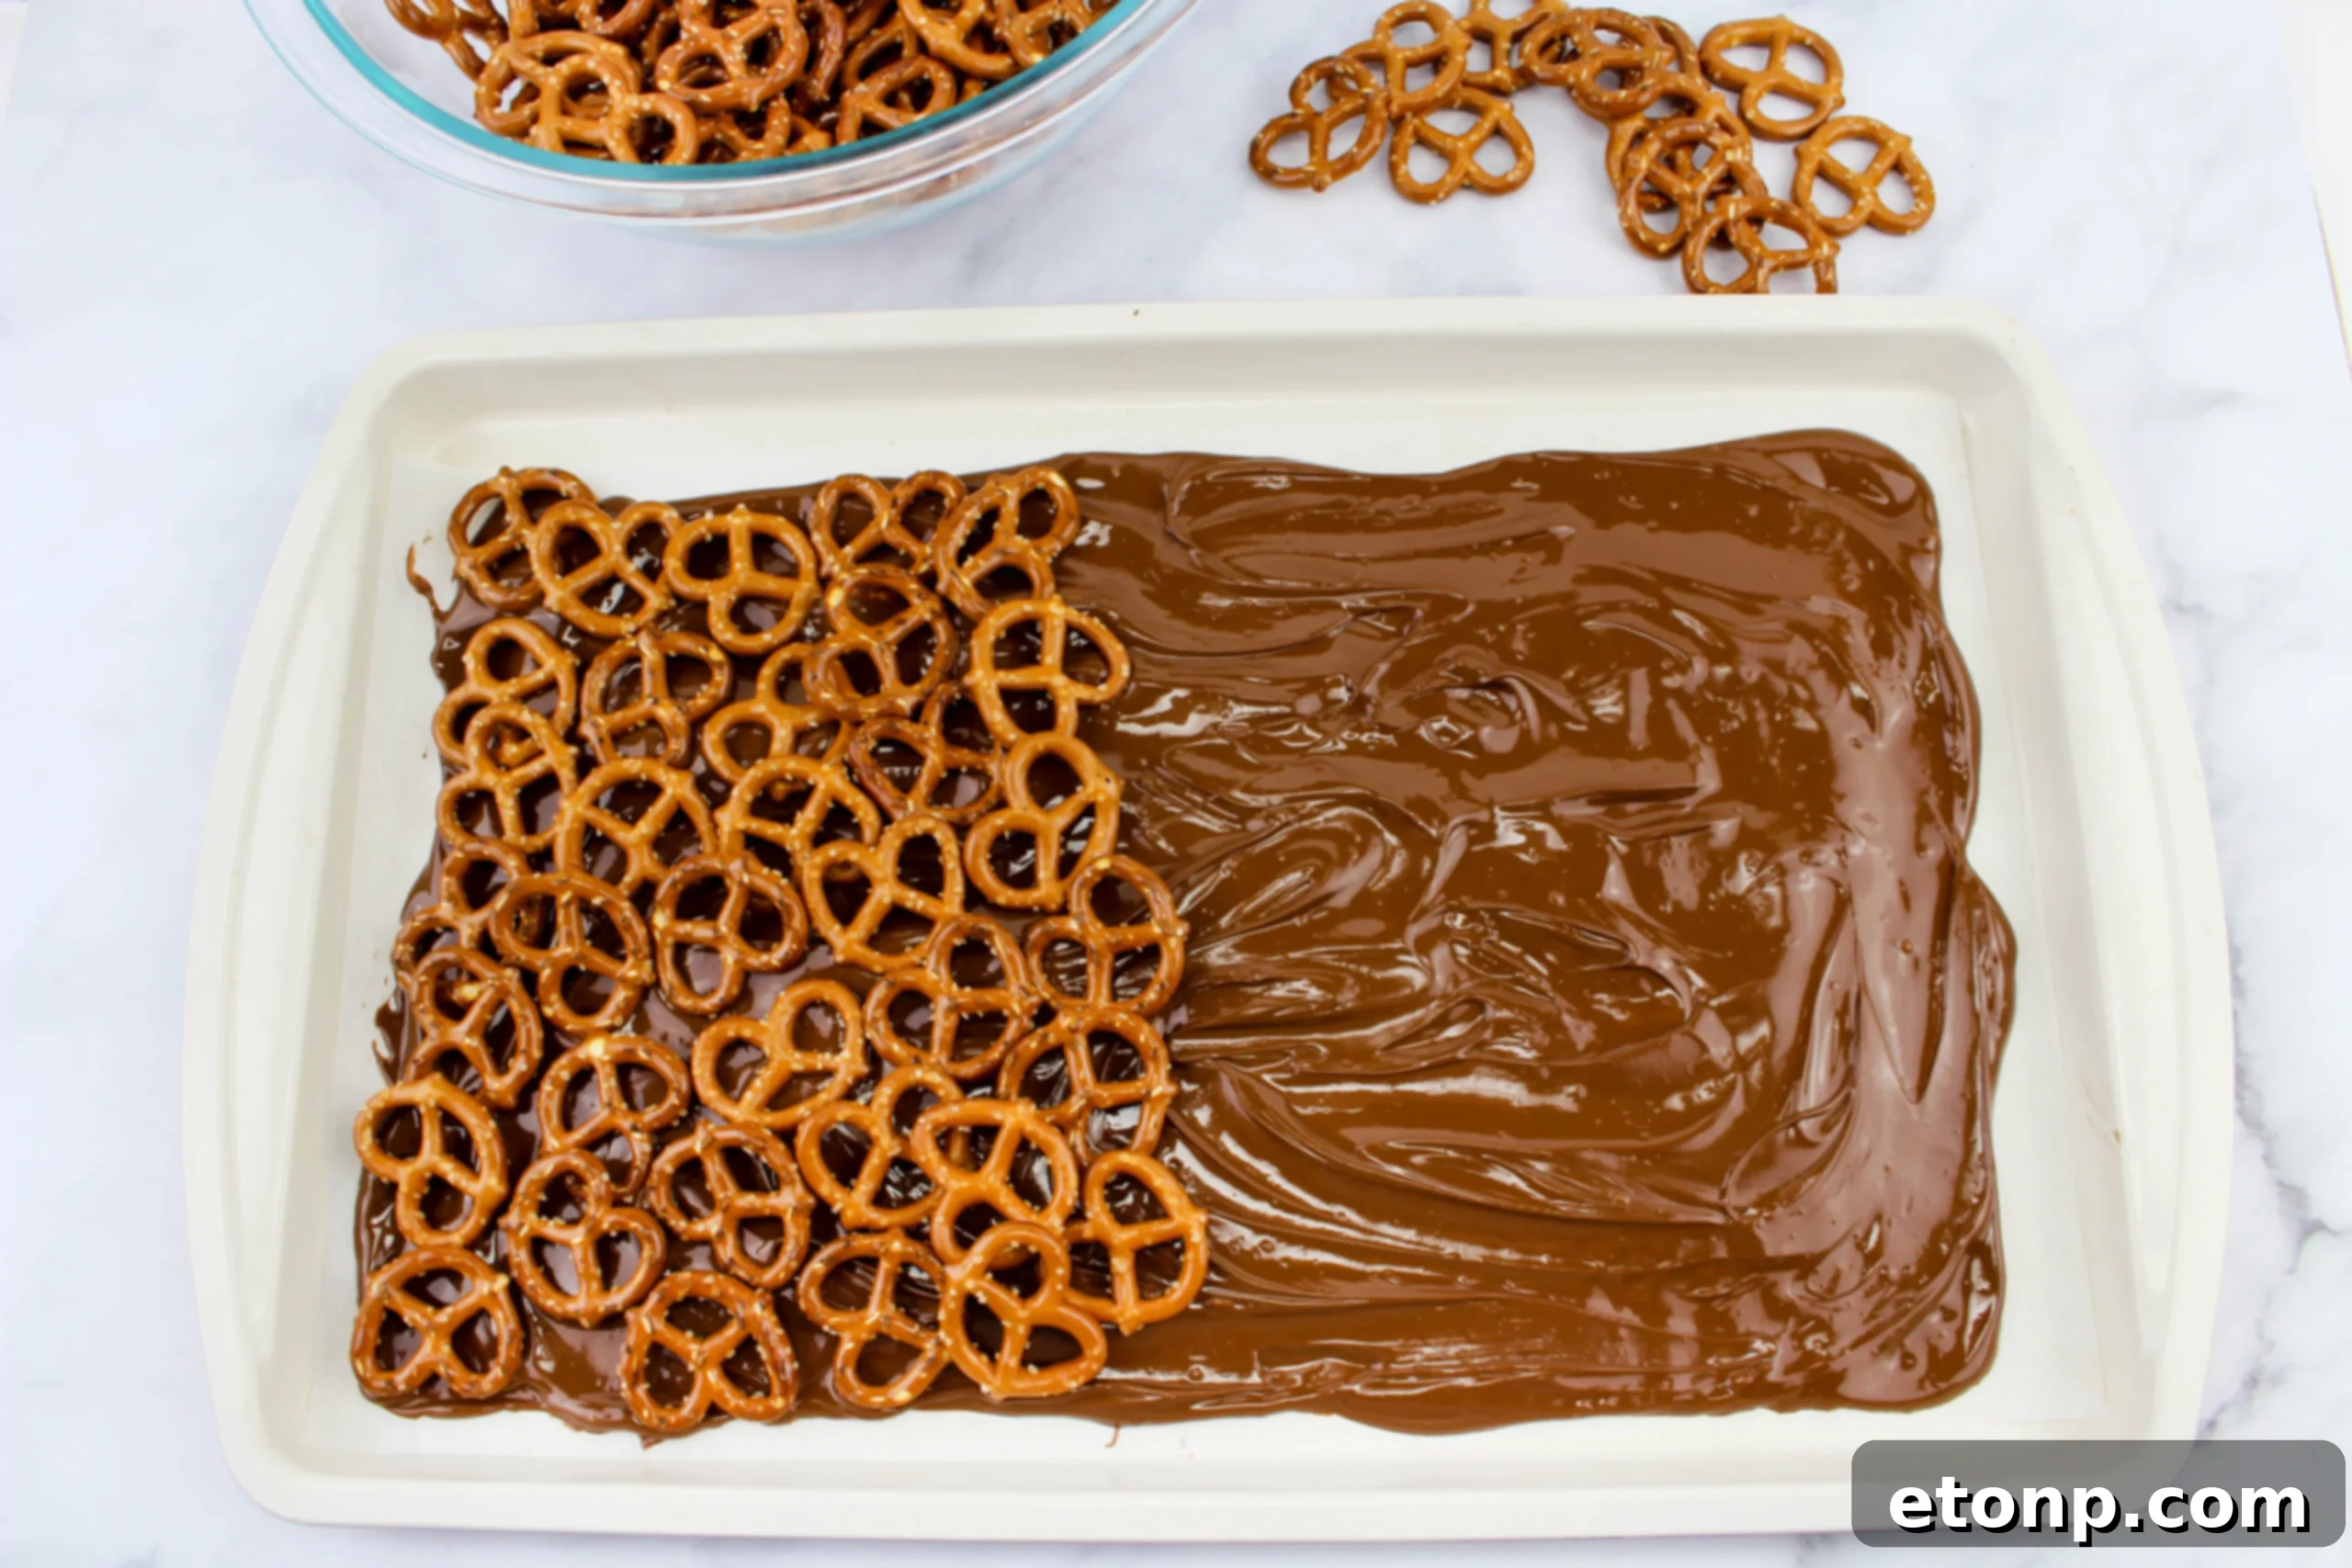
- In a microwave-safe glass bowl, add the Hershey’s milk chocolate chips (reserve about ¼ cup of chips for later drizzling). Microwave in 20-second intervals, stirring well after each, until completely melted and smooth.
- Pour the melted chocolate onto the parchment-lined baking sheet and spread evenly with an offset spatula or the back of a spoon to create a thin base layer.
- Arrange the mini twist pretzels on top of the melted chocolate. You can lay them flat, slightly overlapping, to cover the entire chocolate layer. Gently press them down to adhere to the chocolate.
- In another microwave-safe bowl, combine the Kraft caramel bits (or unwrapped caramel candies) with 2 tablespoons of water. Microwave for 1 ½ to 2 minutes, stirring every 30 seconds, until the caramel is fully melted and smooth. If desired, stir in 1-2 tablespoons of butter for extra creaminess.
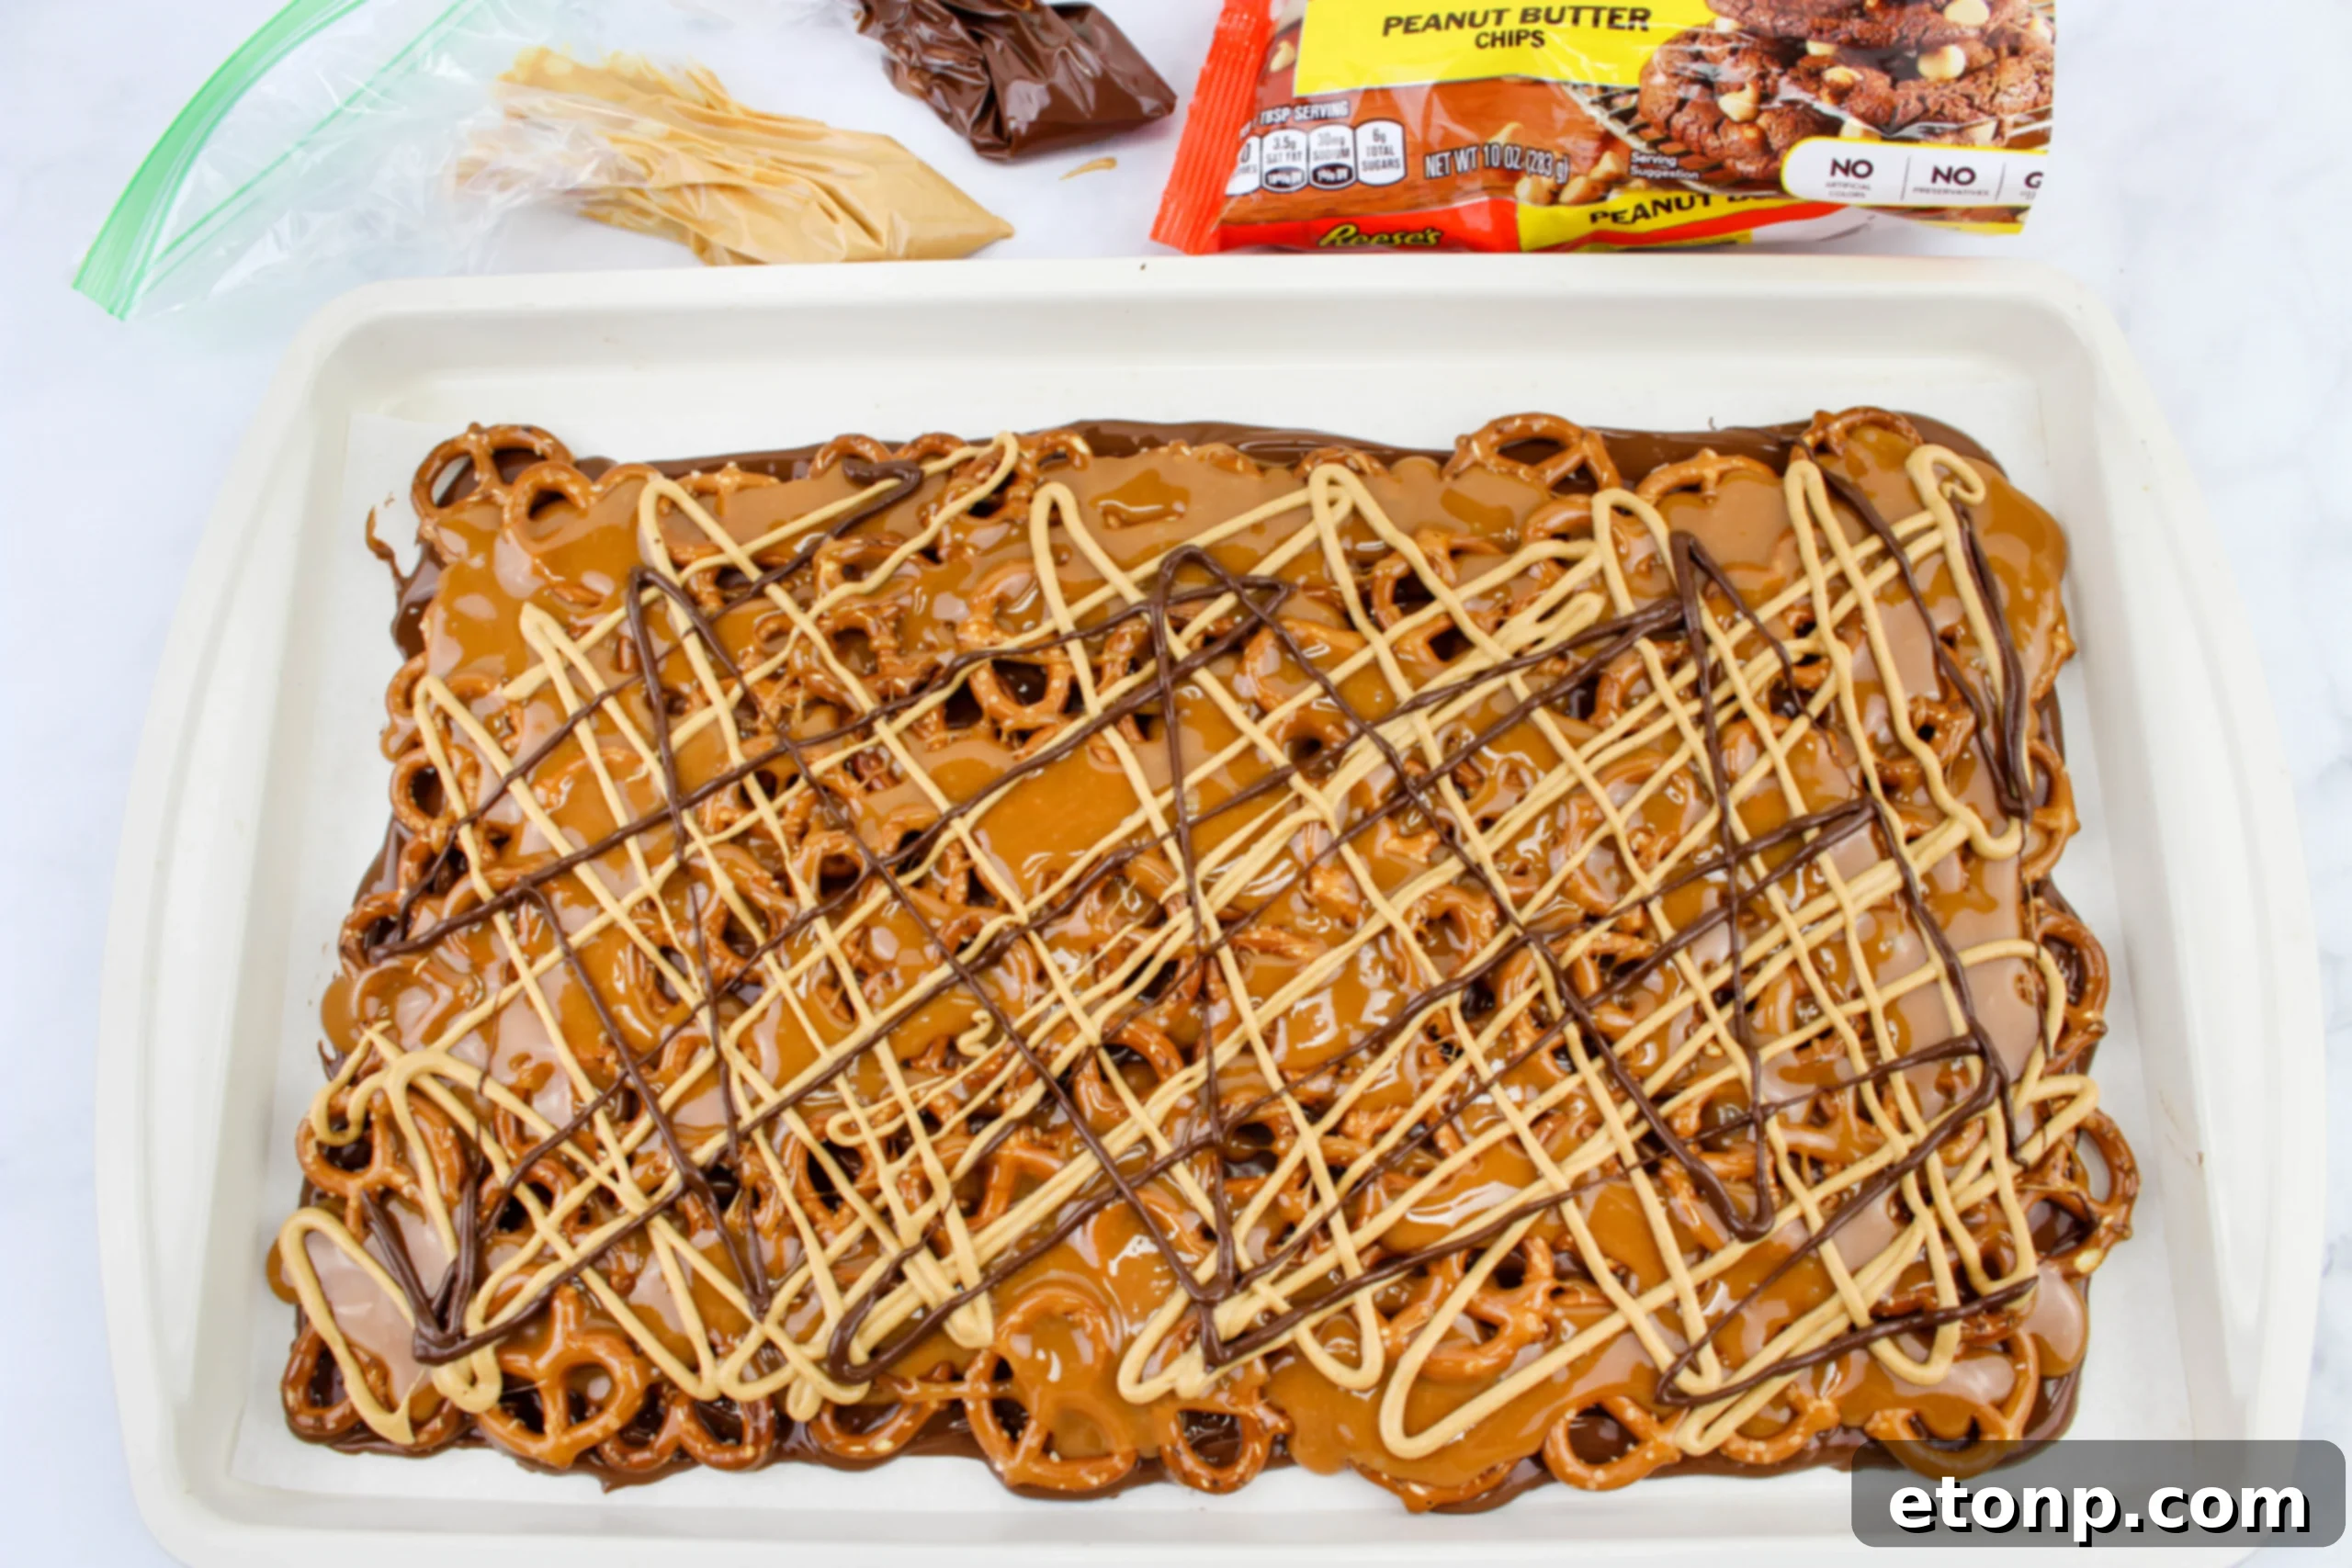
- Drizzle and spread the warm, gooey caramel evenly over the pretzel layer, ensuring all pretzels are coated. Allow to cool and set slightly at room temperature, or place in the refrigerator for 15-20 minutes.
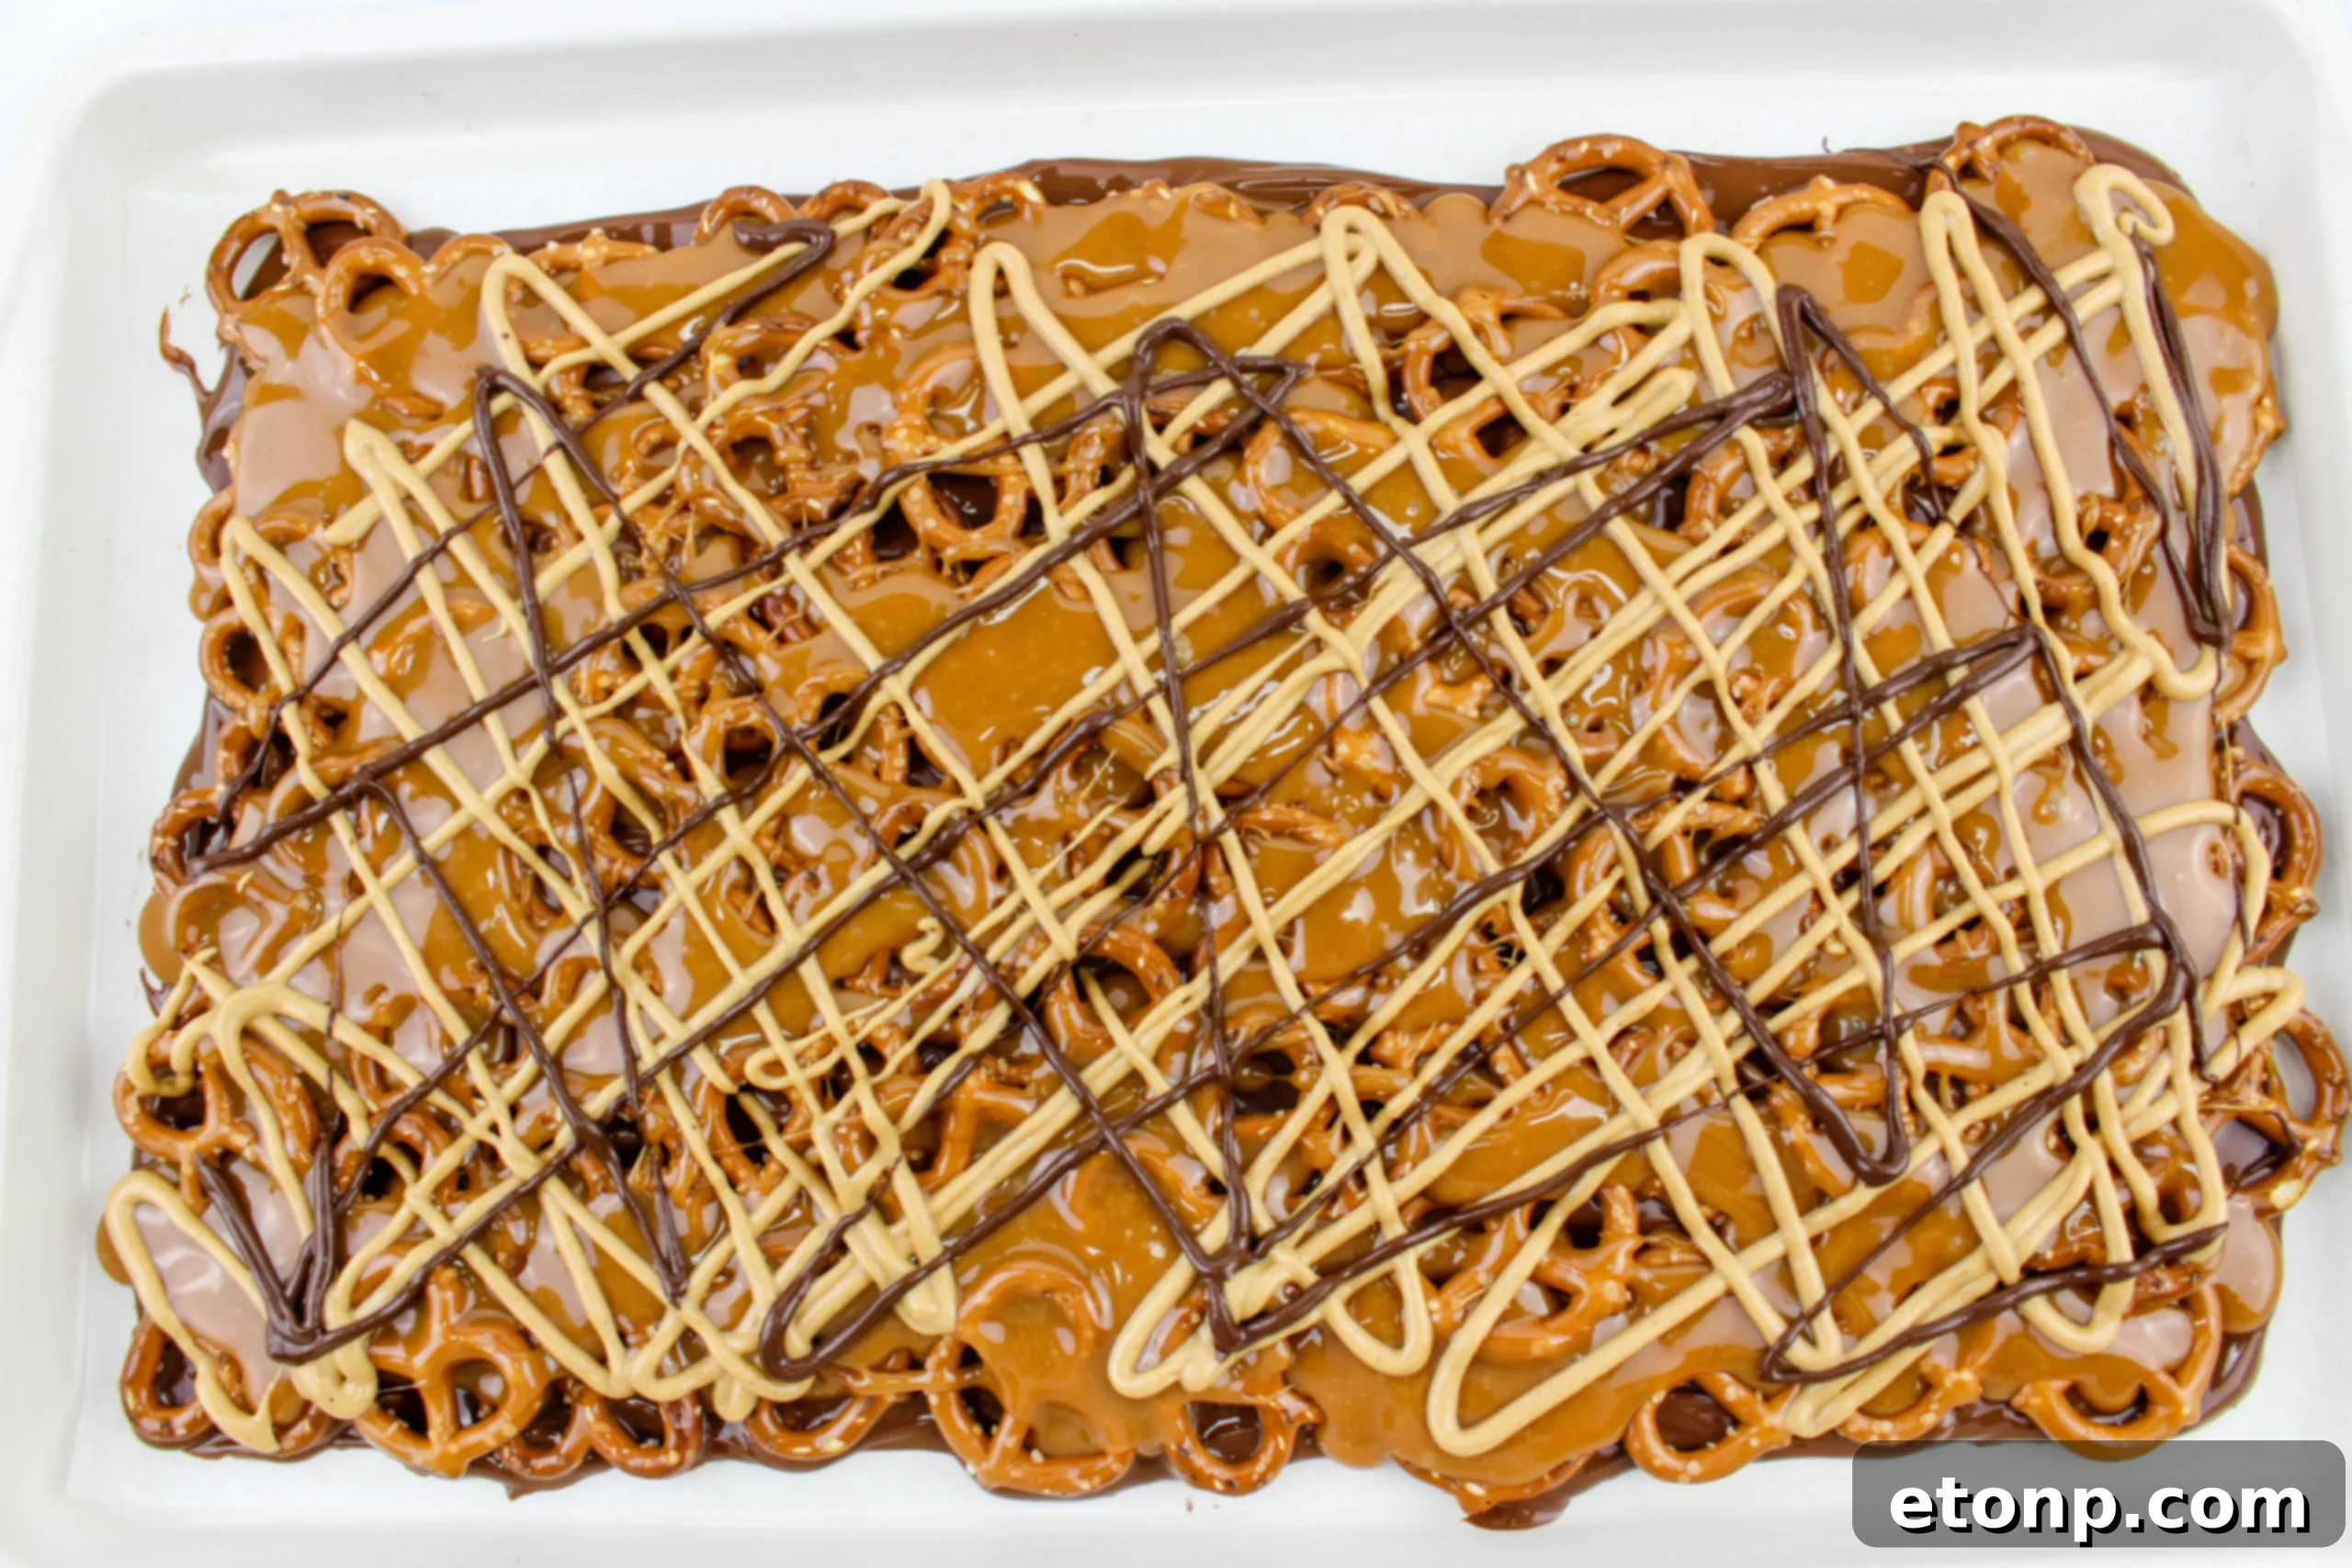
- Once the caramel layer has cooled and firmed up a bit, melt the reserved ¼ cup of chocolate chips in the microwave. Drizzle this melted chocolate over the caramel layer in a decorative pattern.
- If using, melt the Reese’s peanut butter chips separately and drizzle them over the cooled caramel and chocolate as well, creating an appealing swirl.
- Let the bars cool completely and set. For best results and clean slicing, refrigerate the pan for at least 2 hours, or ideally, overnight.
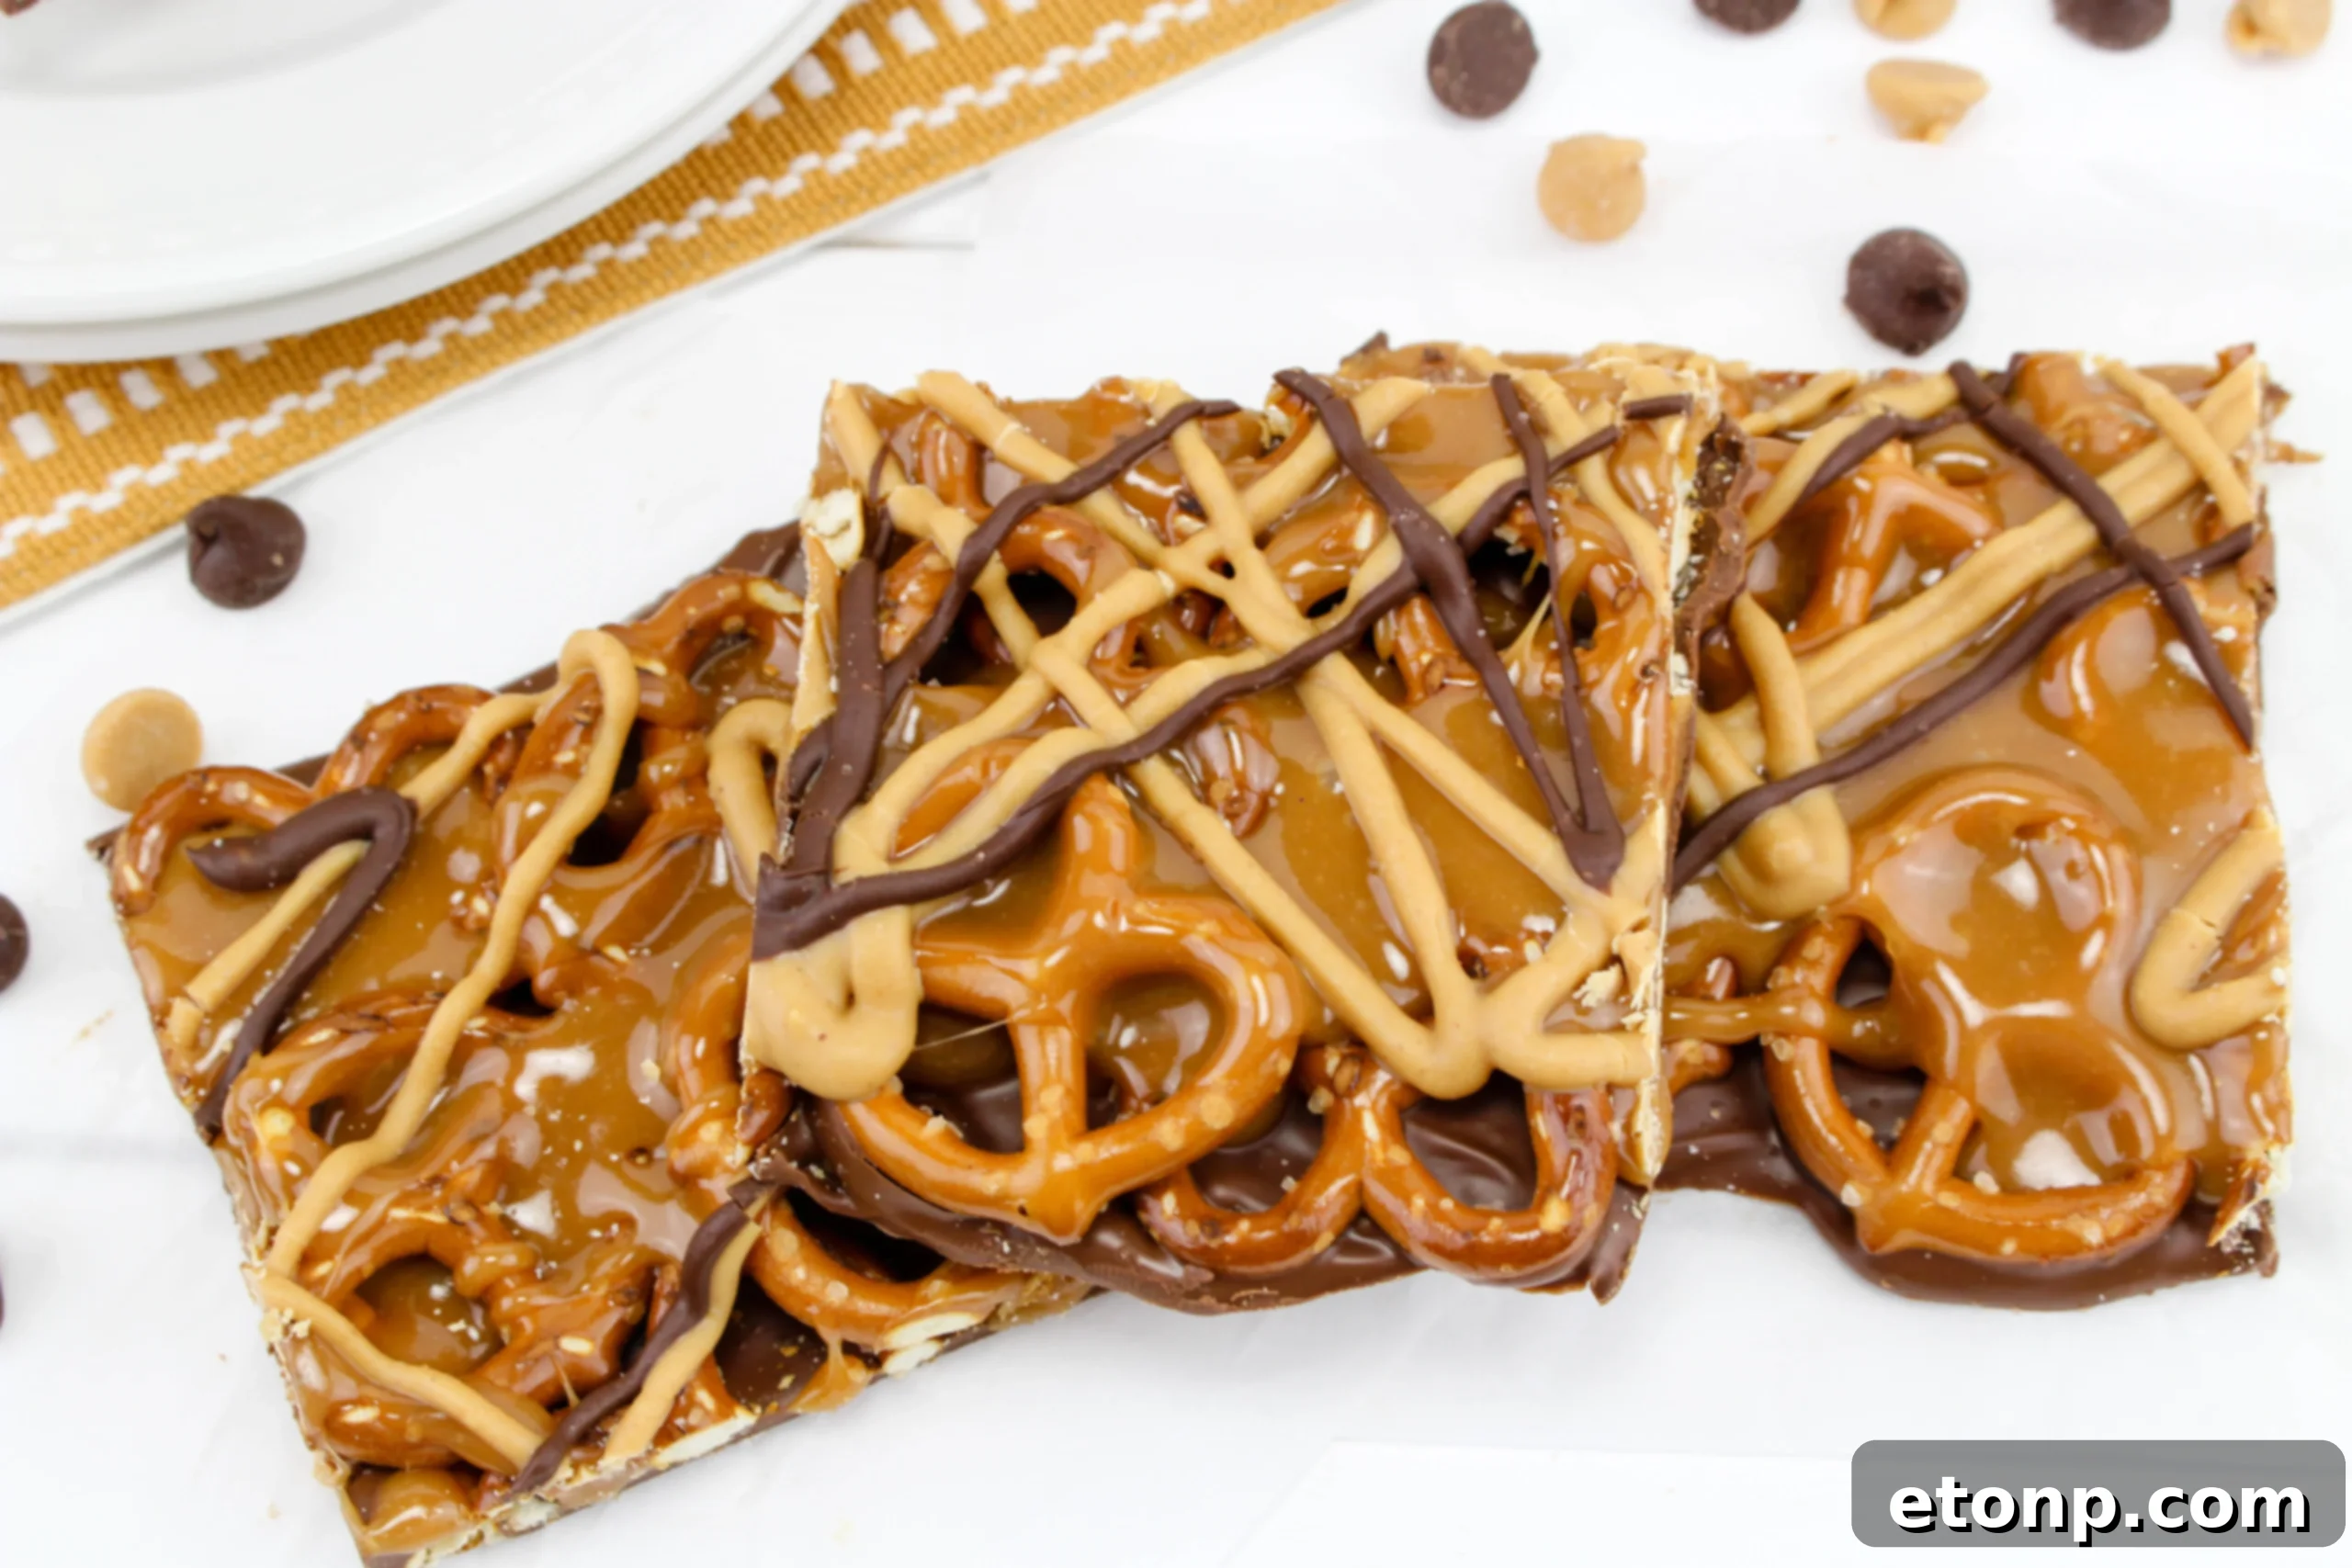
- Once fully set, use the parchment paper overhangs to lift the entire slab out of the pan. Place on a cutting board and use a sharp, lightly oiled knife (or a pizza cutter) to slice into desired square sizes.
- Enjoy your deliciously easy No-Bake Caramel Pretzel Bars!
Did you make this recipe?
We’d love to see your creations! Share them with us and make sure to follow for more recipes on Pinterest!
Pin Recipe
Share on Facebook